
It seems appropriate to build a Power BI calendar on New Year’s eve ready to plan 2019. So this post walks through the steps of building a calendar in Power BI desktop using DAX. The aim is to have a calendar that has columns for all the variations you quickly want from a date, for example, the day name, the month name and even the quarter based on week number. You need a calendar table if you want to do any date-based calculations such as SAMEPERIODLASTTEAR.
Simple Calendar
Step 1: From the Modelling ribbon tab select New table.
Step 2: Calendars can be created using two different functions. CALENDAR requires two parameters, a start date and an end date and it will create a single column calendar with a row for every day. AUTOCALENDAR looks at your existing date columns and creates a calendar that goes from the minimum date to the maximum date, this can be expanded to always start and finish on financial year dates with an optional parameter of the end of year month number.
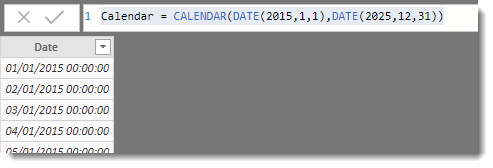
For this post, we are going to create a 10-year calendar starting in 2015 and ending at the end of 2025. So enter the following formula:
Calendar = CALENDAR(DATE(2015,1,1),DATE(2025,12,31))
Step 3: This only creates a single column calendar so I’m going to expand the table by using ADDCOLUMNS function and using variables to layout the DAX a little better. Quick hint, to add a line break in a DAX formula press Shift+Return.
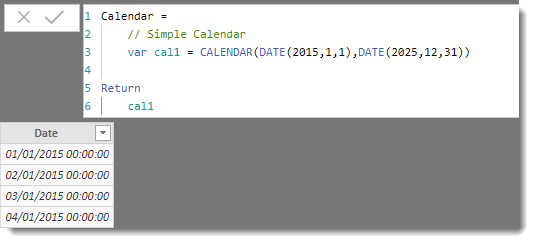
The first step is to introduce a variable and the concept of return. A variable is a named store for some data, in this case, a variable called cal1 contains a calendar table. The return command sends back as the result the variable that you specify. Change your formula to the following:
Calendar =
    // Simple Calendar
    var cal1 = CALENDAR(DATE(2015,1,1),DATE(2025,12,31))

Return
    cal1
This creates a table exactly the same as step 1 except its now ready to expand to more columns. The line starting with // is a comment.
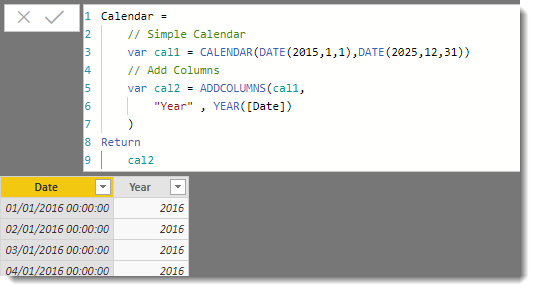
Step 4: Before the return add a new line that creates a new variable cal2 that uses ADDCOLUMNS. The first parameter is the table to add columns too. Following this are pairs of parameters giving column name and the formula. So as a quick example add the following line and change the return to cal2:
// Add Columns
    var cal2 = ADDCOLUMNS(cal1,
        "Year" , YEAR([Date])
    )
Your result should now look like:
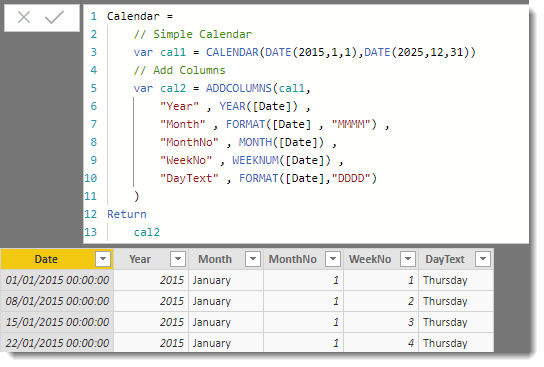
Step 5: Add more pairs of parameters to the above formula to expand your calendar with more columns:
Calendar =
    // Simple Calendar
    var cal1 = CALENDAR(DATE(2015,1,1),DATE(2025,12,31))
    // Add Columns
    var cal2 = ADDCOLUMNS(cal1,
        "Year" , YEAR([Date]) ,
        "Month" , FORMAT([Date] , "MMMM") ,
        "MonthNo" , MONTH([Date]) ,
        "WeekNo" , WEEKNUM([Date]) ,
        "DayText" , FORMAT([Date],"DDDD")
    )
Return
    cal2
Step 6: All of the above columns can only be based off the Date column which was in cal1. If you wanted to add a column based on another calculated column you need start a new variable based of the previous one and then you have all the columns returned in cal2.
So a simple example would be to add a column based off the DayText column that contains Weekend and Workday in the right rows.
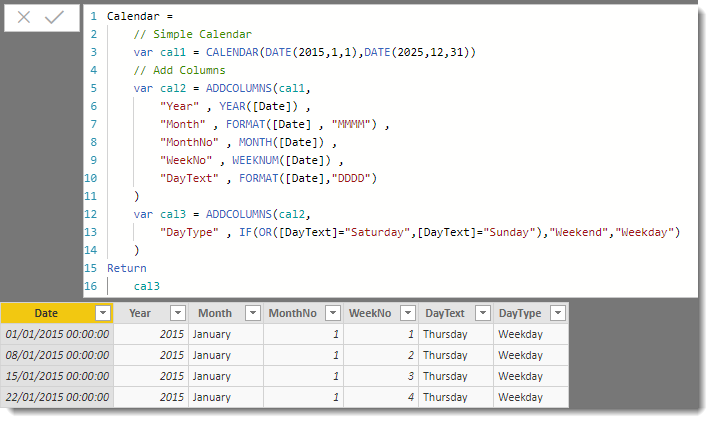
    var cal3 = ADDCOLUMNS(cal2,
        "DayType" , IF(OR([DayText]="Saturday",[DayText]="Sunday"),"Weekend","Weekday")
    )
Remember to change the return to return cal3.
Conclusion
The above calendar is based off a calendar year and assumes only weeks, months and quarters are required. Building a 445 calendar based on a fiscal year ending on a different month to December takes more work but is possible. Before complex calculations are done to create the unique calendar you should as the question “does a calendar already exist that we could make use of?”
