
Creating and applying a Composed Look:
- Download SharePoint Designer 2013 and SharePoint Color Palette Tool.
- Create your theme using the SharePoint Color Palette Tool and save it as a .spcolor file. Suggest that you sort the Color Slot Grouping by UI Groups.
- Open SharePoint Designer 2013.
- Click Open Site.
- Enter the URL of your SharePoint page (Master Page).
- Click on All Files under Navigation.
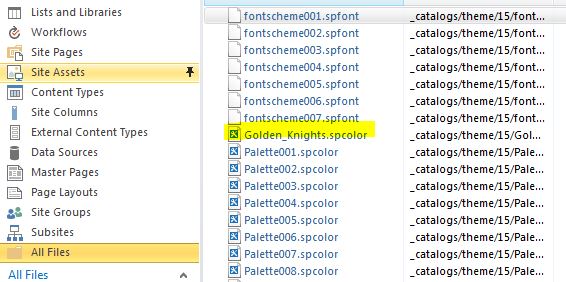
- Click on _catalogs.
- Click on theme.
- Click on 15.
- Click Import Files.
- Select your .spcolor file and click ok. You should now see your template file in the 15 directory.

- Click All Files.
- Click images.
- Click Import Files.
- Select the image you want for your background image and click ok. You should now see your image file in the image directory.
- Now open the master page that you want to add the theme to in SharePoint 2013.
- Click on the settings icon and select Site Settings
- Under Web Designer Galleries, select Composed Looks
- Click + new item.
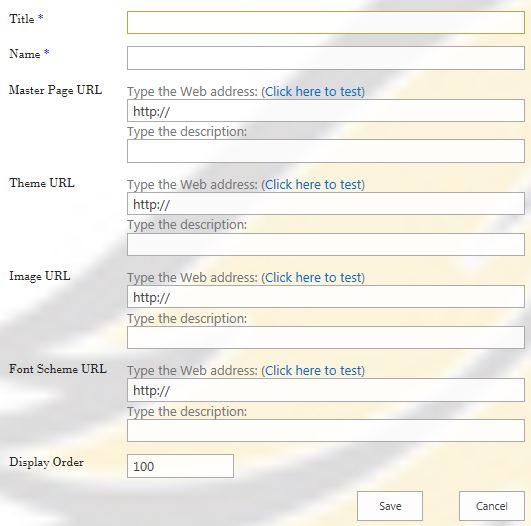
- You should now see a list that looks like this:

- Give the theme a title and name.
- Enter the Master Page URL: http://www.something123.edu/_catalogs/masterpage/seattle.master or /_catalogs/masterpage/oslo.master
- Enter the theme URL: /_catalogs/theme/15/Whatever_You_Named_It.spcolor
- Enter the Image URL: /images/Whatever_You_Named_It.jpg
- Enter the Font Scheme URL: /_catalogs/theme/15/fontscheme007.spfont
- Change the Display Order to 5.
- Click Save. You should now see your theme in the list of composed looks.
- Click on the settings icon.
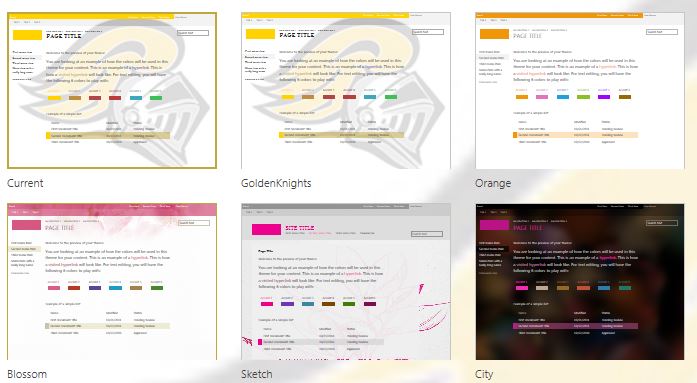
- Click on Change the look. You should now see your template listed.

- Select your theme.
- Click Try it out.
- If you like what you see, click on Yes, keep it. Your theme should now be applied to the master page and its subpages.
Special thanks for this posting goes to Chip Candler for his work in testing this out and documenting the process and to Randy Drisgill, John Ross, and Paul Stubbs (SharePoint 2013 Branding and User Interface Design book)
