What is a Microsoft Team?
A Team is a place where you can collaborate with your colleagues or with people from other organisations. You can chat with individuals, have group chats, share files, and work with apps such as Microsoft Excel and Word.
You can also have face-to-face meetings, organise video conferences, and have regular voice calls, too.
There are three ways to interact with Teams: in the Teams app, the web app, or the mobile app.
Teams is part of Microsoft Office 365. And as such, it works brilliantly with all the other apps that you are familiar with such as Outlook, OneDrive, and SharePoint.
This post s a beginners guide to Microsoft Teams, and will take you through the basic features you need to know about to get started and get the most out of Teams in your day to day work.
Contents
Joining your first Team
If you have been invited to join a team, you’ll receive an email that contains a link to the team or a code. If you click on the link, your browser will open up and you’ll be given a choice between Get the Teams app or Use the web app instead.
For a better experience, you should download the Teams app as it has more functionality as not all features are supported in all browsers. For the purposes of the guide, you should download the Teams app.

Regardless of using the Teams app or web app, the structure of the team will look like the following picture.
App bar Team name Channel Tabs Command bar
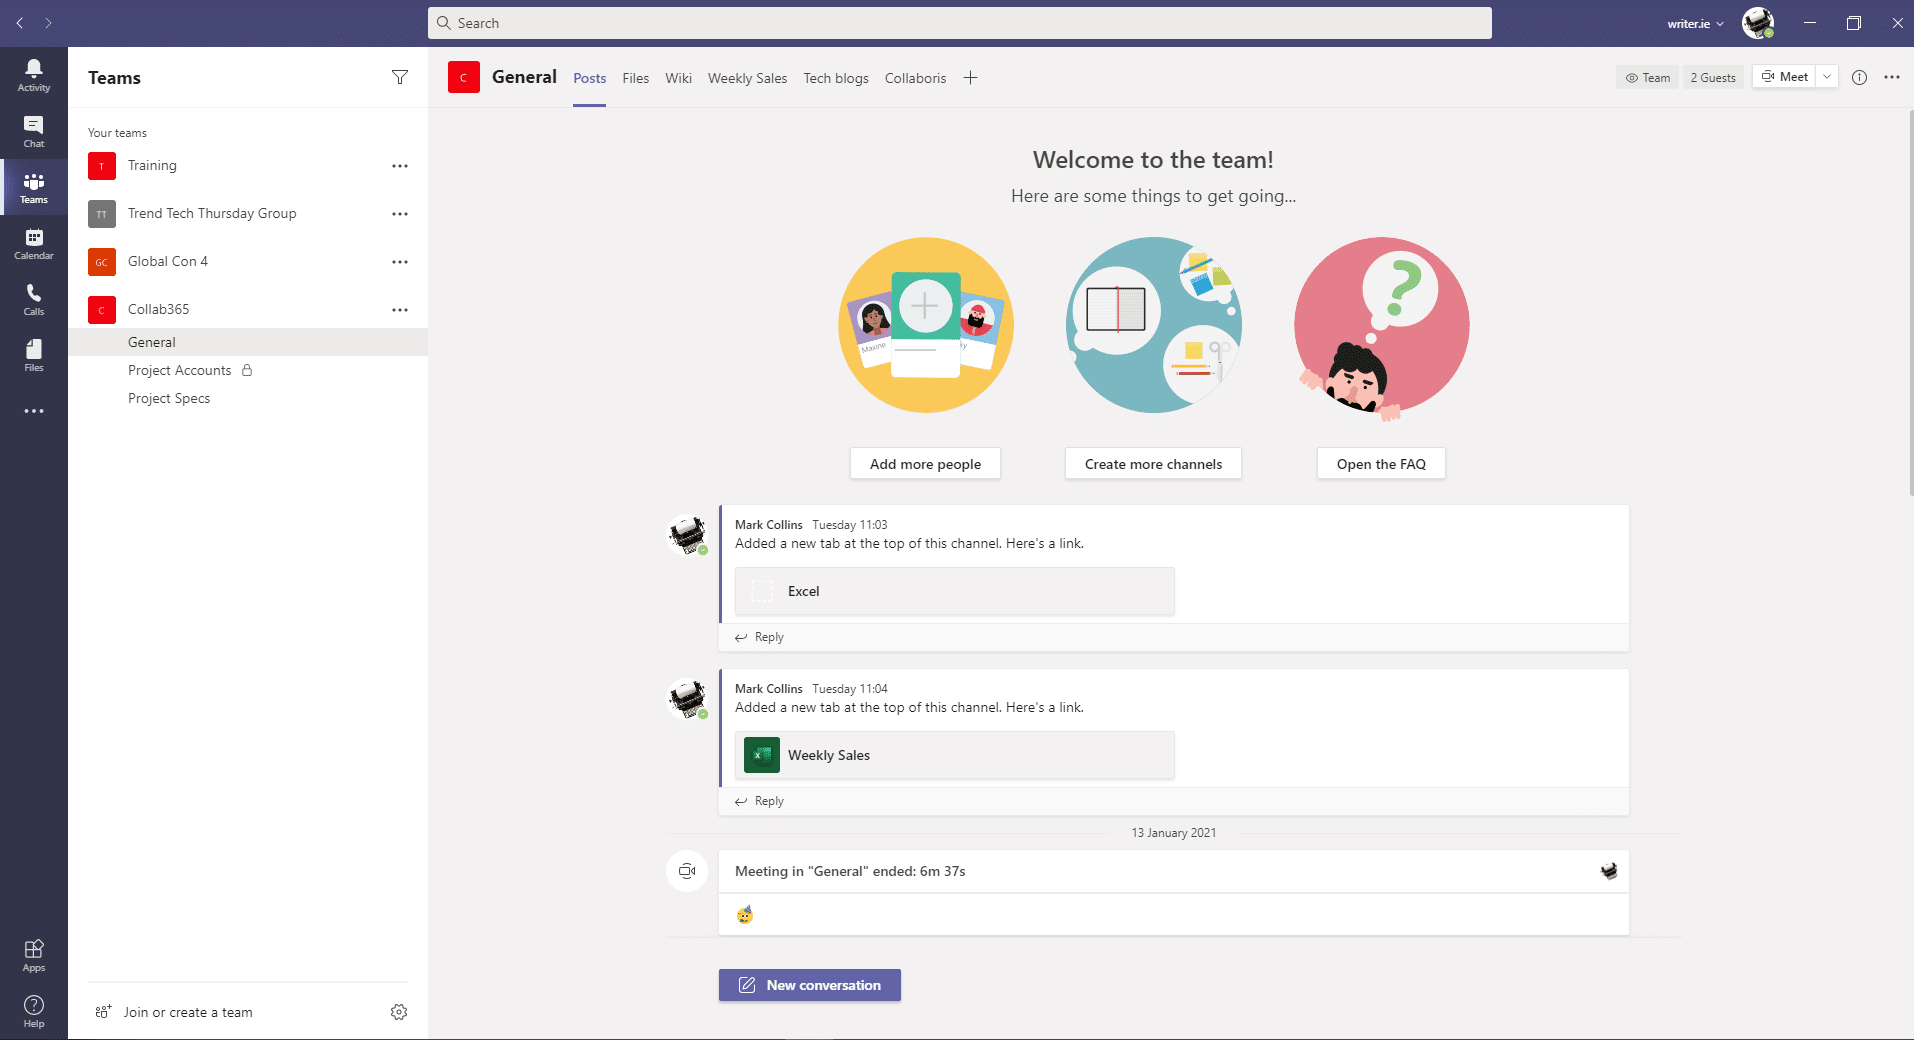
Join or create a team Manage Teams New conversation
| Part | Function |
|---|---|
App bar | The main parts of the App bar help you to navigate around Teams.
|
Team name | The Teams that you have joined or created are listed here. |
Channel | Channels are sections within a single team organised around an aspect of that team, such as a project. |
Tabs | Tabs allow you to pin content in an easy-to-reach location. You always have at least two default tabs: Posts and Files. |
Command bar | Specific actions and shortcuts are available in the Command bar. |
Join or create a team | Join an existing Team or create a new one from here. |
Manage Teams |
Manage the Settings of the teams that you’ve created from here. |
| New conversation | Start a New conversation. |
Introducing Tabs
Posts
Posts are where you communicate with all the people on your team in what are called Conversations. This is a great place to discuss items that are normally sent through email. In fact, one of the benefits of using Teams is to reduce the number of emails that are sent.
A conversation is one self-contained discussion. You can have many conversations at once.
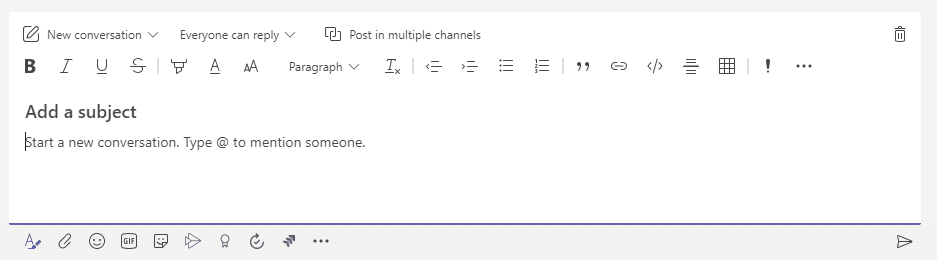
To start a conversation just select New Conversation and write your message.

- New Conversation – At the bottom of your screen, the New Conversation entry is used to start a new chat and not to reply to the conversation above. Use the Reply option to reply to an existing conversation
- Subject – When creating a conversation, it is good to add a subject. By clicking the ‘A’ icon you get more edit options. Adding the title helps to keep focus and context to that conversation
- @mention – When starting a conversation or asking a specific question, it’s good to use the @mention functionality to either get the whole channel’s attention (by using the name of the channel) or a team member’s name. The relevant people then get alerted in the Teams app to this new reply or conversation. The below screenshot shows a subject and the entire Teams (Collab365) has been alerted to it

- GIFs – In both chat and conversation you can brighten up everyone’s day and use GIFs
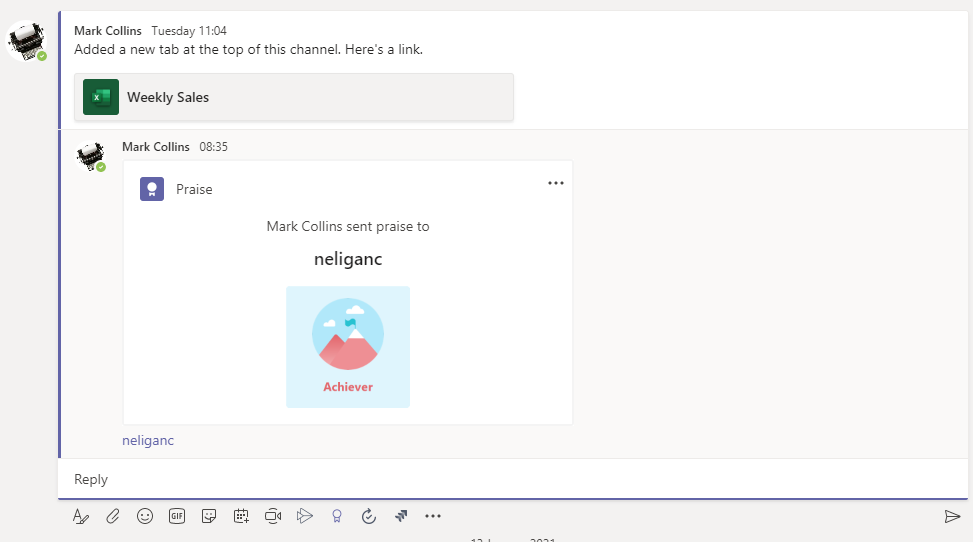
- Praise – A great little option on the chat and conversation boxes is the small medal/badge icon that allows you to give open Praise to team members that appear in the conversations feed
Bookmarking Messages
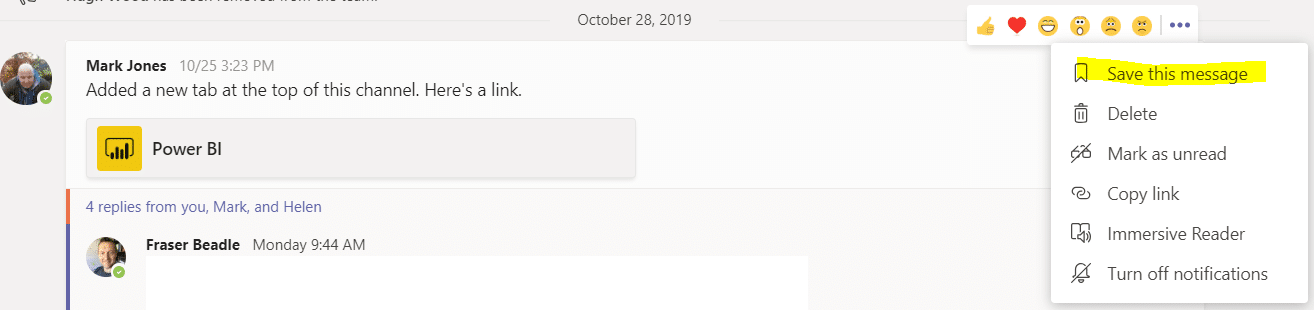
This is a handy piece of functionality that allows you to save a particular message, or more accurately a position in a conversation or chat, just by clicking on the (…) menu next to the message:
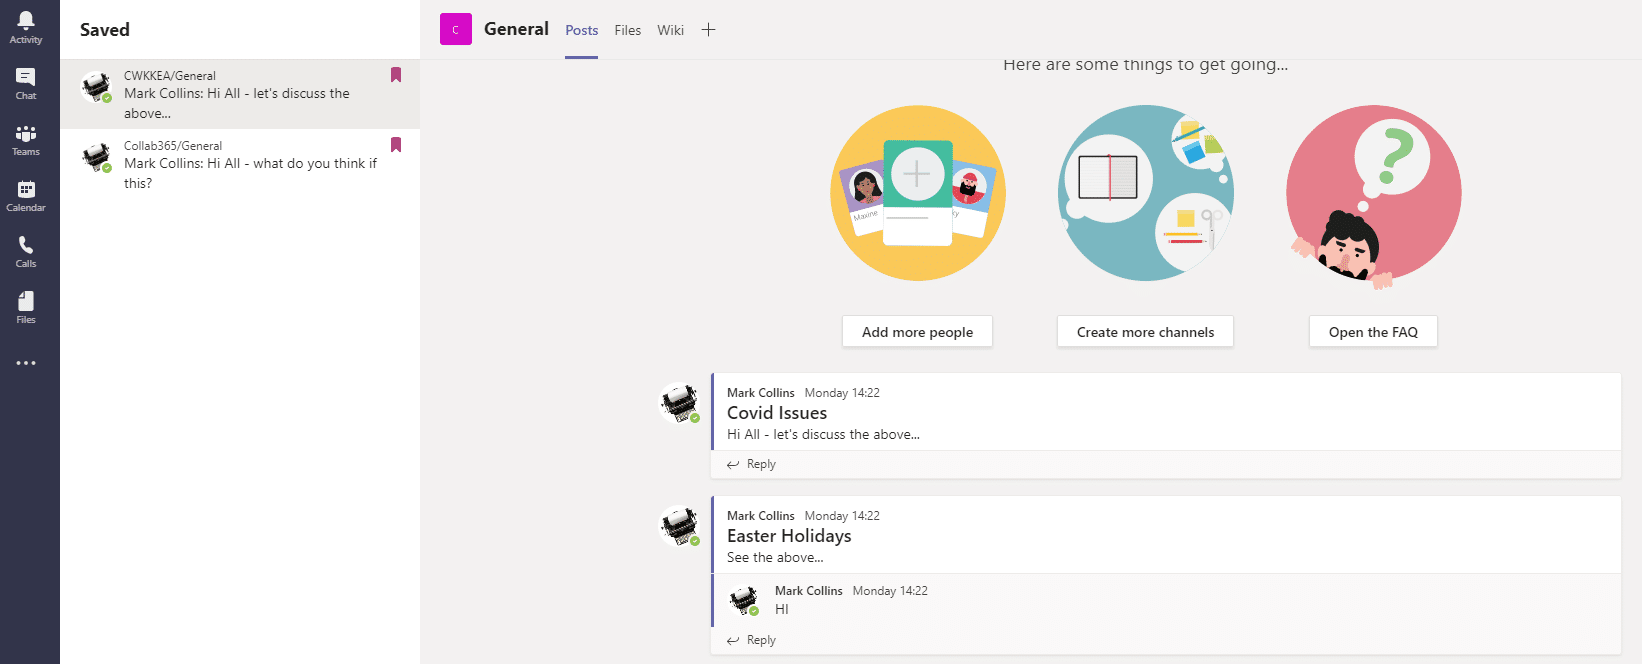
Then to recall all your saved messages, you simply click on your profile picture top right and select ‘Saved’. This gives you a list of all your saved points in the left-hand pane and clicking on them takes you back to the point in the conversation you saved them from.
Chats
A chat is different to a conversation as it’s usually between you and one other person. You access your chats in the App bar and can turn the chat into a call or a video call by selecting the relevant icons on the top right-hand side of the screen.

What are Files?
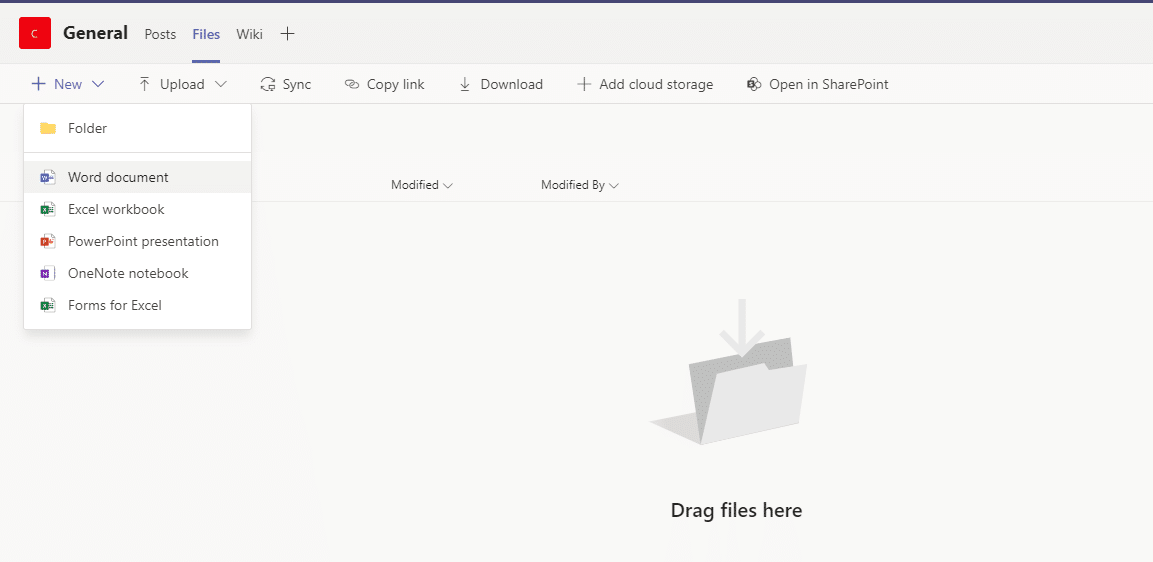
When you select the Files tab, you will be brought to a document library. If you use OneDrive or SharePoint, this library will look familiar as it’s very similar in terms of its structure.
- To create Word, Excel, PowerPoint or OneNote notebook, select New and the corresponding file type. When you do, you must name your file, and then the browser-based version of the programme will open up in Teams
- Browser-based programmes are ideal for quick edits. Select Open in Desktop App to use the desktop version
- Select Upload to add files
- Select Sync to create a mirror or a synced version of this document library on your desktop. This is ideal if you will be using the library a lot
- Copy link gives you two options: you can send a link to the General channel or just the document library itself. This is ideal if you want to give somebody access to the files, but not the entire team
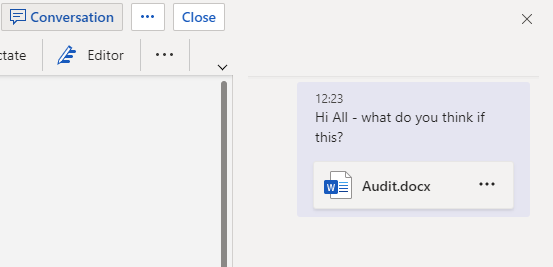
- If the programme allows it, you can add comments to your file. You can also have a conversation with other members of your teammates
Channels
Every team has at least one channel called General. A channel is a place where you can chat, share files and add tabs, among other activities. At best, a channel should help you organise your team. For example, if you have a team dedicated to a project, different channels can reflect different aspects of the project.
Adding channels is easy:
- Select the ellipsis (…) by your team’s name, and choose Add channel
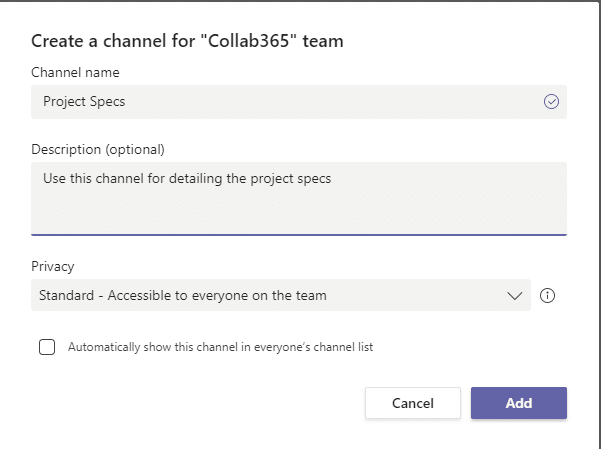
- Give your channel a Name, an optional Description, and (in this example) set the Privacy to Standard – Accessible to everyone on the team and select Add
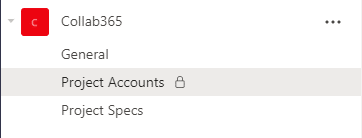
- Once added, your channel will sit below the General channel
Please note:
- Each channel will always have a Posts and Files tab
- When selecting Standard privacy, it means that all your teammates will see the channel
- Posts in this channel will be only posted to this channel
Private Channels
Let’s say that you need to share files and have chats with some of your teammates but not all of them. This is best done via Private channels.
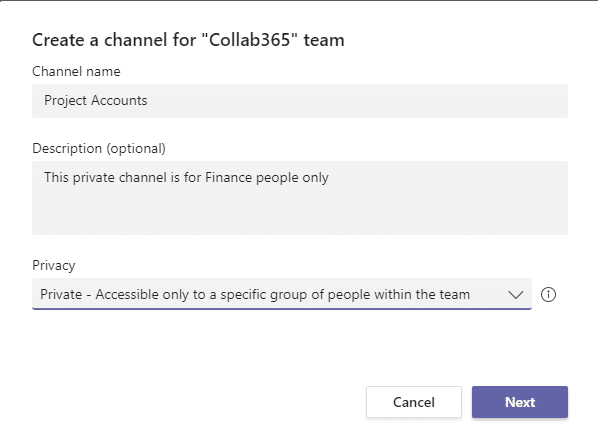
- To create a Private channel, perform the same steps as when creating a standard channel, but select Private – Accessible only to a specific group of people within the team and select Next
- When prompted to Add members to the…channel and choose people from your existing team. When your channel appears, it has a lock symbol on it, denoting that it’s private
Tabs
Tabs add functionality to your team by giving you a shortcut to a file such as Excel or Word or allowing you to work with an app. All teams have at least two tabs – Posts and Files – which cannot be deleted.
You can add more tabs if you like, and the tabs that you add can be deleted.
In this example, we’re adding a tab in order to detail the Weekly Sales.xlxs file which is in the Files or document library.
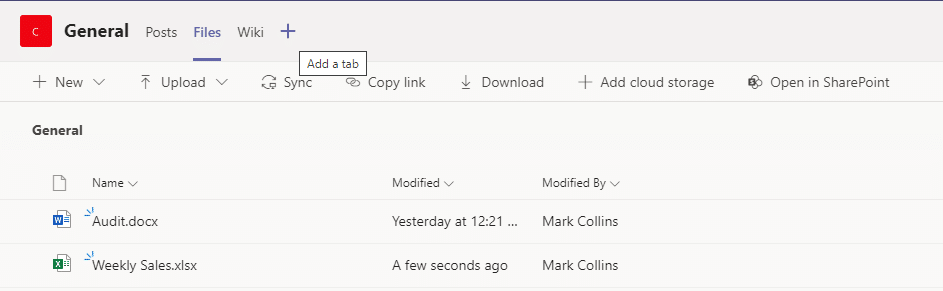
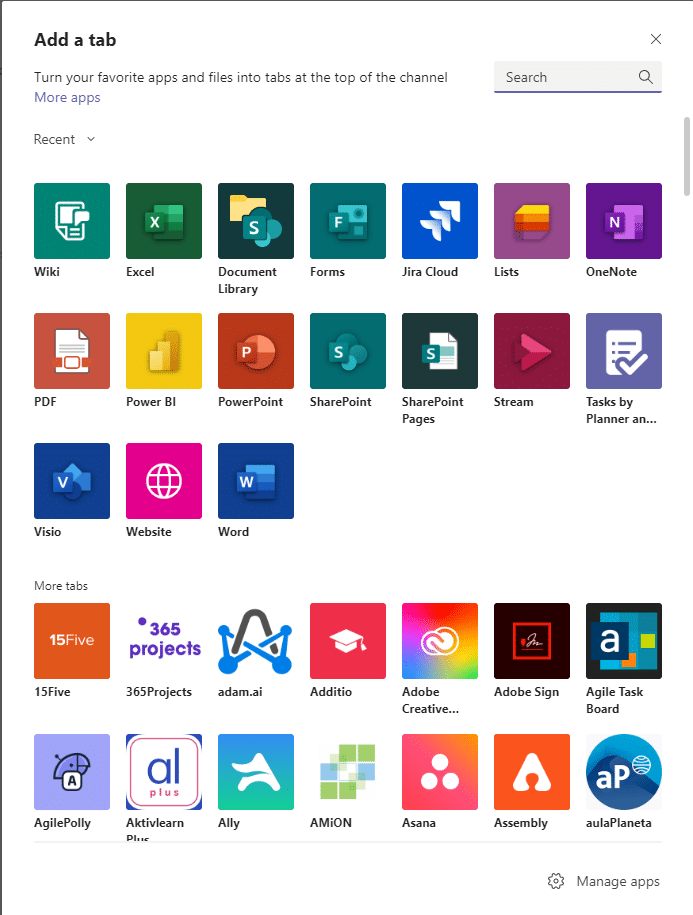
- Click on + Add a tab
- The Add a tab window opens detailing many non-Microsoft apps and Microsoft programs that can be used as tabs. Please note, when adding a Microsoft file as a tab, the file must be in the channel’s Files. As we want to add an Excel file, we select the Excel app
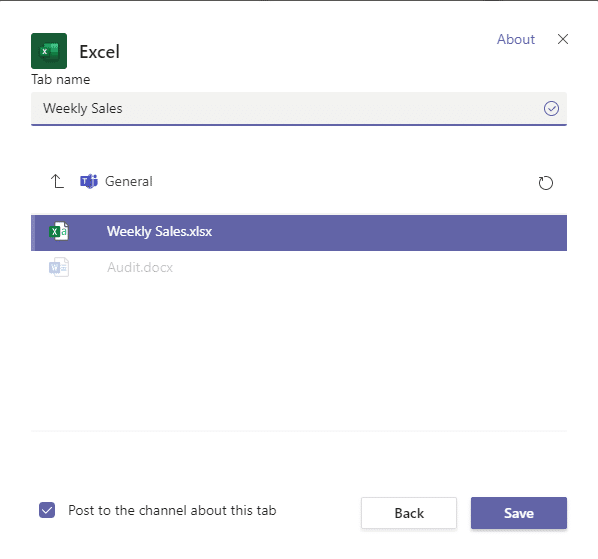
- Once selected, the next window shows what Excel files are in the General channel’s Files i.e. in our example there are only Weekly Sales.xlxs
- Give your tab a name – we’ve called it Weekly Sales
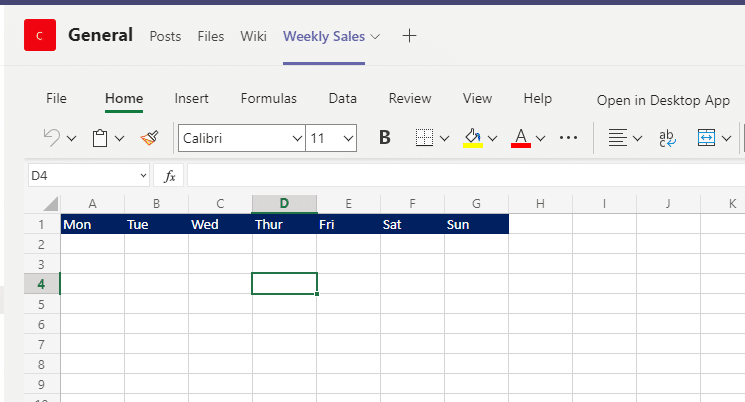
- A tab appears called Weekly Sales and allows you to input data without opening up the file in Excel. However, for the full functionality of Excel, select Open in Desktop App
- If you want to Rename, Remove or associate a different file with your tab, select the dropdown arrow by the tab’s name

Creating your first Team
Creating a team is easy.
- Once you are in the Teams App, click on Join or create a team
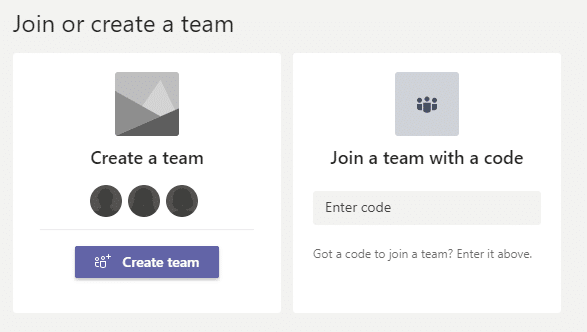
- Select Create team
- Choose either From scratch, From a group or team, or a template
- In this demonstration, we’re going to pick From scratch
- Next, we have to choose what kind of team it will be: Private, Public or Org-wide. These setting are important and you should pick one which best suits your needs. We’re going to pick Private which means you have to add people to your team. Public means that anyone from your organisation can join the team, and Org-wide means that everybody from your organisation automatically joins the team
- Give your team a name and a brief description
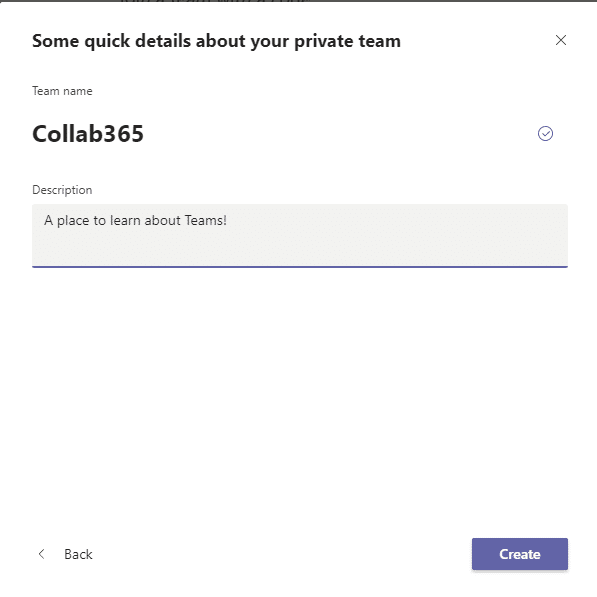
- Next, you can add members by typing a name, distribution list, or security group. Or you can skip it and add people later
- And that’s it – you’ve created your first team!
It’s important to note that when you create a team, regardless of the template used, you are creating a:
A Microsoft 365 group
A SharePoint site that contains a document library
An Exchange Online shared mailbox and calendar
A OneNote notebook
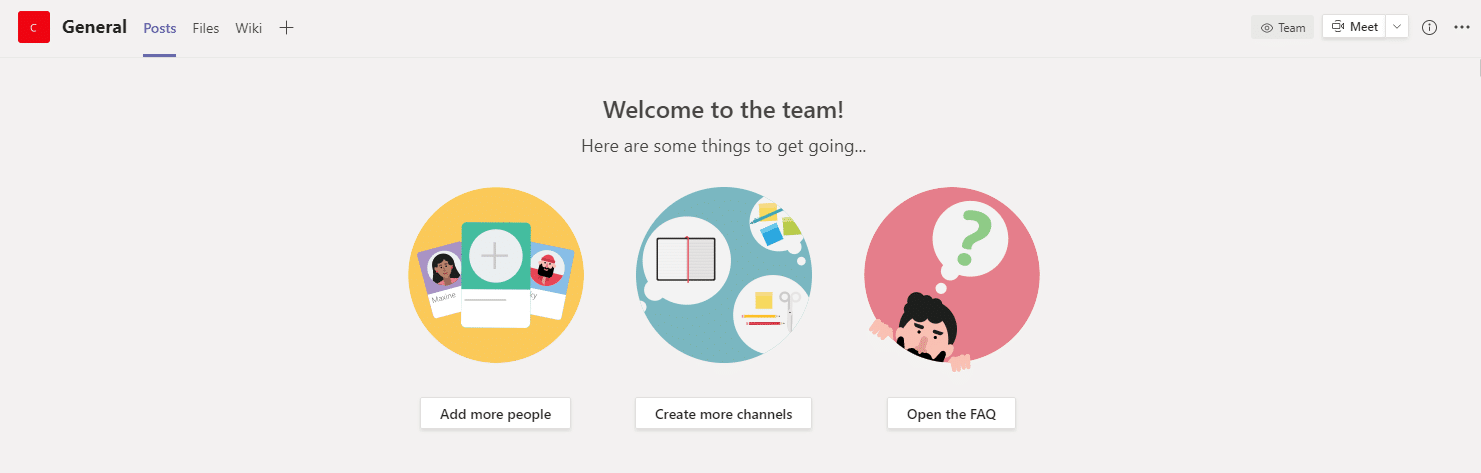
Also, all teams, no matter what template you use, have a channel called General and tabs called Posts and Files. Posts and Files are tabs that can never be deleted.

Adding people to your Team
There are two ways to add people to your team: when you first create your team, or once your team has been created. To add people to your team:
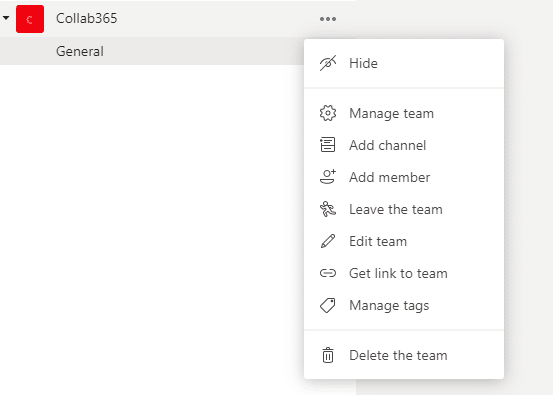
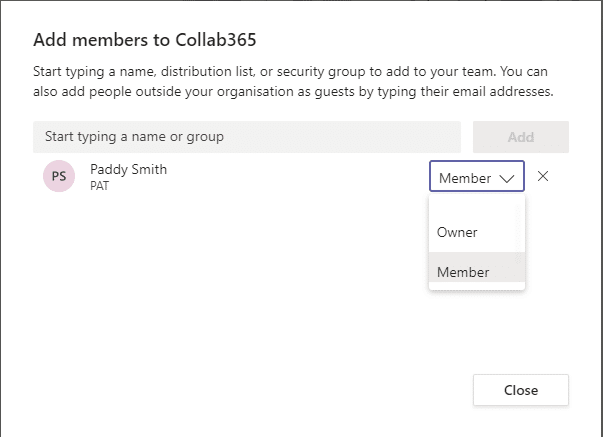
- Click on ellipsis or three dots (…) by the name of your team and select Add member
- Type in the name of the person and select add
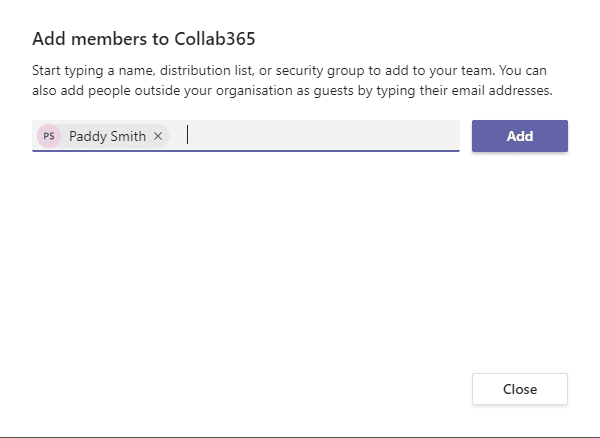
- You have the option to make the person an Owner or Member
The following is a table that details the different roles people have in Teams.
| Role | Permissions |
|---|---|
Owners | Team owners manage certain settings for the team. They add and remove members, add guests, change team settings, and handle administrative tasks. There can be multiple owners in a team. |
| Members | Members are the people in the team. They talk with other team members in conversations. They can view and usually upload and change files. They also do the usual sorts of collaboration that the team owners have permitted. |
|
Guests | Guests are people from outside of your organization that a team owner invites, such as partners or consultants to join the team. Guests have fewer capabilities than team members or team owners, but there’s still a lot they can do. |
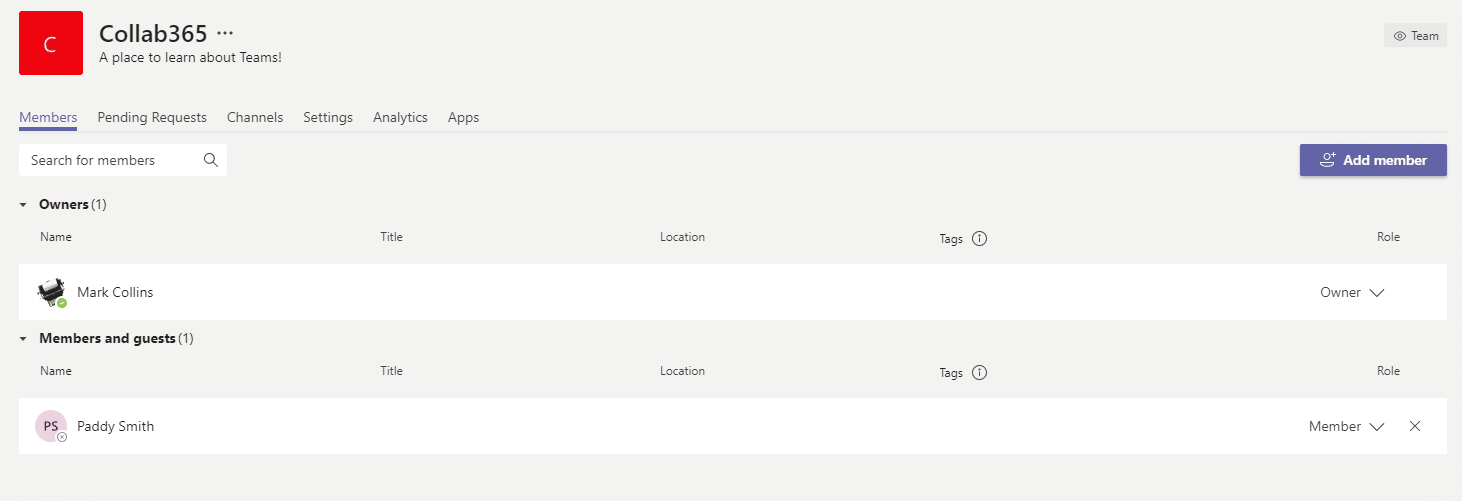
- Once you have added a person, you can get an overview of your team by selecting Manage team from the ellipsis (…) by the name of your team
- When you add a person, they will automatically get an email which gives them access to the team
Adding Guests to your team
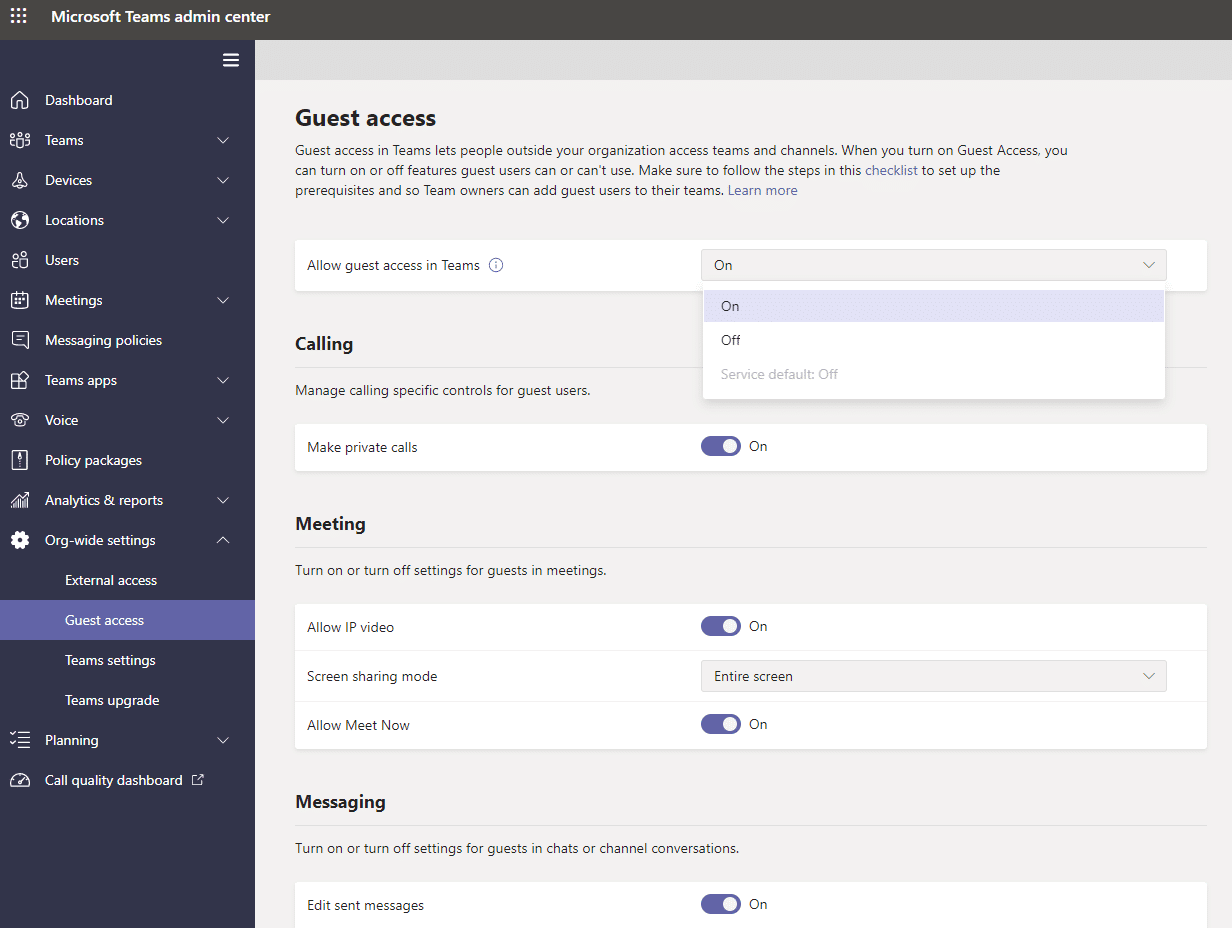
If you want to add a person who is not from your organisation to your team, you can. This person will be called a Guest. Now, before you can add a guest you (or your Office 365 administrator) must turn on guest access in the Teams admin center.
- Once in the admin center, select Org-wide settings and Guest access. By default, it’s off, so switch it on
Once the admin side has been taken care of, adding guests is easy. Just perform the same steps as when adding a teammate from your organisation and then they’ll appear under Manage team:
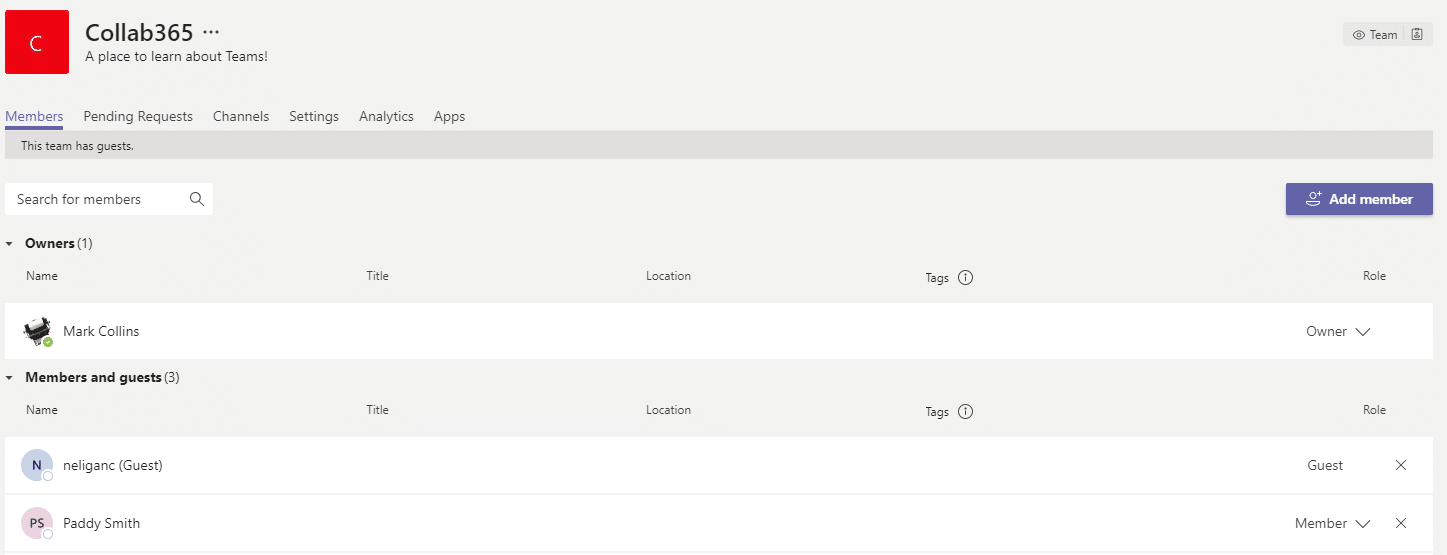
Guests will receive a notification in their email that they have been added to a team. For a comparison of what a guest can do compared to a regular teammate, see this full list from Microsoft https://docs.microsoft.com/en-us/microsoftteams/guest-experience
Meetings in Teams
Teams is a great tool for communication. You can message individuals, groups, and use the amazing video conferencing tools, too.
Organising meetings
When organising a meeting, you must decide if it is with members of an existing team, or a person, or a group of individuals. The reason for this is, if you organise from within an actual team then it will be linked to a Channel. Whereas, if you organise a meeting from the Calendar, it will not be linked.
To organise a meeting with your teammates, click on the Meet icon on the right-hand side of your team.
- You have two choices: Meet now or Schedule a meeting. Select Schedule a meeting and enter the following details: Name, attendees (you must have at least one attendee), and a date. As we have scheduled this meeting through our team, it is automatically linked to our General channel
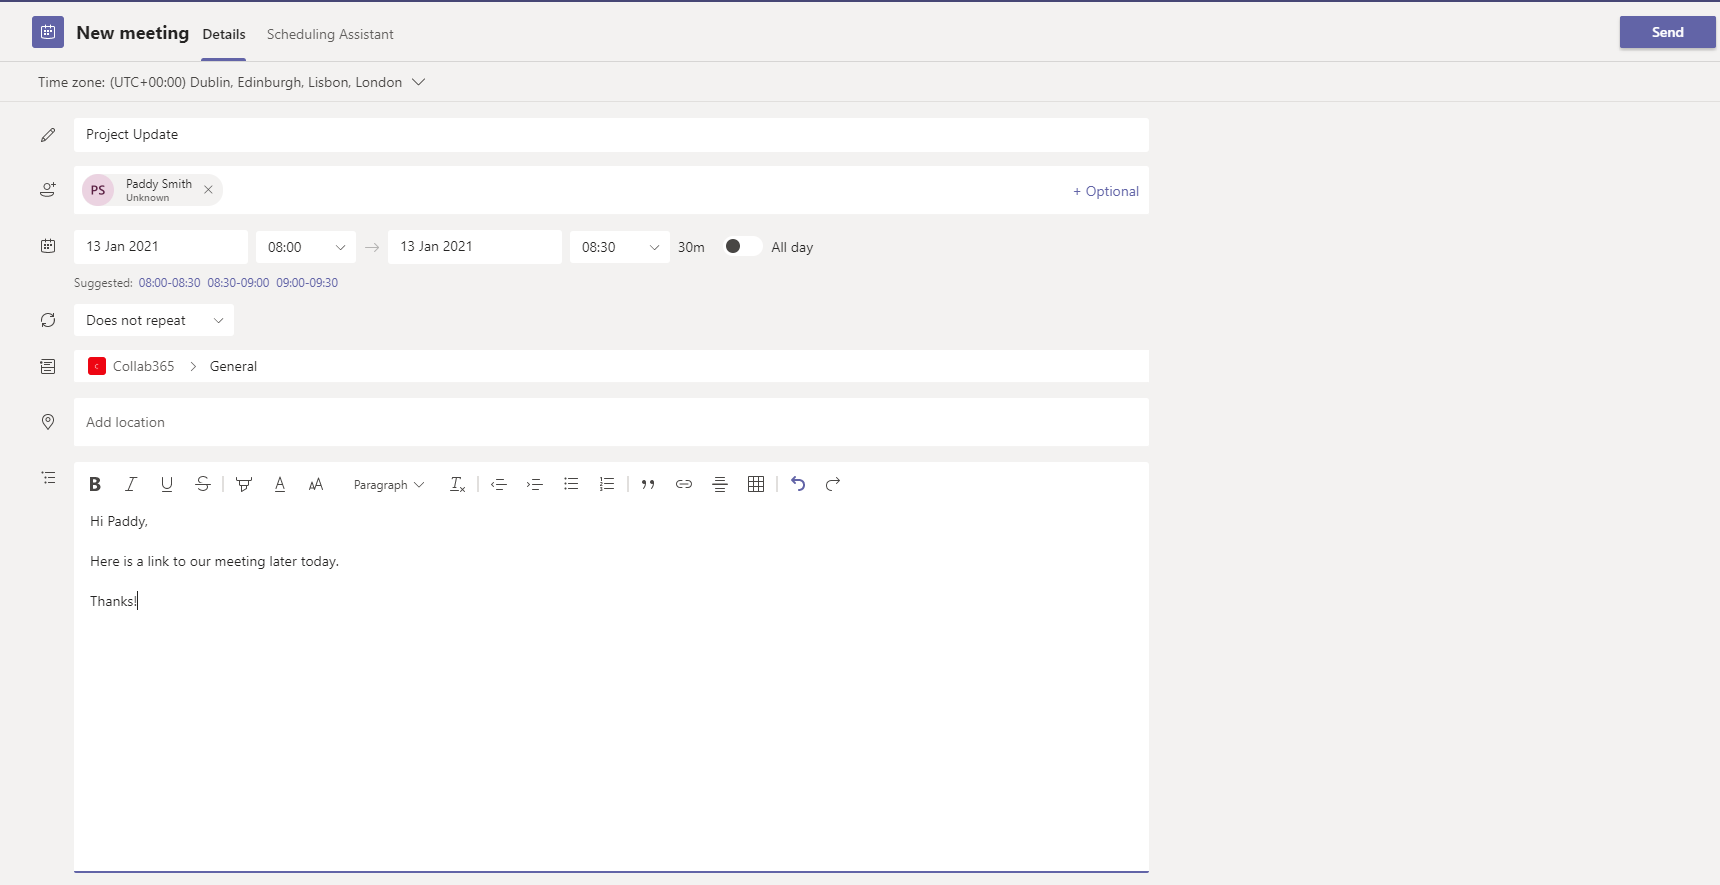
- Add a location (office, meeting room etc.) if required, and a message to the attendees. When you select Send the attendees will get an email in Outlook
- Even though you have created this meeting in Teams, it will also appear in your Outlook calendar
To organise a meeting with other people who are not connected with a team, click on the Calendar 
Meet now
Meet now allows you to start a meeting immediately and you can ask people to join your meeting on the fly. It doesn’t matter where you launch your Meet now meeting as it’s will not be connected to a team.
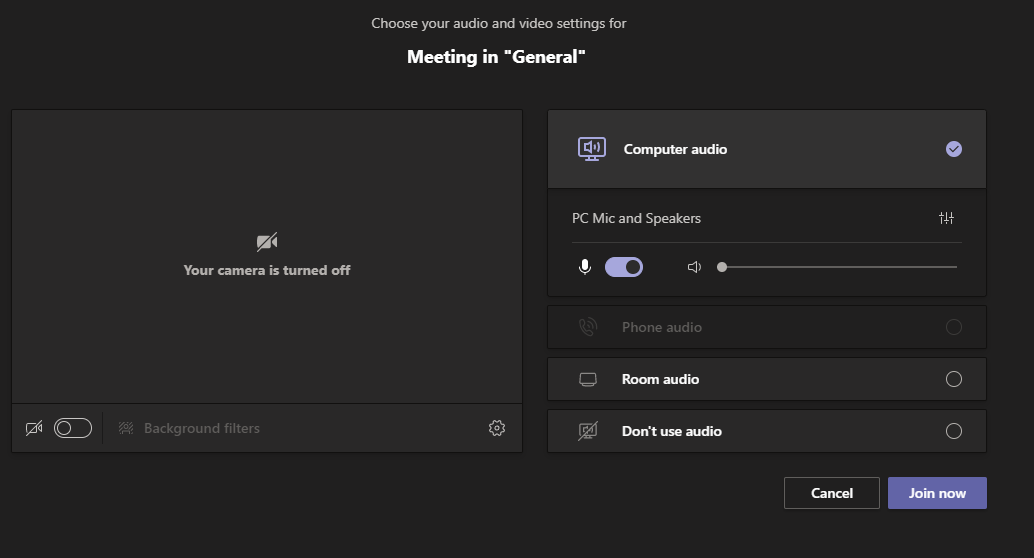
- Click on Meet now
- Before you start your meeting, you can turn on/off your camera and select the audio and video that you’ll use, such as what speakers, camera etc.
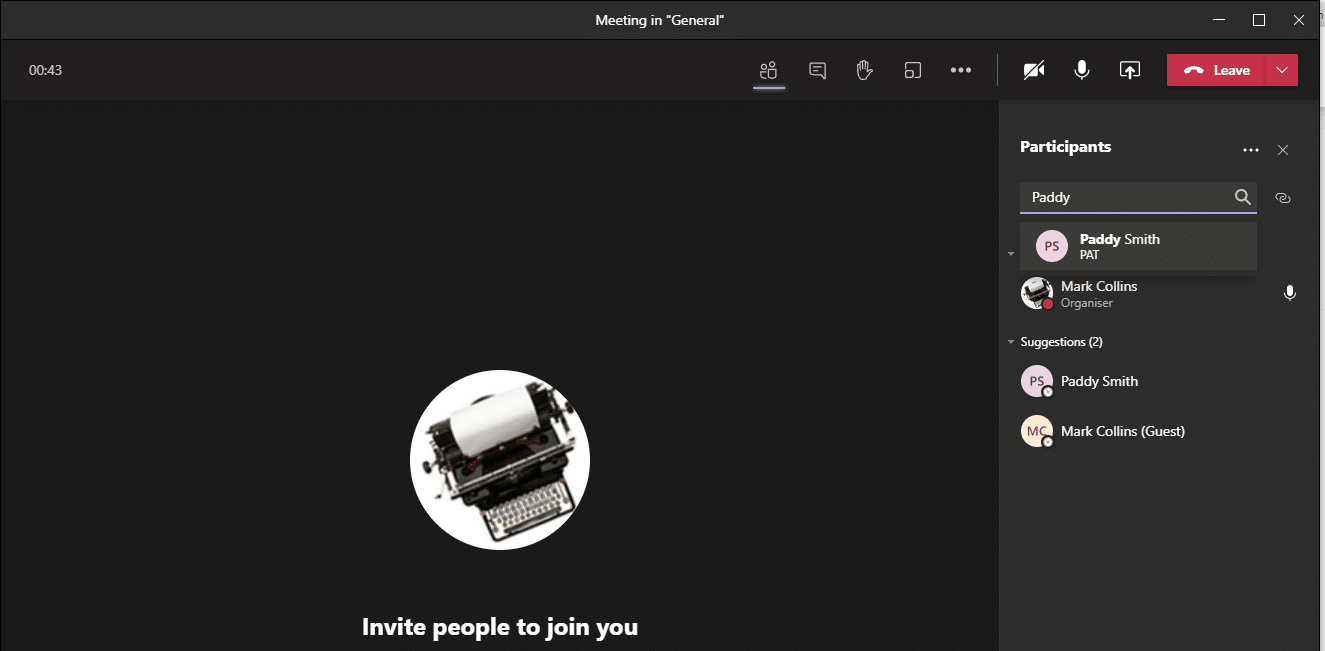
- Once your meeting has started, you can invite people by entering their names in the Participants pane
Meeting options
Regardless of whether you have scheduled a meeting, launched Meet now, or have been sent a link to a meeting, if you are using the Teams app, you’ll have a lot of meeting options.
Teams app interface
When you are in a meeting, by selecting specific icons, you have the options.
|
OPTIONS |
FUNCTION |
|---|---|
|
Show participants | See who is in the meeting or add more people. |
|
Show conversation | Chat with everybody in the meeting by bringing up the conversation pane |
| Raise your hand | Raise a virtual hand to let people know you want to contribute without interrupting the conversation. |
| Breakout rooms | Create a breakout room – we’ll discuss this in-depth in the next section. |
More options |
|
|
Camera | To turn on your video on or off, select Camera |
| Audio | Turn on your audio, or mute yourself |
| Share content | When you share content, you either share your entire screen, a specific window such as a file, or a program, such as PowerPoint or Excel. You will know that you are sharing your screen because it will be framed in red |
| Leave | You can either leave the meeting or end it for all participants |

Breakout rooms
Breakout rooms allow you to create rooms where you can have a separate meeting within a meeting. This is ideal for people who are attending a meeting to have a private chat, with the option to returning to the original meeting.
Only meeting organisers using the desktop version of Teams can create breakout rooms. The highlighted icon below is for Breakout rooms.

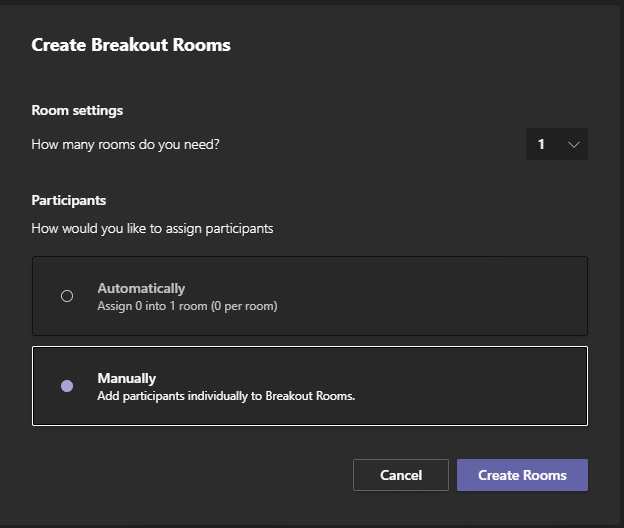
- Select Breakout rooms and chose how many rooms you need – the maximum is 50. Then either assign participants Automatically or Manually and select Create Rooms
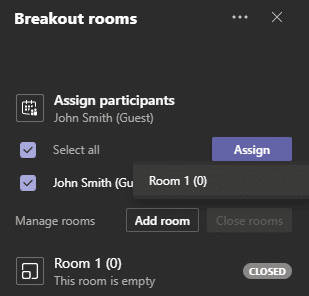
To assign people manually to a breakout room, select Manually and check peoples’ names and then assign a room. At this stage, you can add more rooms and assign people accordingly
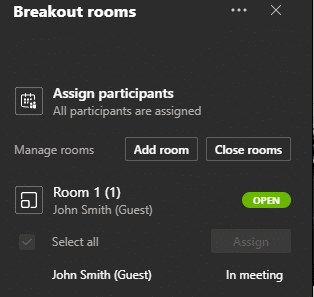
- Once you have assigned somebody to a room, you must open the room by clicking on the (…) beside the room and selecting open – the room status will change from Closed to Open

- The attendees will be notified on-screen that: The breakout room session has started. You will be automatically moved in 10 seconds
- As a meeting organiser, you can join any of the breakout room by selecting the More options (…) next to the room and Join room. When the meeting organiser joins a breakout room, the original meeting is put on hold
- To send an announcement to everybody in all the breakout rooms, select the (…) and choose to Make an announcement
- When finished with the breakout rooms, you can either close one or all of them at once. To close one, select More options and pick the room that you would like to close. Alternatively, select Close rooms to close them all
- Attendees who want to return to the main meeting can select Return

- Please note – when the attendees have finished with their breakout rooms and want to join the original meeting – and if you as the meeting organiser have also joined a breakout room – you must select Resume to start the original meeting and then the attendees will automatically join it
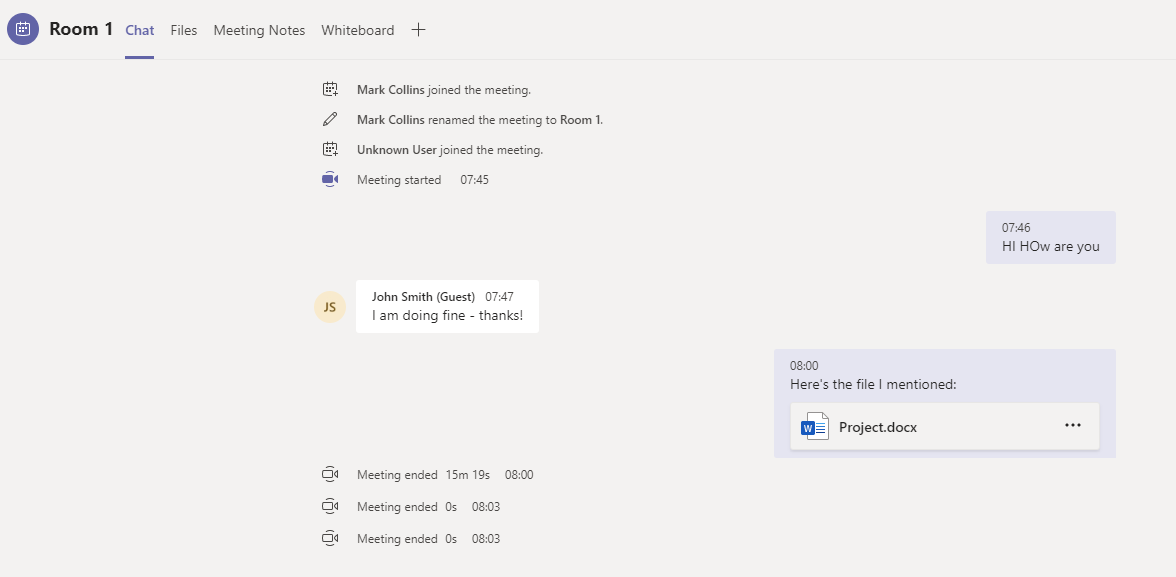
Chats in Breakout rooms
Any files that are shared or chats that occur in a breakout room are saved to Chats.
Breakout room tips
- Only a meeting organiser can move freely between multiple breakout rooms
- You must be using the desktop version of Teams – not the web app – to organise breakout rooms; however, attendees can use the web app / mobile app to take part in breakout rooms
- Attendees can present in breakout rooms by default
- You can rename your breakout room by selecting the (…) by the room’s name
- In each breakout room, you can record, chat, and share content just like a regular team meeting
- Breakout rooms become part of the original meeting and remain in place for further use if required
- A room must have attendees assigned for it to open
- You can start breakout rooms individually, or all at once
- If a guest selects Rejoin while in a breakout room, they will leave that room and the original meeting; in order to rejoin the original meeting they must click on the link which they were initially sent
The lobby
If you have organised a meeting (and are the official ‘meeting organiser’), you decide who gets to join the meeting directly or if people have to wait in the lobby.
If someone is waiting in the lobby, you will get a notification in by the participants’ icon and can let them join the meeting by selecting the green arrow:

| Who can bypass the lobby? | What happens | Recommended when… |
|---|---|---|
| Only you | As the meeting organizer, only you can get into your meeting directly. Everyone else will wait in the lobby. | You want everyone else to wait in the lobby until you’re ready to admit them. |
| People in my organization | Only people in your org (including those who have different email domains than yours) can get into your meetings directly. | You want all external guests (anyone outside your org) to wait in the lobby so you can approve them one by one. |
| People in my organization and trusted organizations | Only people in your Teams org and external guests from trusted organizations can get into your meetings directly. | You want some external guests to wait in the lobby so you can approve them one by one. |
| Everyone | Anyone who has access to the meeting link gets in to the meeting directly, including people who call in. | You don’t want anyone to wait in the lobby. You want everyone to be able to join your meetings without specific approval. |
Recording meetings
You can record your Microsoft Teams meetings. The recording captures Audio, Video, and any screen sharing activities. The meeting is recorded in the cloud and saved to Stream, meaning you can manage, download, and share along with all your organisation’s other video content.
At the most basic level, this allows you to have a record of what was discussed, so you can go back to it at a later stage, or share it with team members that could not attend.
Once in the meeting just click the (…) and click ‘Start Recording’:
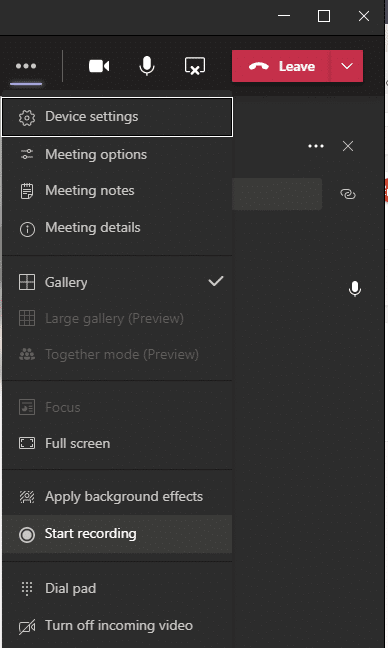
Once clicked, you will be told you are recording in a message at the top of the meeting. Once finished, click stop recording from the same menu. The video is saved to Stream. However, you will also see a link to it in the meeting chat window and be emailed a link to it from Stream.
Here are a couple of links to help explain further and give other prerequisites and considerations:
- Teams Cloud meeting recording
- Get started with Microsoft Stream
- End User Documentation: Record meeting in Teams
Live events
A Live Event is a meeting which you can create in Teams designed for large online audiences. They can be either public or private events and up to 10,000 people can attend.
They are more complex than a regular meeting and require you to have a presenter and a producer. For more information, see https://support.microsoft.com/en-us/office/schedule-a-teams-live-event-7a9ce97c-e1cd-470f-acaf-e6dfc179a0e2
Calls in Teams
Calls is another central part of Teams. Once everybody is online or connected to the internet, you can start a call with one or more of your colleagues.
However, there is a vital distinction between calling people in your organisation over the internet and calling actual landlines/mobiles.
This section only covers calls made over the internet and not landlines/mobiles. For more information about Calling Plans, see Microsoft’s guide – https://docs.microsoft.com/en-us/microsoftteams/configuring-teams-calling-quickstartguide
Calling people in Teams
Call a colleague by selecting Calls.
- To make a call to someone in your organisation, enter their name in the Make a call field
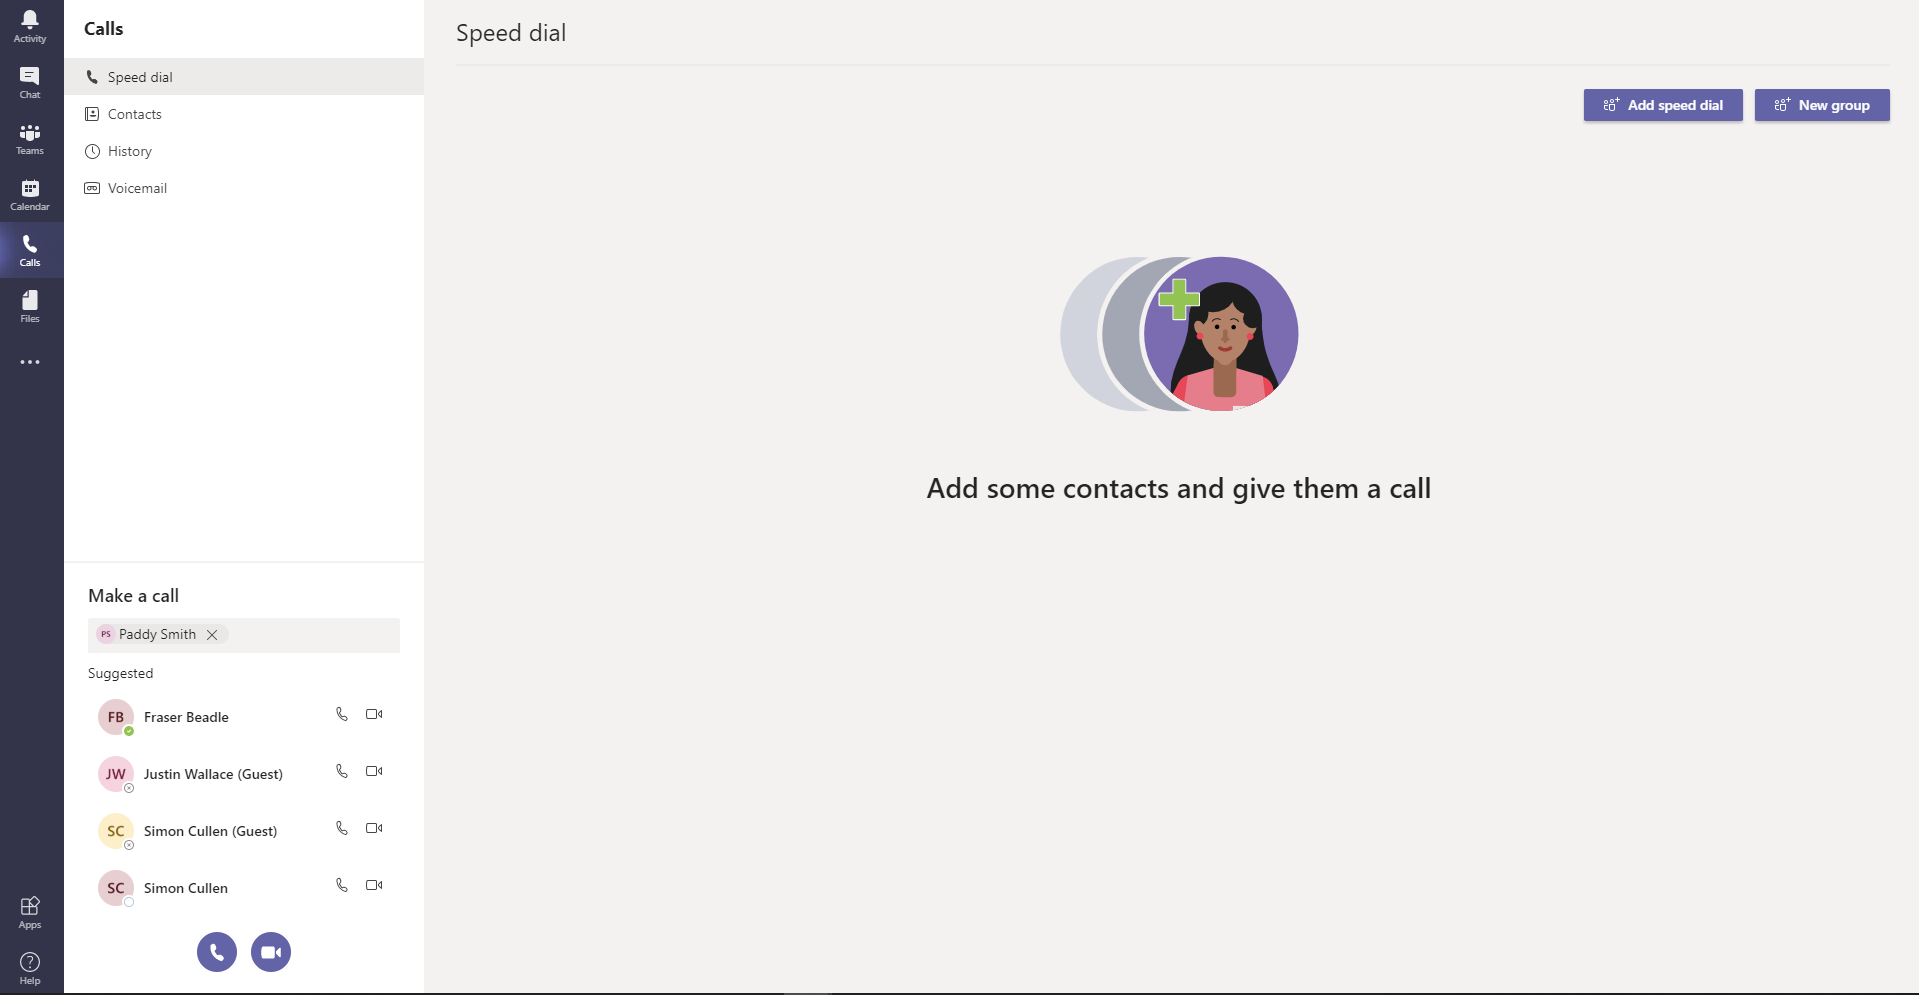
- Your call can be either a voice call or a video call
- Once on the call, the familiar meeting environment will appear, and if it’s a video call, your image on the bottom right of the screen
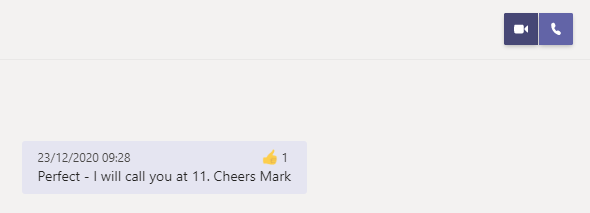
Call some you are chatting with
- If you are in a chat, or if you go to a previous chat, select either video or the voice symbol at the top right-hand side of the screen
Call with the Command box
- Type /call into the command box and enter the person’s name

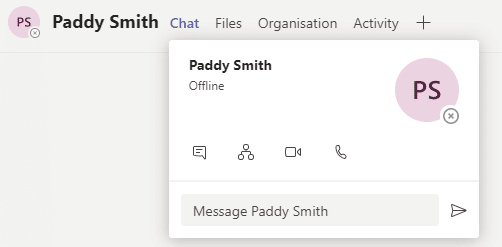
Via a Profile picture
In Teams you will often see people’s profile pictures. If you hover over one of them, you can start a video or voice call:
Add contact to Speed dial
- Go to Calls and Speed dial and Add speed dial. Enter the person’s name and add
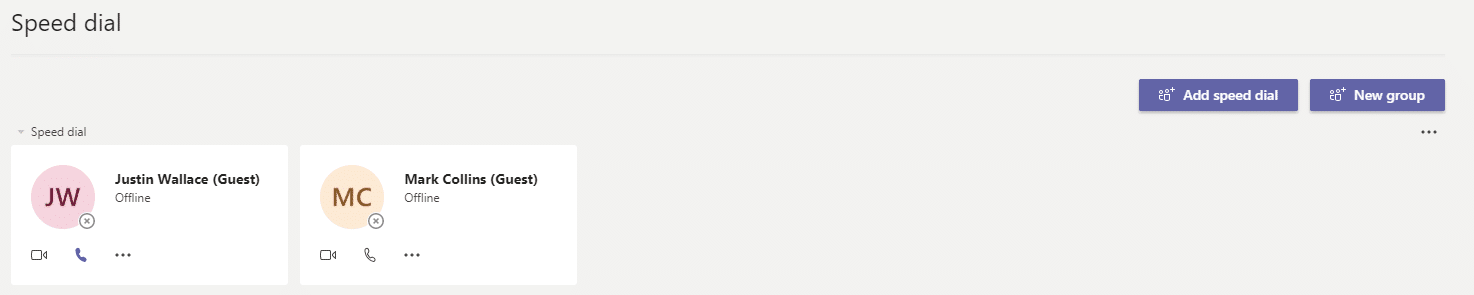
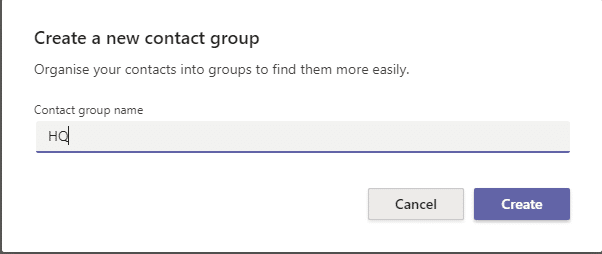
- Under Speed dial, you can also add a New group. Select New group and give it a name and Create
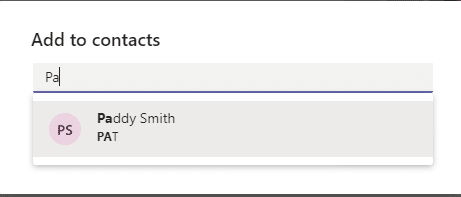
- Add a contact to the groups by selecting the (…) on the far right of your screen

- Add the person
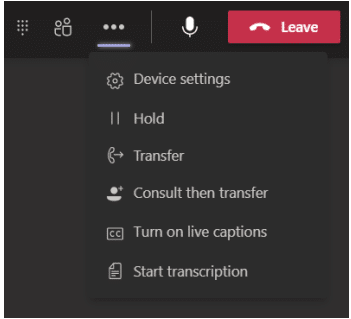
Calls Options
During a call, you have many options. To see these, select More actions (…):
| OPTIONS | FUNCTION |
|---|---|
|
Device settings | This is where you can select the audio settings, such as what speaker, microphone and camera to use. |
| Hold | By selecting Hold, you put the call on hold for everybody in the call. |
| Transfer | Type in the name of the person you want to transfer, select them, and then Transfer. |
| Consult then transfer | If you like, you can consult with a person before transferring them, and once you have finished consulting them, select Transfer |
| Turn on live captions | Live captions take note of what is being said in the call. However, as it’s transcribed by the AI feature in Teams, it may not be perfect |
| Start transcription | A transcription of your meeting will be saved in Stream |
Advanced features
The Command Box
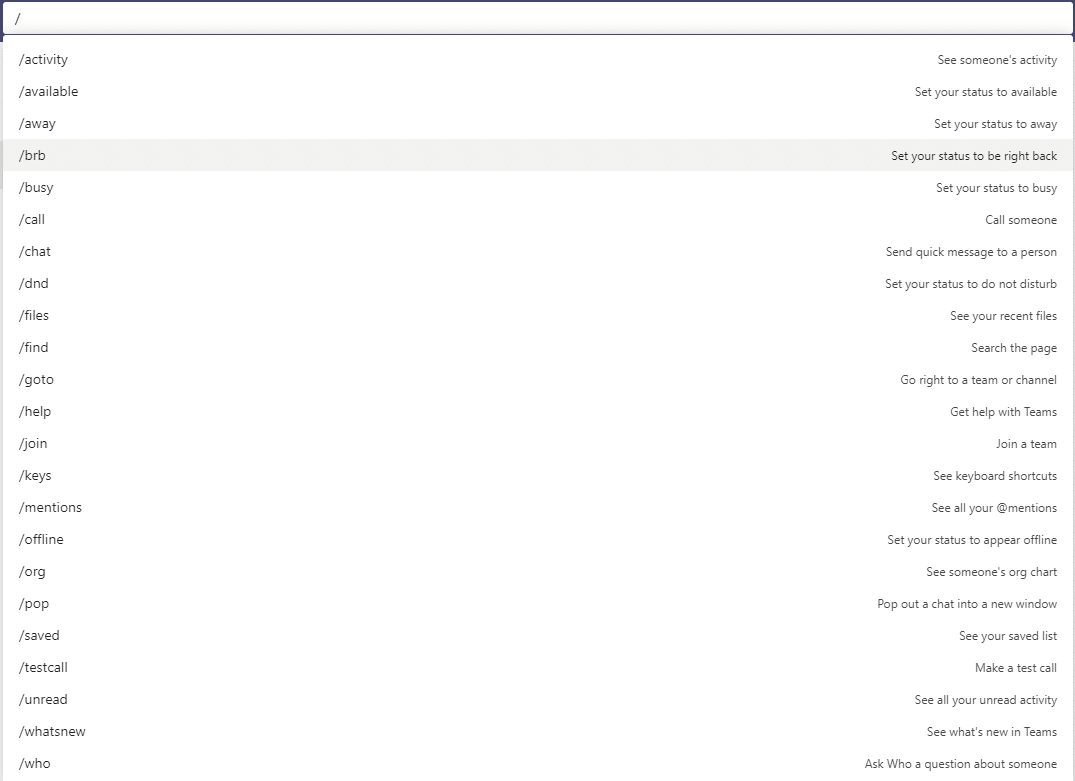
The search bar at the top is hiding more than just search functionality, it has some great ‘shortcut’ app and command options, some of which are really useful
All you have to do to see what’s on offer is type ‘/’ for the commands that work standalone or ‘@’ to see the Apps commands, give it a go.
Here are just a few of our favourites:
- @Wikipedia – Allows you to do a Wikipedia search. Returns a summary that you can click on to go to the full Wikipedia page.
- /goto – If you have a lot of teams or channels or spend a lot of time in the Chat part of teams, then this is a good way to hop straight to your destination.
- /unread – Helps in those busy times, and pulls up a list of all your unread items
- /mentions – Gives a list of all your @Mentions. This will include direct tags or where a team you are in has been tagged.
- /files – Shows your recent files and allows you to search and go to the file you want rather than having to click around your teams to find what you need.
- /keys – This is a shortcut to show shortcuts. Nice quick reference for the MS Teams Keyboard Shortcuts.
- /call – This allows you to type the first few letters of the person you want to call and select them to call. In big organisations, this could be very timesaving.
- /help – A really good quick way to ask a question of the Teams help via the T-Bot.
- /saved – This takes you straight to your list of saved messages.
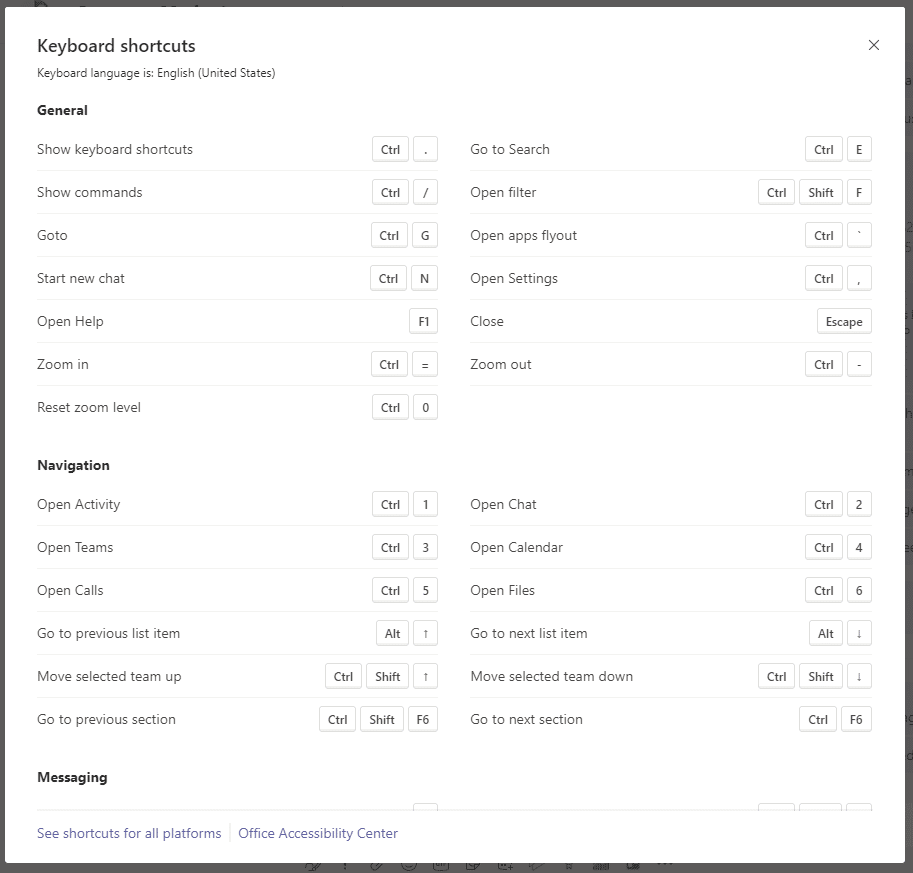
Shortcut Keys
- Navigation of the Left navigation panel – Ctrl + 1+ 2 + 3 – i.e. Ctrl + 1 = Activity feed; Ctrl +2 = Chat; Ctrl + 3 = Teams etc
- An Emoji for every occasion – Type a colon “:” immediately followed by a word – to discover additional emojis (e.g. :disappointed or :frog)
- Move your Teams around – Ctrl + Shift + up or down arrow – Moves the Team you have selected up in the Teams Panel on the left-hand side, up or down in your list of Teams.
- What you really need! – CTRL + ‘.’ – Ctrl and the Full stop key together, probably should be first in this list, as it gives you all the shortcuts you can use