Overview and features
How long does it take from you to develop a complex approval process? What about testing? Do you want a single simple solution that you can use to automate all your business processes? In this post I will show how to create a template using SharePoint and Power Automate that you can keep reusing for all your processes. The solution will allow to:- Automate repetitive processes
- Define approval steps from a SharePoint configuration list in order not to change in the Power Automate flow
- Gives an overall picture of the workflow – Keep history of all actions in a separate SharePoint list
- Manage approval process from a SharePoint configuration list
- Standardize all notifications by creating one single location to send email and create approval
- Save development time and most importantly standardize approval processes
- Approve from either SharePoint List or Power Automate
- Choose notification option to assigned approvers from the following options:
- Notify through email – user must approve from SharePoint list. This is useful in case there is some fields that he needs to set before submitting to the next step.
- Notify through email with options – User can respond with any of the selected Options from Email.
- Create approval with options – User can respond with any of the selected option from Email or from flow client app.
- Assign approval to manager get from Active Directory
- Send custom notification to requester
- Send notification to chosen people on CC
- Integrate with MS Teams
Solution architecture
Following the main components of the solution:- SharePoint Lists
- Trigger List: this is a custom SharePoint List used to trigger the flow. It contains all the fields necessary to keep track of the flow status, and all the fields required for business (Form fields). We will name this list: Flow Trigger
- Configuration List: this is a custom SharePoint List that contains all the process steps and what will happen on each step. We will name this list: Flow Status
- Flow History List: this is a custom SharePoint List that will contain all approval actions and history. This list will also trigger a Flow that will send email notifications and create approvals. We will name this list: Flow History
- Power Automate Flows
- Main Flow process: this is a Flow triggered when a new item is created or modified on the Main List. It checks the current data and accordingly fetch what is the next step from the Flow Status List. We will name this Flow: Flow Trigger – Main Process
- History Flow Process: This is a Flow triggered when a new item is created in the list Flow History. In this Flow we will provide a unified location to send notifications and create approvals. We will name this Flow: Flow History – Main Process
SharePoint Lists (back end)
Following SharePoint Lists (back end) fields.
Flow Trigger
Create custom SharePoint List: Flow Trigger with the following fields.| Name | Type | Description |
| Title | Single Line of Text | |
| WorkflowCurrentStatus | Lookup | Used to retrieve current process Id from configuration list Flow Status
 |
| WorkflowCurrentStatusID | Number | Used to contain Id of lookup field WorkflowCurrentStatus. This will be set by workflow and needed for ease of using a Text Field instead of lookup |
| Requester | People Picker | People only field. Used to contain the summary status of the request |
| RequestClassification | Choice | Choice field used to set the current status
 |
| ApprovalStatus1 | Choice | This field is updated by user. Contain choices for first level submitter. Usually options available for requester
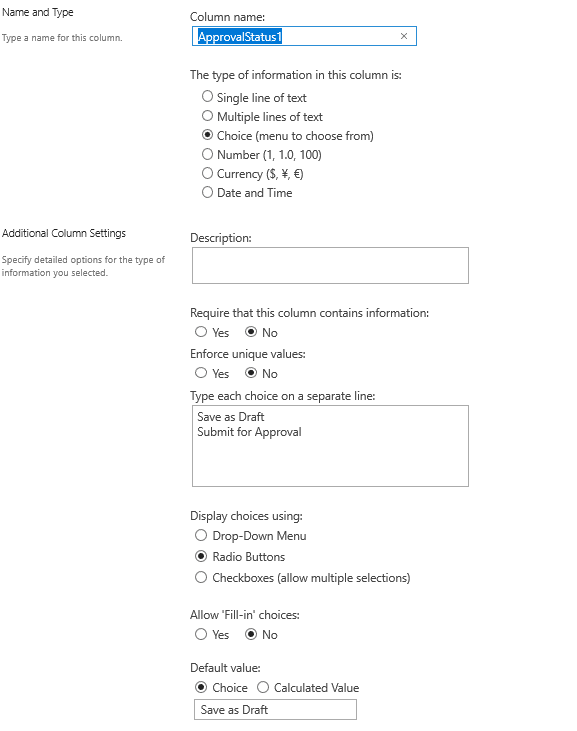 |
| ApprovalStatus2 | Choice | Contain choices for second level submitter. Usually options available for approver.
 |
| ApprovalStatus3 | Choice | 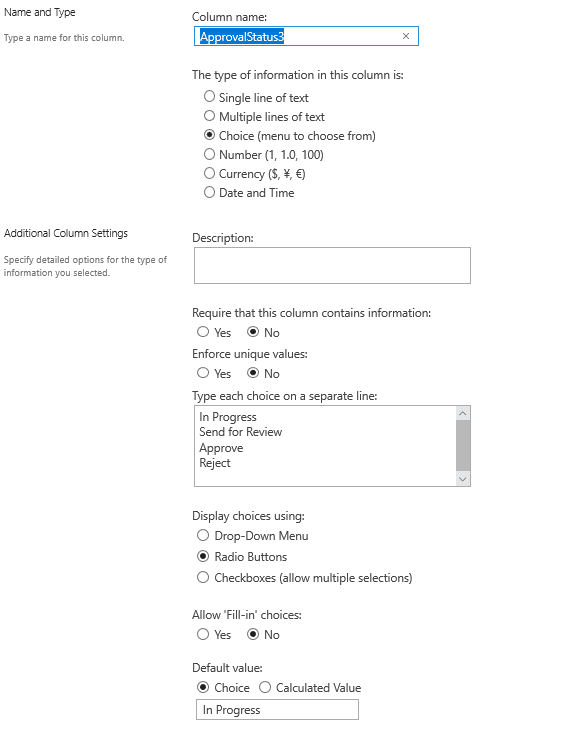 |
| ApprovalStatus4 | Choice |  |
| ApprovalStatus5 | Choice |  |
| ApprovalStatus6 | Choice | |
| ApprovalStatus7 | Choice | |
| ApprovalDate1 | Date With Time | Contain the date of level 1 submit. (In this example when Requester change the status from Save as draft to Submit for Approval) This is changed by Flow |
| ApprovalDate2 | Date With Time | Contain the date of level 2 submit. (In this example when ApprovalStatus2 is changed from In Progress). This field is updated by Flow. |
| ApprovalDate3 | Date With Time | Contain the date of level 3 submit. (In this example when ApprovalStatus3 is changed from In Progress). This field is updated by Flow. |
| ApprovalDate4 | Date With Time | Contain the date of level 4 submit. (In this example when ApprovalStatus4 is changed from In Progress). This field is updated by Flow. |
| ApprovalDate5 | Date With Time | Contain the date of level 5 submit. (In this example when ApprovalStatus5 is changed from In Progress). This field is updated by Flow. |
| ApprovalDate6 | Date With Time | Contain the date of level 6 submit. (In this example when ApprovalStatus6 is changed from In Progress). This field is updated by Flow. |
| ApprovalDate7 | Date With Time | Contain the date of level 7 submit. (In this example when ApprovalStatus7 is changed from In Progress). This field is updated by Flow. |
| ClosedDate | Date With Time | Contain the closure date. At this point the request is completed, either approved or Rejected. This field is updated by Flow. |
| Comments | Multiple lines of text | User updated field. Make sure to set as Plain Text!!
 |
| CommentsHistory | Multiple lines of text | Contains history of all approval actions and comments. This field is updated by Flow.
 |
| EmailSelectedFlowID | Number | For Internal use with Flow. |
| EmailSelectedUserOption | Single line of text | For Internal use with Flow |
| LastSubmitAction | Single line of text | |
| LastSubmitBy | People Picker | 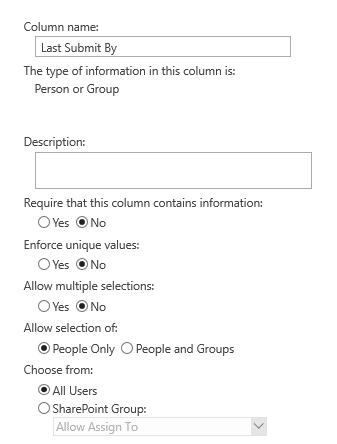 |
| LastSubmitDate | Date With Time | |
| AssignedTo | People Picker | Contain the current peoples assigned to request
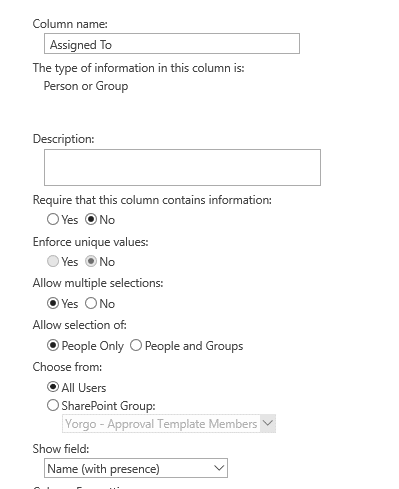 |
Flow Status
List Columns
| Name | Type | Description |
| Title | Short Text | Name of the approval step |
| Assign to Requester Manager | Yes/No | Set to Yes in order to assign the request to the Requester Manager set in AD. In case no Manager is set. The request will be assigned to whoever is set in field Assigned To |
| Notify Requester in CC | Yes/No | Set to yes in order to send a notification to the requester on the action taken on this step |
| Notify Options | Choice | 
|
| Approval Options Flow Status | Multiple lines of text | Set Flow status ID Corresponding to each Approval Option. This a Json object with the following schema
{
“type”: “array”,
“items”: {
“type”: “object”,
“properties”: {
“ApprovalOption”: {
“type”: “string”
},
“Id”: {
“type”: “integer”
},
“ApprovalAction”: {
“type”: “string”
}
},
“required”: [
“ApprovalOption”,
“Id”
]
}
}
|
| Approval Options | Short Text | No need to fill this field manually as it will be filled by workflow. This fields contains the custom responses separated by , |
| Assigned To CC | People | The people that will be notified on CC on this step |
| Assigned To | People | People that will be assigned on this step |
Sample Data
 So, what does the above means? If we take for example step 2- Manager Approval,
- Assign to requester manager = Yes => the request will be assigned to the requester manager. In case the requester manager does not exist, the request will be assigned to user “dany” (Assigned To = Dany)
- Notify Requester in CC = Yes => the requester will be notified on CC
- Assigned to CC = “Tony” => User “tony” will be notified on CC
- Notify Options = “ApprovalWithOptions” => the notification type that will be send to the assigned user will be created as Create and Wait for an approval with custom responses
- Approval Options Flow Status
 This means that on this step we have 3 approval options: “Approve, Reject and Send for Review”. When “Approve” is selected the flow next step id is equal to 3 and the flow will set the field WorkflowCurrentStatus to “3-Final Approval”. When “Reject” is selected the flow next step id is equal to 5 and the flow will set the field WorkflowCurrentStatus to “5-Completed – Rejected”. When “Send for Review” is selected the flow next step id is equal to 1 and the flow will set the field WorkflowCurrentStatus to “1-Requester Submit”.
In summary, this will define the action to be taken per the selected value by the user
This means that on this step we have 3 approval options: “Approve, Reject and Send for Review”. When “Approve” is selected the flow next step id is equal to 3 and the flow will set the field WorkflowCurrentStatus to “3-Final Approval”. When “Reject” is selected the flow next step id is equal to 5 and the flow will set the field WorkflowCurrentStatus to “5-Completed – Rejected”. When “Send for Review” is selected the flow next step id is equal to 1 and the flow will set the field WorkflowCurrentStatus to “1-Requester Submit”.
In summary, this will define the action to be taken per the selected value by the user
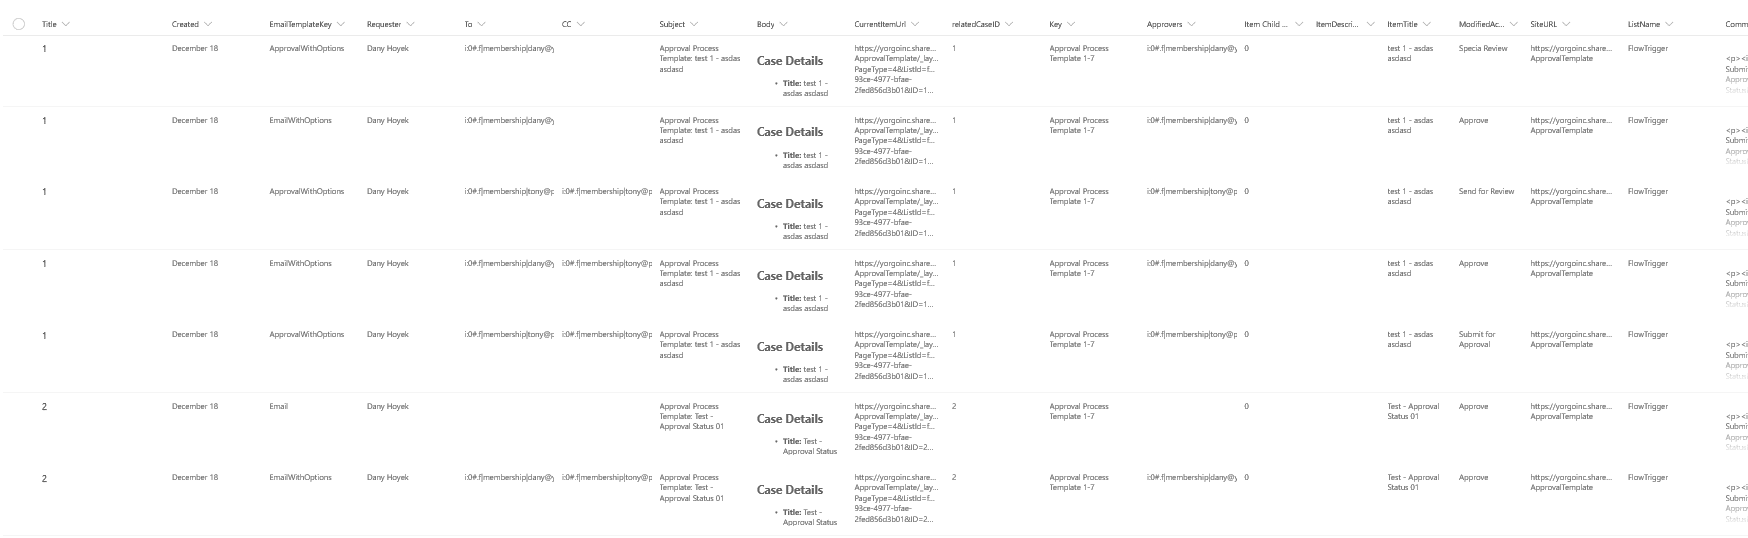
Flow History
Items in this list will be created by workflow and will be used to keep track on this history of all actions that have been done. Also, this list will be the trigger of the approval workflow. This will bring the advantage of having one single place to define approvals.List Columns
| Name | Type | Description |
| Title | Short Text | |
| EmailTemplateKey | Short Text | |
| Requester | Person | |
| Subject | Short Text | |
| Body | Long Text |  |
| CurrentItemUrl | Short Text | |
| relatedCaseID | Short Text | |
| Key | Short Text | |
| ItemDescription | Long Text |  |
| ItemTitle | Short Text | |
| ModifiedAction | Short Text | |
| SiteURL | Short Text | |
| ListName | Short Text | |
| CommentsHistory | Long Text | 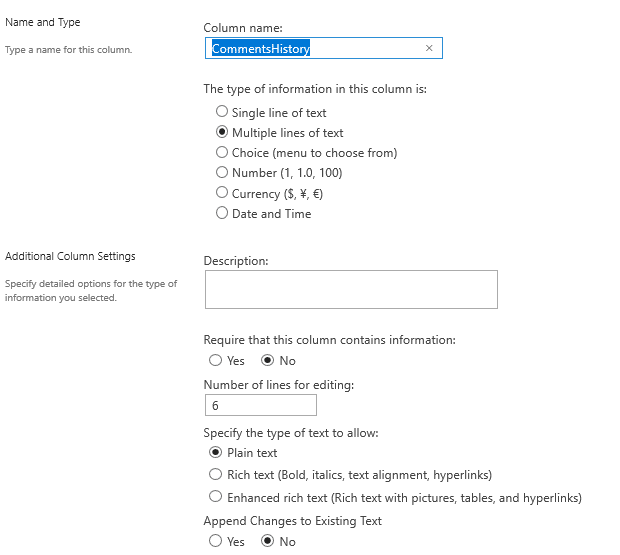 |
| WorkflowCurrentStatusID | Double | |
| WorkflowCurrentStatus | Short Text | |
| SiteFlowURL | Short Text | |
| SiteFlowID | Short Text | |
| NotifyRequester | Yes/No | |
| RequestClassification | Short Text | |
| EmailSelectOptions | Short Text | |
| ModifiedByUser | Person | |
| ModifiedByDate | Date With Time | |
| EmailOptionsHeaderText | Short Text | |
| EmailOptionsSelectionText | Short Text | |
| FlowName | Short Text | |
| ListTitle | Short Text | |
| Comments | Long Text | |
| BodyApproval | Long Text | |
| Approvers | People | |
| CC | People | |
| To | Peaple |
Sample Data