Did you know that over 40% of websites on the internet built are using WordPress? With the rapid growth of Microsoft Teams and thousands of companies turning to online cloud services such as Microsoft 365, it requires quite the learning curve and skillset to stay on top of all the services you may need to keep your business running efficiently.
This article will outline how you can setup an integration between your Microsoft 365 tenant and WordPress. You will also learn how we (at Collab365) use Microsoft 365 and the Power Platform to moderate our very popular, Daily Digest Newsletter service!
Let's first understand why we decided to build the solution in the first place. Our Daily Digest boasts a significant source of the latest updates and blog posts from bloggers and content creators worldwide, reaching over 15,000 individual users every day. To keep content delivered, appropriate, and of the highest quality, we would spend a portion of the working day seeking out the right content to provide. Keeping track of the near 2000 articles, we have shared to date was proving difficult. In addition, duplicate posts would often crop up, or I would have posted something that Mark had posted earlier on in the day. Finally, we got our heads down and began thinking about a Microsoft solution to our problem.
In an "ideal world", an automated process of gathering the latest articles and adding them to our Daily Digest in WordPress would have been the perfect option. However, we tried this and it often resulted in posts unrelated to the type of content we wanted to deliver.
In short, we needed a better way to automatically find awesome content and then have it move through an approval process.
All of our newsletter content is driven from a set of summary articles that are stored in WordPress. You can see them here. These posts are merely the title and summary from the post on the bloggers site. If you click on any link, they all redirect to the original author.
We wanted to be able to master the summary articles in a SharePoint List because it was far easier to manage them in Teams (and SharePoint). Having them in SharePoint also allowed us to introduce an approval process using Power Automate and Power Apps.
Step 1: Create a list in SharePoint to store new articles
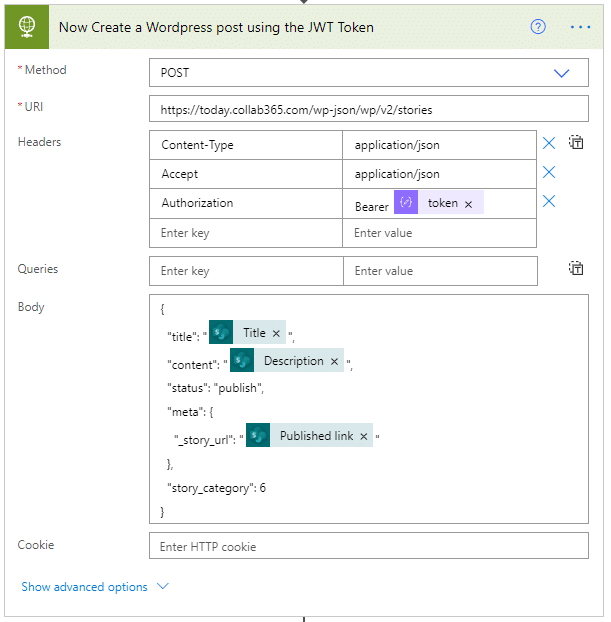
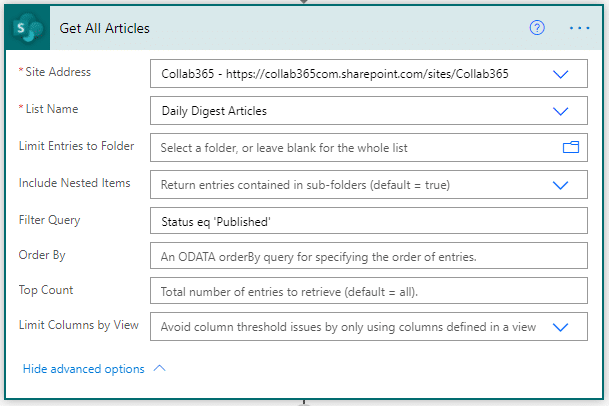
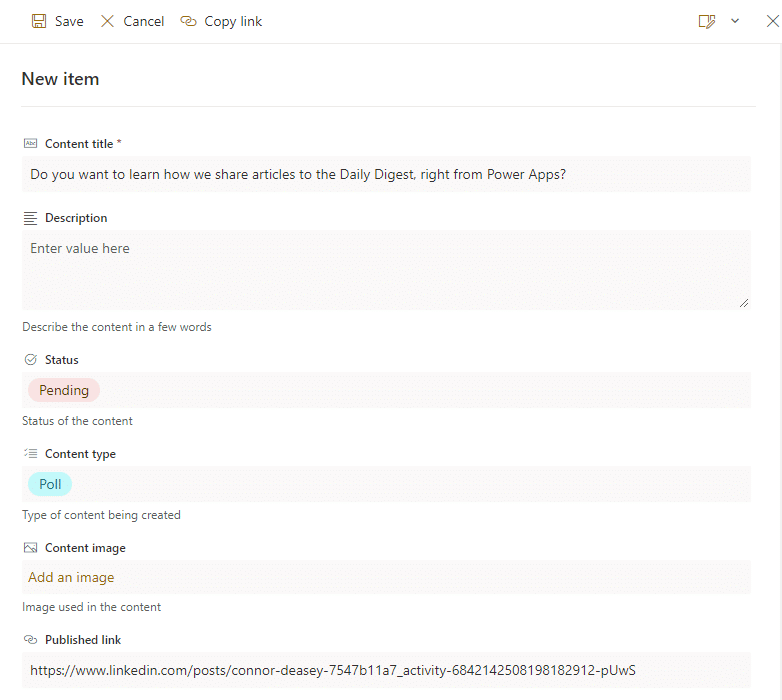
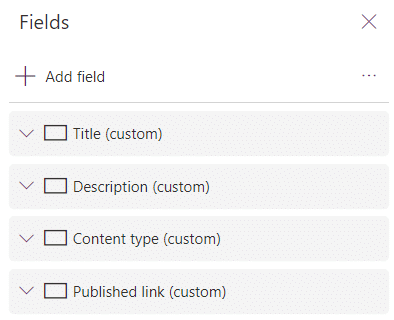
We began by first proving it was possible to create a post in WordPress using Microsoft 365. To do this, we started by creating a SharePoint list that would serve as a database of new articles we had found going forward. This list consisted of a few essential columns matching the primary fields we would have to provide information for in WordPress when creating a new article.
This included the Content Title, Description and Published Link, and a few other columns to help with article management, such as the Status and Content-Type.

We quickly came across an "HTTP connector" (needs a premium license), which allowed us to perform REST API actions. With a bit of tweaking, we could directly access WordPress's API unleashing a considerable amount of control over what we could do in WordPress right from Microsoft 365.
Never miss another Microsoft 365 update!
Did you know you can receive a daily email in your inbox bringing you the best SharePoint, Power Platform, Teams and Azure articles from across the Internet?
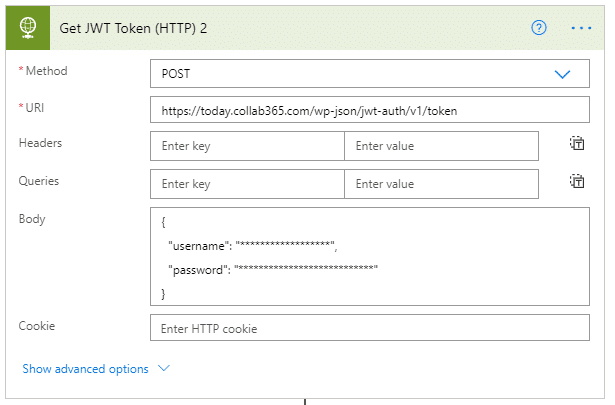
Step 2: Authenticating to WordPress from Power Automate
The days when we used to store username and passwords, in config files on our servers are long gone and have now largely been replaced with a process called OAuth. We won't go into this in too much detail, but in short, OAuth works on tokens (not user name and passwords). Namely, you acquire a token and then use that to authenticate each REST call.
Luckily, there are a few plugins that can help. We used a free plugin called "JWT Authentication for WP REST API".
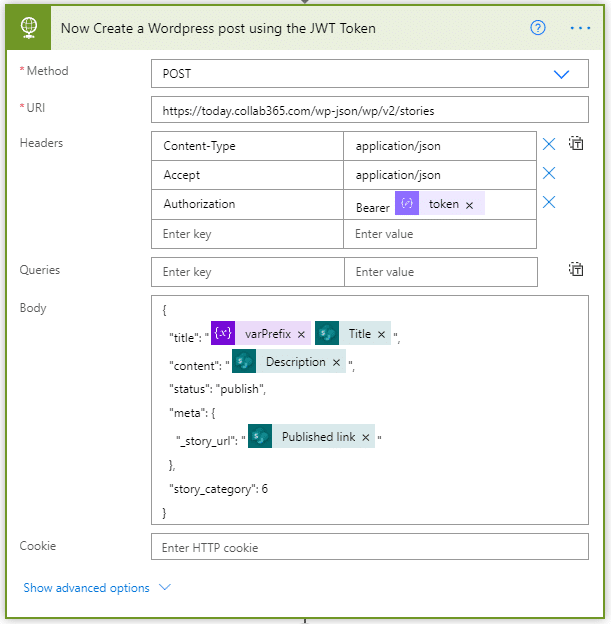
Our actions to authenticate, get a token and create a new post (using Power Automate), look like this:

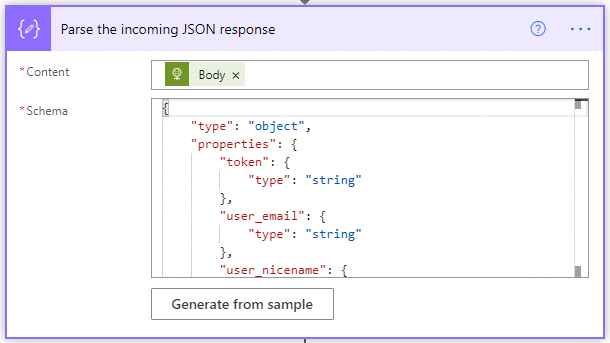
See how we use the bearer token (not user name and password) to publish the article.

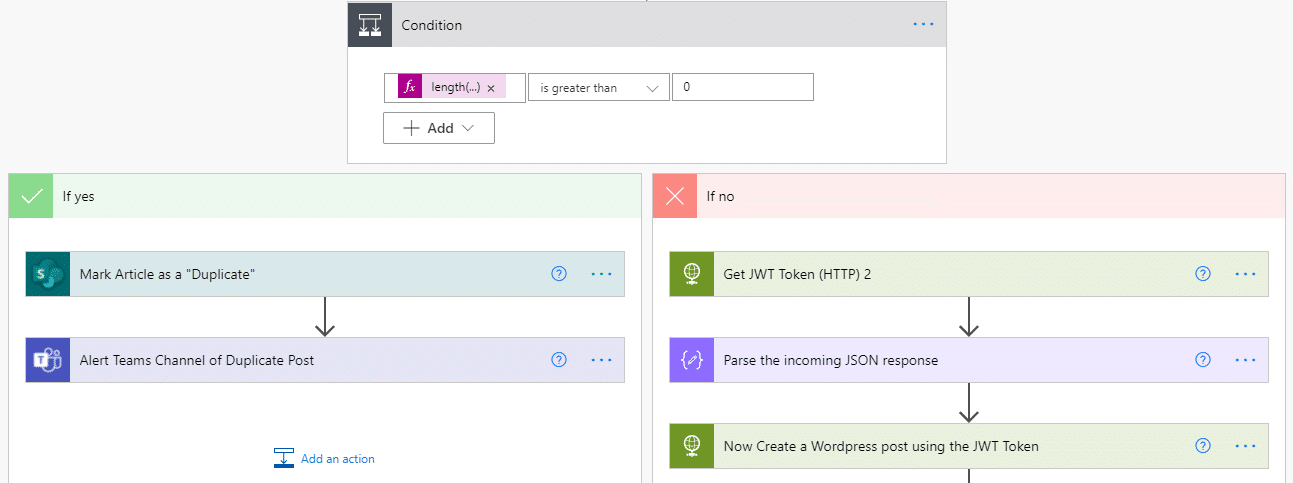
Step 3: Check for duplicate articles
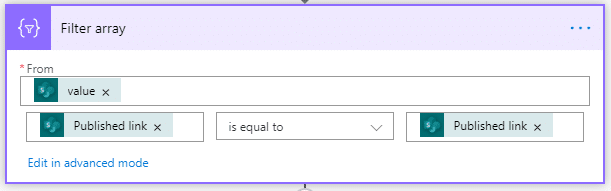
As already mentioned, as we got a series of suggested articles automatically, we wanted the ability to check if it already existed in our SharePoint list. Using the out-of-the-box connectors in Power Automate, we used the fields in our SharePoint list, alongside common filter queries and condition nodes to check if the URL provided matched an existing URL in our records.
The first step was to use a filter query to only return published items from our list of articles.


We were expecting 0 (zero) records or a Null return if we submitted an article that was fresh and did not already exist in our articles list, or 1 (one) or more records if the article was a duplicate.
With this in mind, we added a Condition node where we could build an expression that says that if the filter array (previous node) returns a value that has a length greater than 0 (zero), we can perform an action.
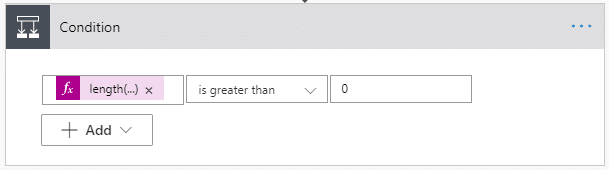
length(body('Filter_array')) From here, we could move the HTTP actions such as the JWT Authorization, the Parse JSON and Create WordPress actions into the No tree. This means that if there is no duplicate the flow can go ahead and create the article as a WordPress post. I also updated the SharePoint items in both trees to mark the article as a duplicate in the Yes tree or Published in the No tree.
Step 4: Prefix the "content type" to the article title
If you have had the pleasure of being a "daily digester", you'll often see article titles prefixed with the type of content they contain, such as "Video ", "Poll " or "Event ". This makes it far easier for the reader to understand what the article is before clicking through.
After adding some of these content types to our Content-Type choice field in SharePoint, we came back to Power Automate to begin implementing a system that would prefix our article titles with the value selected in the UI when a new article is published.
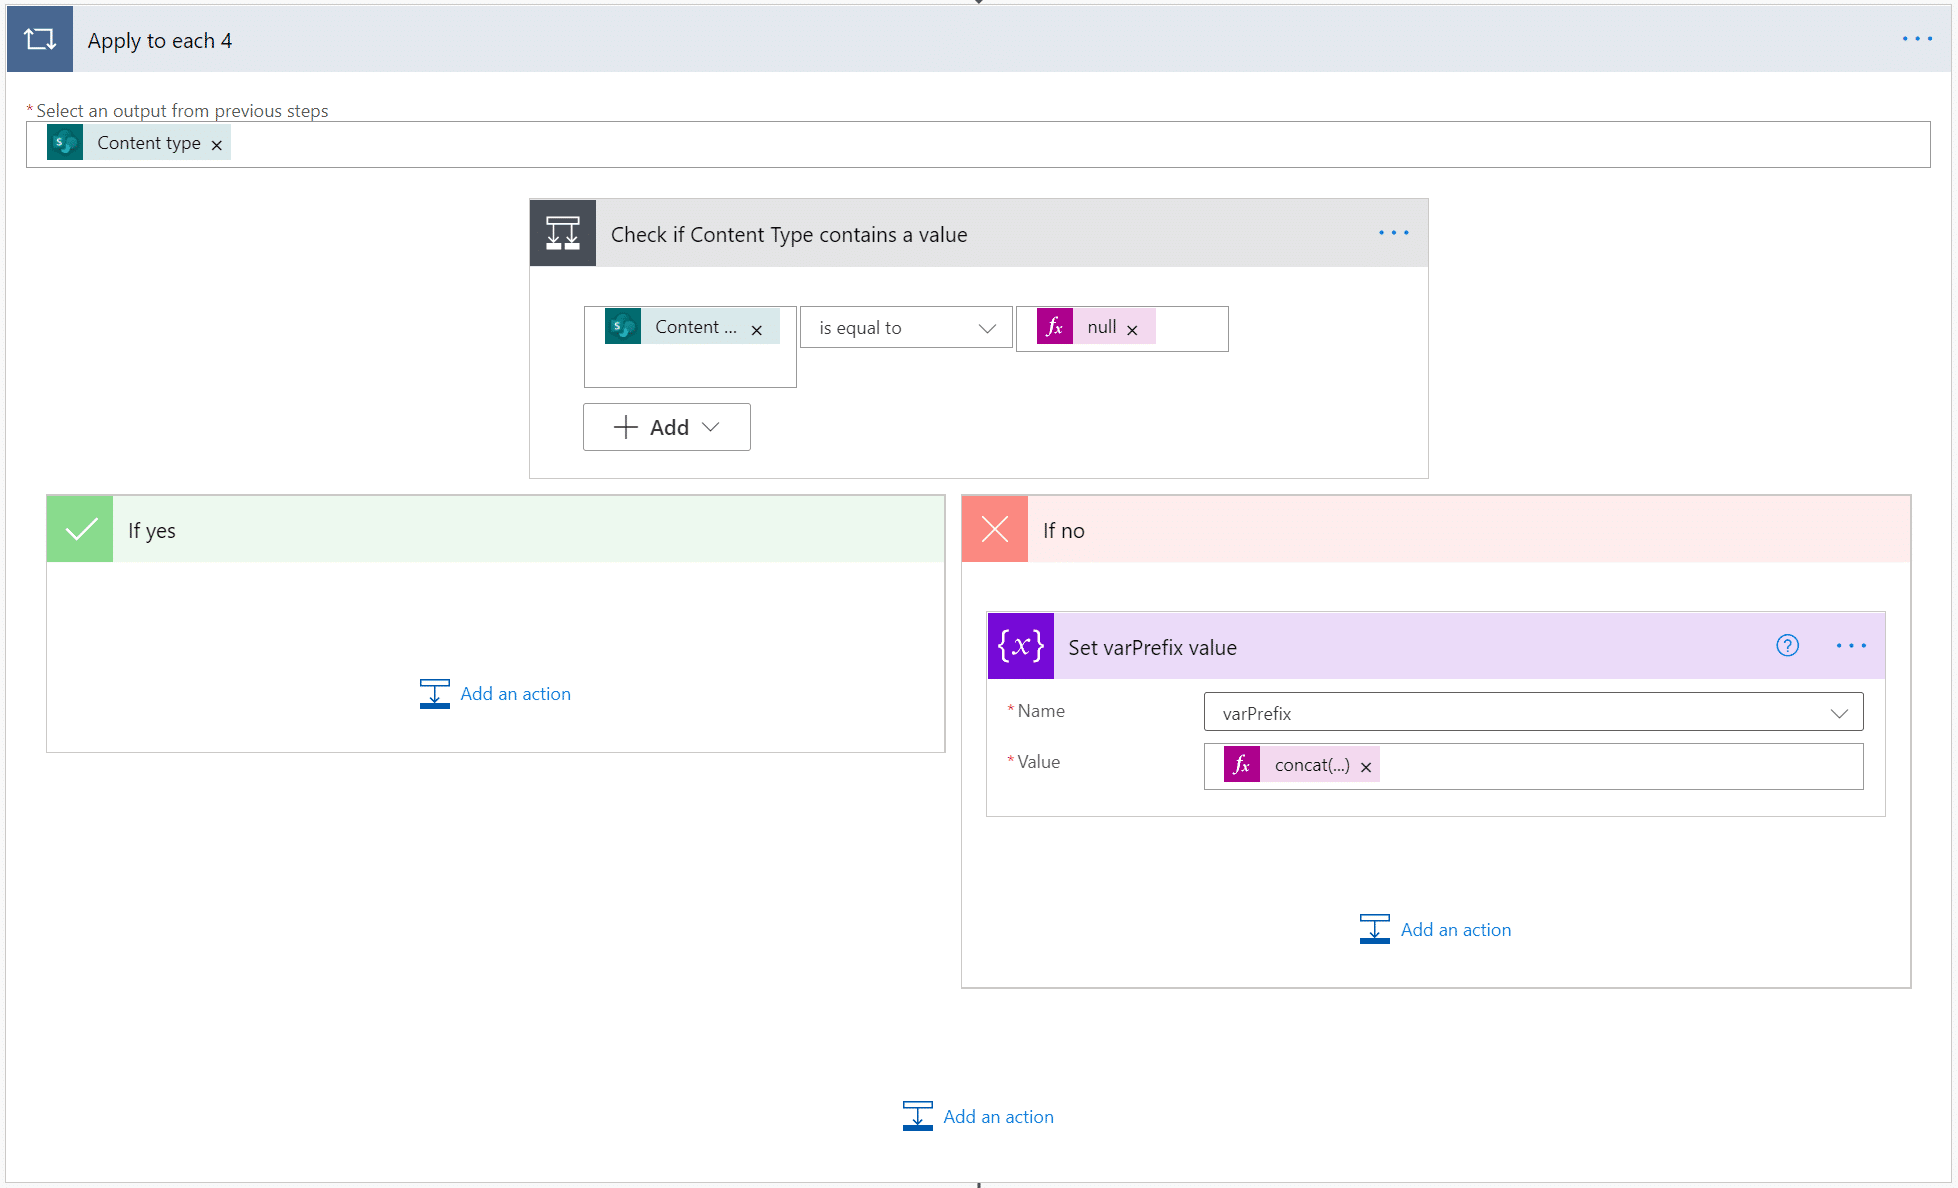
We began by initializing a string variable named "varPrefix". This variable will be used later to store a string which is set when the article is created using the Content Type Value (Dynamic Content) in the next step. We will then use this at the end of the flow when creating a WordPress post to append the content type to the front of the Title.

A standard style blog post will not have a prefix.
To implement this I used a condition to check if the Content Type Value has a value set when the form was submitted. I used the expression "null" to do this.

To implement this I needed to set the value of the variable varPrefix by using a set variable node. I then used the concat expression to use the content type value as the first value (which is wrapped in our apply to each) followed by a semicolon and a space. The final expression should look like this.
concat(items('Apply_to_each_4')?['value'],': ')


Create a Canvas App to post new articles into the SharePoint List (and then to WordPress)
Our solution worked as planned for a few days, but being developers and keen Microsoft 365 enthusiasts, we wanted to extend our solution into Power Apps. The idea of having a Power App embedded in a Microsoft Teams channel excited us and seemed far more intuitive than navigating to SharePoint to add new entries to a list. So, we got to work in Power Apps.
We already had the data in place to begin working with and the automation that takes place to create the WordPress article, so we could pay more attention to UI & UX.
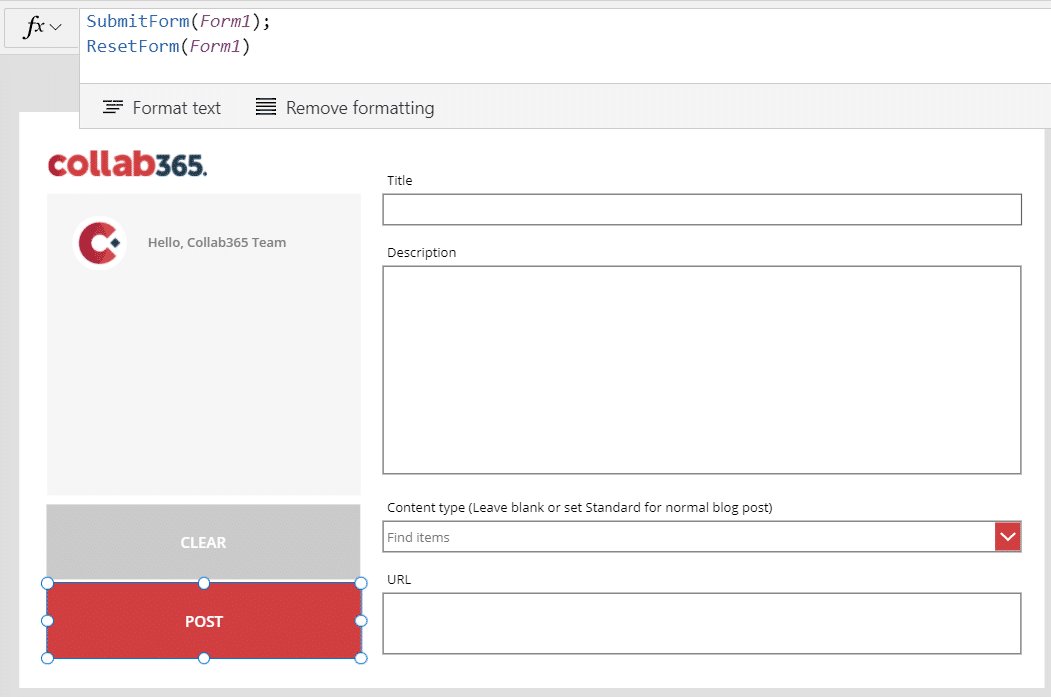
As we wanted to build an application accessible in Teams primarily from a Desktop device, we chose to build a Canvas app from blank using the Tablet format.
From here, I bought in our Collab365 company logos and added a simple personal greeting to each user using the app using the in-built "User().FullName" function.
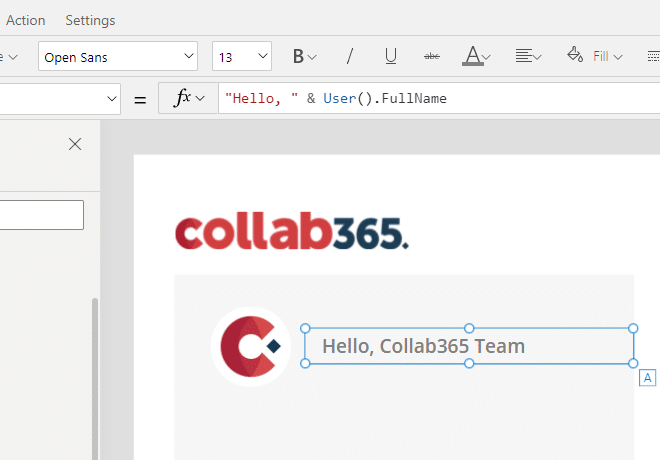

I then selected the Form and set the "Default Mode" to "New", allowing me to keep using the Form. I added styling using our Company colours to keep the app on brand.

Taking our Power App for a Test Drive
Let's take the new app for a spin! I did my daily routine by heading over to some of my favourite Microsoft blog post sites and found one of the latest, copied the details into my Power App and hit the post button. After a very short period, I head over to the Daily Digest WordPress Admin Panel, where I can see a list of all the articles that have ever been posted. Much to my excitement, it was a brand-new article from a submission in Power Apps.
I tested with a few more articles, some different whilst others being purposely duplicate articles to ensure my duplicate validation works. Finally, after the success I was hoping for, I head over to Microsoft teams and find a channel for our solution to live in.
Conclusion
Whether you want to write blog posts in Microsoft Teams and post them to your website or have a gallery of images to upload to WordPress, we must look at how this solution is a fantastic grounding for integrating your Microsoft content with WordPress. Unfortunately, it's overlooked and has become everyday practise to keep Microsoft and your other business services like WordPress separate. Still, hopefully, we have proven that that doesn't necessarily need to be the case.