
Microsoft Visio comes with thousands of shapes and stencils like network diagrams, organizational charts, home or business plans already installed. Thus, in spite of what kind of project you are working on, there is probably something that would work for you. In addition to all these, there are a large variety of stencils available online, which can download to your system for precise features. Besides this, if your Visio template does not consist a stencil that you need, then add the stencil to a template and save a copy of an improved template as well. For this first, you should add stencils to a template. Therefore, in the upcoming section, we will discuss the step-by-step procedure for adding shapes to Visio stencil in a clear way. Before that first, let us explore a short description of Visio templates.
A Quick glance At Visio Stencils
In the Visio world, the entire content refers to shapes, templates, and stencils. It is a way that can hold collections of different shapes. In order, the shape of each stencil may have anything in common. The shapes may be a collection of different shapes that you want to create a specific kind of diagram, or multiple versions of the same shape. For an instance, a basic flowchart shapes stencil consists only similar flowchart shapes. A specialized type of flowchart shape is available in other stencils, like Work Flow Objects and TQM Diagram Shapes. Moreover, stencil files have .vss or .vsx extension.
Some Steps to Add Stencil to Visio Template
Go through the following steps by which users can add stencils to a template in Office 365 Visio. Let us have a look:
- Under the Shapes window screen, click on More Shapes
- Click a stencil you would like the template to have – transfer your pointer over all the categories to view a stencil list in each category. Checkmark indicates a stencil the template already has.

- Now, a new stencil will display in the stencils list under the Shapes window.

- After that, you have to save those files as a new Visio template.
- Go to File menu and click on Save As button
- Select a particular location, and in the Save as type list, choose an option Visio Template (or Visio Macro-Enabled Template if you have already added macros to a file).
- Give the actual name of the template and press OK button


Here, you can follow below steps to find and open the custom template:
- Now, click on File and then, choose a New option. After that, select Categories from the template search

- In Categories gallery, select New from Existing option and press Create
- Eventually, you can find the saved template and select Open.

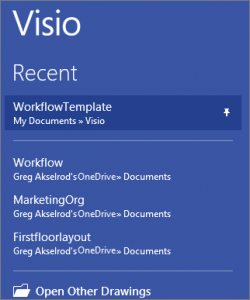
Remember: Attach the new template to your “Recent Drawings” list, thus it is very easy to find. Click on the File menu, go to Open button and select Recent Drawings. After that, find your template file, then click on the pin icon and next to the desired file name. Then, you can open Visio at any time, the pointed template always shows at the top of a list.
Final Words
In the above discussion, we have explained what is Microsoft Visio stencil in a detailed manner. Apart from this, whenever a Visio template does not contain stencils that you want, then add those stencils to a template and keep a copy of the improved template. Therefore, in this blog, we have discussed a complete method that will help to add a stencil to the template in Office 365 Visio. Make sure to follow each and every step very carefully.
