
This blog gives a great whistle-stop tour of one of Teams newer features, “Shifts”. If you want to manage shift patterns on mobile or desktop (within Teams) then this is a great introduction to this feature. This blog post is based on a session that was done by Knut Relbe-Moe (MVP) at the Collab365 Microsoft Teams Virtual Summit.
Introduction
Shifts is a relatively new app in the Office 365 suite and is available as part of Microsoft Teams. Teams is used as a unified messaging and collaboration tool, enabling teams of people to work together regardless of location. Shifts integrates with Teams as it allows the creation and management of shifts and work rotas.
The purpose of this blog post is to give an overview of Shifts, think of it as a whistle-stop tour of all the main features that Shifts provides. As with all Office 365 apps and services, features and user interface are likely to change in the future, but this book should give you enough information to start your journey with Shifts.
We’ll cover a brief introduction to what Shifts is, what it’s used for and the kinds of workers and organisations that can make use of it. Shifts is available in Teams via both the desktop and mobile clients, so we’ll explore how to access and use the features available in both. Please note that Shifts is also available in the web browser version of Teams, but we don’t differentiate between this and the desktop client throughout this blog post as the UI and functionality are the same.
Every feature and process in Shifts will be explained and should give you the information needed to hit the ground running when you first use the app.
Shifts is a new app that is accessed through Microsoft Teams and replaces the old stand-alone app called StaffHub. Shifts can be accessed using both desktop and mobile clients and allows managers to create and manage their employee schedules/rotas. Team members can then use the app to view their shifts and perform other actions such as requesting time off and swapping shifts (with manager approval).
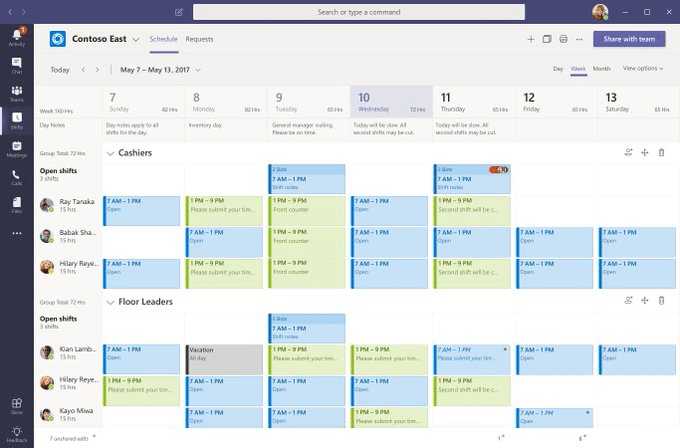
Image source: https://twitter.com/microsoftteams/status/1044670630463983616
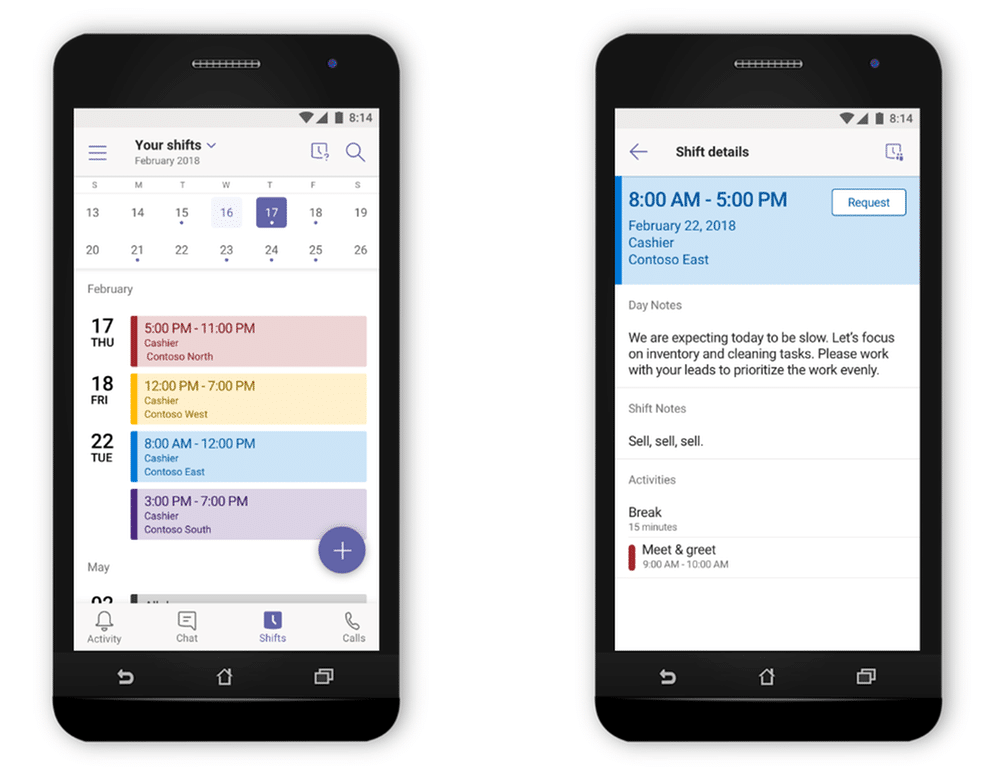
Image source: https://techcommunity.microsoft.com/t5/Microsoft-Teams-Blog/Empower-your-Firstline-Workers-with-new-capabilities-in/ba-p/312171
Shifts also provides the ability to have groups of people in a team with different schedules, so a team can be made up of multiple sub-teams that have different work schedules. For example, one team may be made up of cashiers, warehouse and service desk operatives who all work varying shift patterns.
Shifts is an app built primarily for frontline staff but also has uses for other kinds of workforces. For example, it could be used in an office to schedule housekeeping tasks such as cleaning, emptying and loading a shared dishwasher or even making tea and coffee!
Using Microsoft Shifts
Shifts is accessible from within the Teams desktop client and can be found by clicking the ellipsis at the bottom of the left-hand navigation menu.
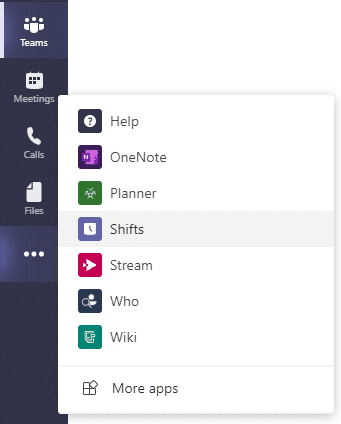
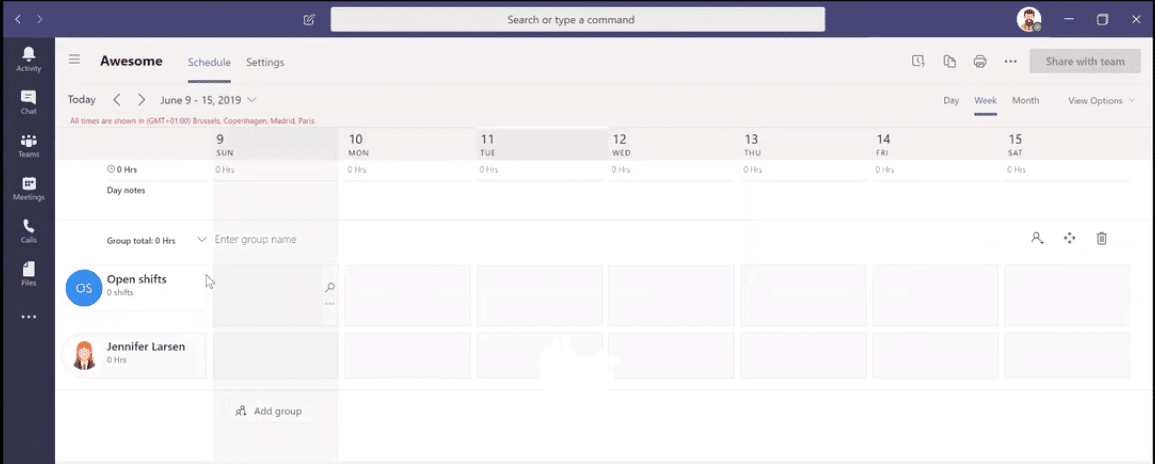
If Shifts doesn’t appear in the list, you can add it by clicking the More apps link and then adding the Shifts app. When you open Shifts for the first time, you will be prompted to select a team and confirm some time zone settings. Once this is done, Shifts will open and displays a blank schedule along with any team members.
Groups
By default, there is one unnamed group in each Shifts schedule, but this can be named to suit your needs. You can add new groups by clicking + Add group so you can setup shifts for different groups of workers in your team.
![]()
These icons, which are shown to the right of each group name, can be used to configure the group further. From left to right, they are used to add users to the group, reorder the group position on the schedule view and remove the group.
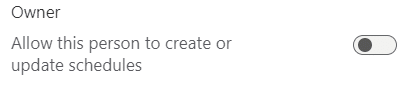
When you add a user to a group, you can also specify whether they have permission to create or update schedules:
Adding Shifts
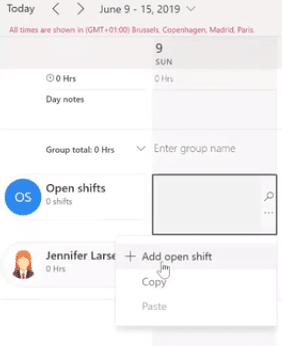
One of the first things you’ll need to do is create some open shifts, which, once created, can be assigned to employees. Alternatively, open shifts can be left open, and staff members can choose the shifts they would like to work. To create an open shift, click the ellipsis for the selected day in the Open Shifts lane and then + Add open shift.
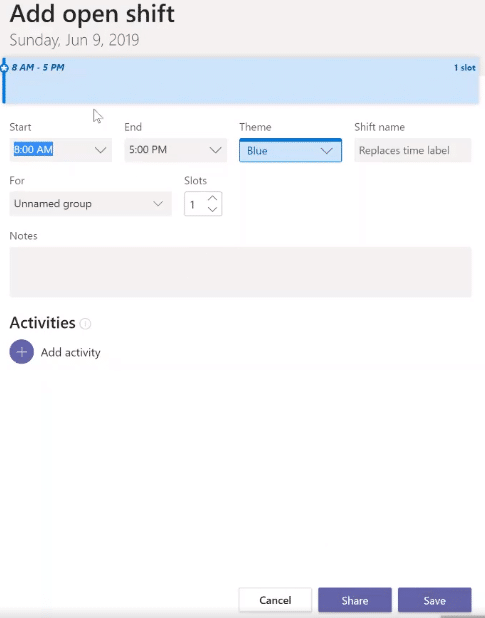
In the Add open shift you can then add the start and end times and give the shift a name and colour coding to make things easier to track when lots of shifts are added. Up to six slots can be added for each shift, which means that six separate employees can be added to the same shift.
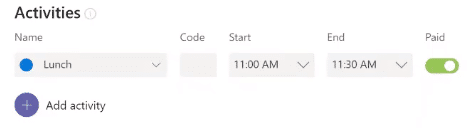
There is also the facility to add multiple activities to a shift, such as breaks, or lunch, as shown below:
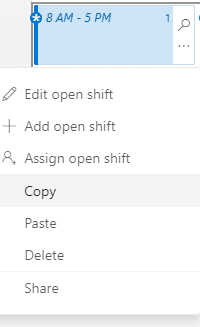
Once an open shift has been created, you can copy and paste the shift over to other days through the week. This can be done using the copy and paste functions available by clicking the ellipsis on an existing shift or by using Ctrl+C and Ctrl+V keyboard shortcuts.
Assigning Shifts
There are two ways to assign shifts to workers. The first way is to click the ellipsis on a day in the lane for a specific user (rather than the open shifts lane). This will enable you to create a shift in the same way as you would create an open shift, but this time, the selected user will automatically be populated as the assigned worker in the shift.
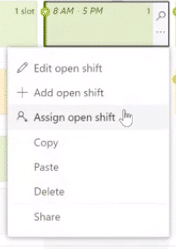
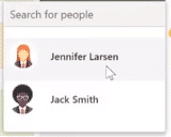
The second way is to assign an open shift to a worker. This can be done by clicking the ellipsis on an open shift and then choosing Assign open shift. You can then search for the worker you want to assign the shift to.
Once a shift has been assigned to a worker, it will show up in their lane:

Requests
Workers can use the Requests feature to request things like time off or swap shifts with colleagues. In the desktop client, the Requests feature can be accessed by clicking the button in the top right-hand corner of Teams:
A new request can then be created by clicking + Add request. There are three types of requests available – Time off, Swap and Offer.
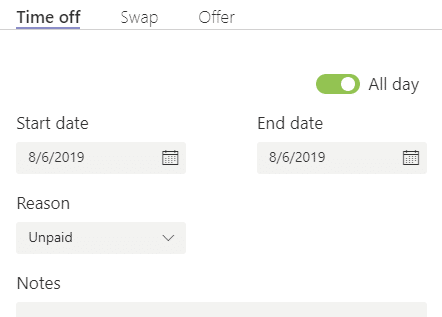
Time off allows a worker to book holidays or other types of leave. They can enter the date(s) required and there is also an All-day toggle, so if they only need part of a day off, they can switch this and enter the times they need. They can select a reason from a dropdown list and add any extra details in the Notes section.
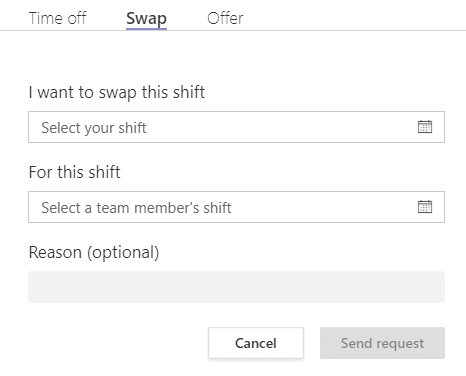
In the Swap section, a worker can ask to swap shifts with a colleague. They select their shift that they want to swap and then a colleague’s shift that they would like to work instead.
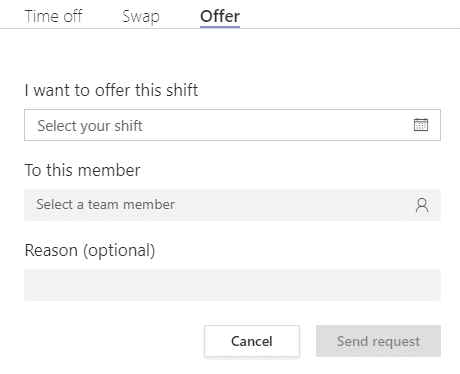
Offer is similar to Swap but allows the worker to offer their shift to a colleague. They select the shift they want to offer, the colleague they want to offer it to and can add reasons for the offer if required.
Although the ability to make requests is available in the desktop client, this would typically be done in the mobile app as it would generally be frontline workers making the requests. However, it’s useful to know that this functionality is available on every device.
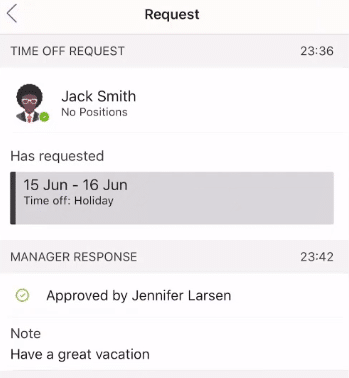
Once a worker has added a request, it then needs to be authorised by a manager. Any user who is an owner in the associated team is considered a manager in Shifts so all owners will have the ability to authorise requests in Shifts.
When a manager clicks on Requests, they will see all outstanding requests that need to be authorised:
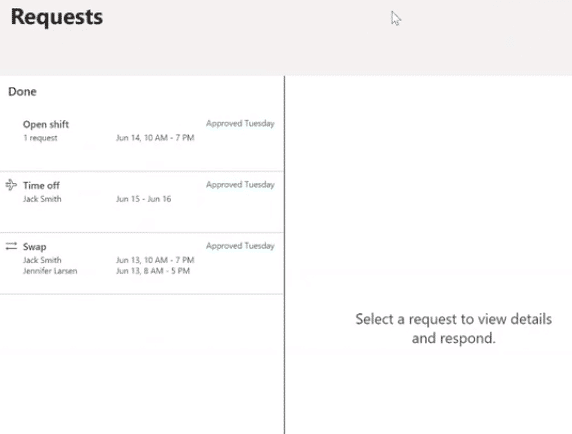
The manager can then select each request and approve or deny it as well as adding any reasons for their decision.
Printing, Sharing & Exporting Shifts
Once a schedule has been created and shifts assigned, this then needs to be shared with the team, and there are several ways of doing this.
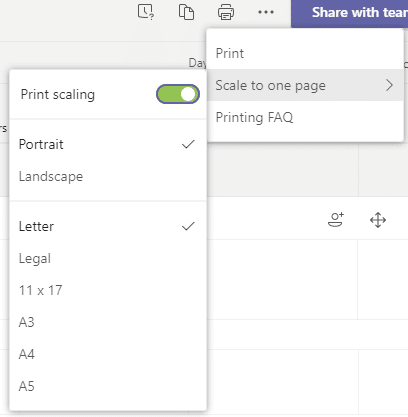
If the workplace is somewhere where workers aren’t allowed their mobile devices on them, for example, a factory floor or kitchen it may be useful to print off a copy of the schedule to display on a notice board. The print button can be found in the top right-hand corner of the Teams window. It allows you to set scaling details if you have specific paper sizes and then you can print to a printer or pdf:
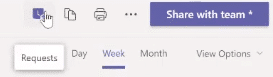
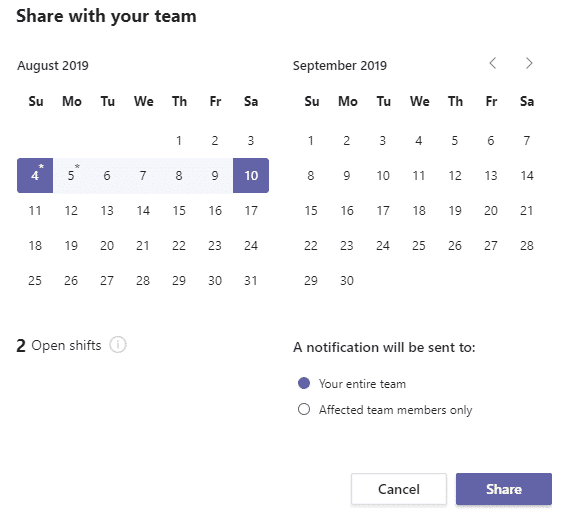
The Share with team button is also found in the top right-hand corner of the window, and when you click this you can see an overview of the shifts along with an option to share the schedule with everyone in the team, or just the affected team members:
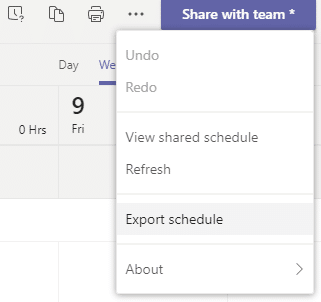
Finally, you can export a schedule to Excel, which can be useful for payroll departments to calculate pay, or HR departments to keep track of holiday and sickness. To export a schedule, you click the ellipsis in the top right-hand corner and then choose Export schedule:
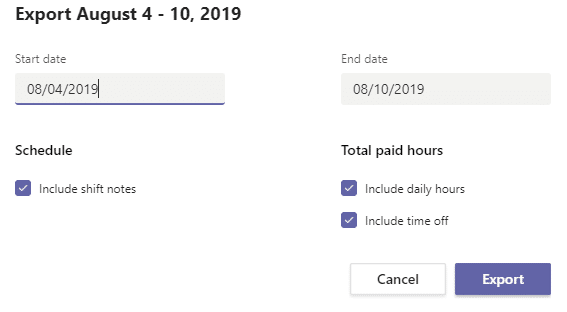
You can then specify date ranges to export along with whether notes and hours and time off information are included. When you click Export, an Excel file will be created, containing all the schedule data.
Views
There are several different options for viewing schedules and shifts:
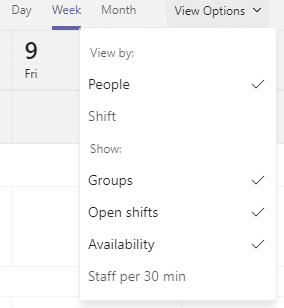
You can choose to view the schedule as a daily, weekly or monthly view. You can also use the options shown above to group the schedule view by shift rather than people and configure what information is displayed such as groups and open shifts etc.
The different levels of view make it easy for managers to keep track of their staff cover for a particular day, week or month. Information that isn’t required can be hidden, so their screen isn’t cluttered with unneeded information.
As mentioned previously, Shifts is also available on the Microsoft Teams mobile client. The mobile version is a trimmed-down version of the full desktop client and is designed for frontline workers to view shifts, create requests for time off and swap shifts with colleagues.
The Shifts app can be accessed on the mobile client by pressing the waffle menu in the top left-hand corner of the Teams mobile app and then selecting More Apps.
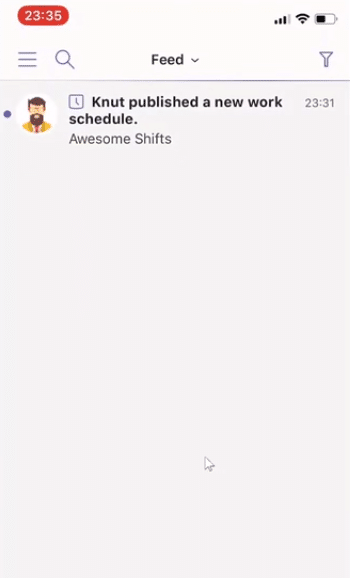
When a manager shares a schedule, a notification will appear in the feed of the Teams mobile client:
Other notifications from Shifts will also appear in the Teams mobile app feed such as requests for shift swaps, open shifts and time off:
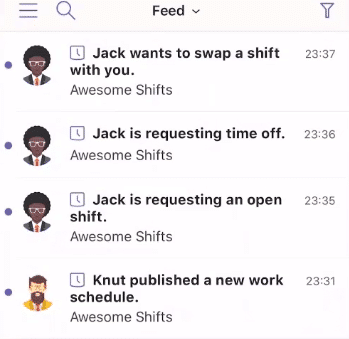
Pressing any of the notifications in the feed will take you to the corresponding item in Shifts.
If you access the app using the Teams waffle menu then you will be presented with the ‘Your Schedule’ screen, which gives an overview of the shifts assigned to the currently logged in user:
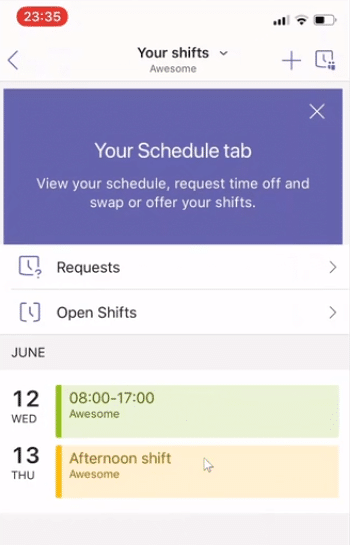
As well as viewing your shifts, you can use this screen to create requests and view requests that need to be authorised if you are a manager. You can also see any open shifts and request these.
Once you’re in the Shifts app, you can then access the navigation menu, which allows you to move around the available sections:
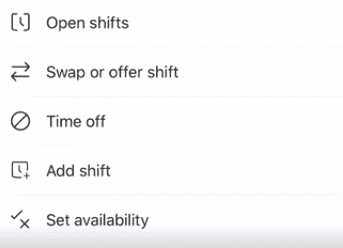
Open Shifts
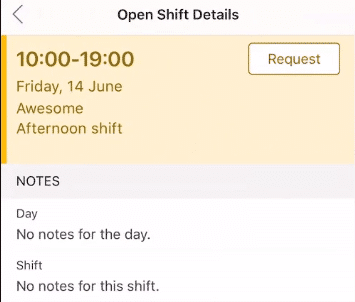
This allows a worker to view any available open shifts and request to work them. The worker can see details about the shift as well as any explanatory notes that have been added. They can then use the Request button to send a request for the open shift. If this request is approved by a manager, the worker will then be assigned to the shift.
Swap or offer shift

This screen allows a worker to either request a shift swap with a colleague or offers one of their shifts to a colleague. Swapping and offering shifts works in the same way as the desktop client where the worker enters their shift details along with either the shift they want to swap with or the colleague they want to offer their shift to:
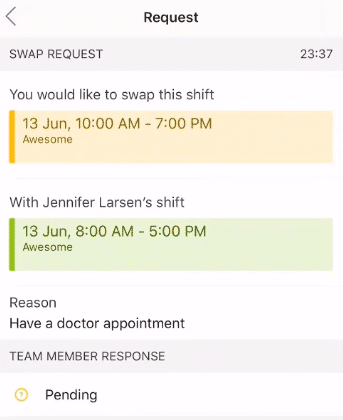
They can also add any supplementary reasons for the request if required.
Once the shift swap or offer has been created, a manager will receive notification of the request and can then approve or reject along with reasons for their decision.
Time Off
Time off requests for holiday or appointments can also be created in the mobile client. Details of the time off are entered along with any other reasons or details:
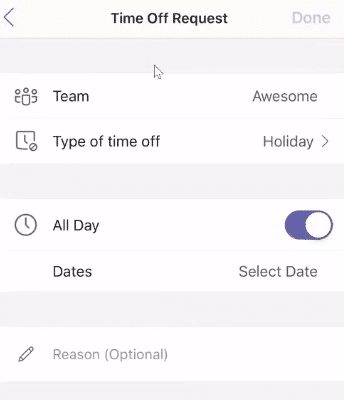
Time off requests can then be approved or rejected using the mobile client in the same way as open shift and swap/offer requests:
Add shift
If a user has the correct permissions, they can add shifts in the mobile app. As well as individual workers viewing their shifts, there is also an overall view of all the shifts setup for the team:
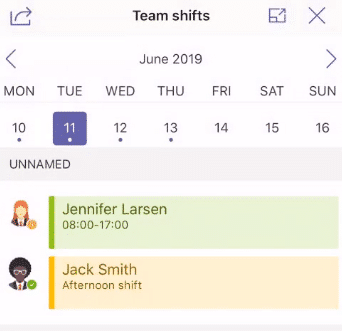
This allows managers to get an overview of staff cover while out of the office. It also enables workers to view all shifts for their team, which may help when they want to swap shifts with colleagues.
Set availability
This is a useful function that allows workers to set their availability for a working week, which can help managers when they are creating and assigning shifts for the team. When a worker accesses this screen, they are presented with their current availability:
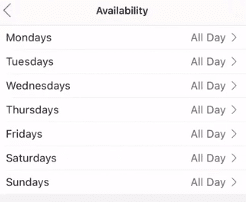
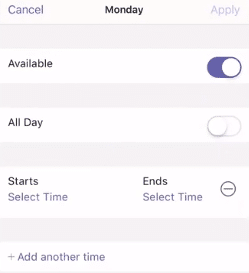
Pressing a single day allows them to set their availability for that day. If they are not available at all, they can toggle the Available switch to off. If they are available that day they can enter start and end times to show that they are only available between those times:
Resources
Some useful resources in the form of Blogs and Videos on Shifts to take a look:
- https://www.avepoint.com/blog/microsoft-teams/microsoft-teams-shifts/attachment/shifts/
- https://www.computerworld.com/article/3332149/microsoft-upgrades-teams-mobile-app-to-woo-frontline-workers.html
- https://www.youtube.com/watch?v=b0R93vbdyfc (Microsoft Mechanics)
- https://www.youtube.com/watch?v=KLpqGJ88NRU
- https://support.office.com/en-us/article/microsoft-teams-for-firstline-workers-723d8259-7d17-49f5-9af8-fa9fee2036bd
Meet the Presenter

Knut Relbe-Moe (MVP) is an Office 365 MVP, MCT, MCSE SharePoint, MCSA Office 365, SharePoint evangelist, speaker, mentor, Founder and CTO at Knowledge People AS, Product Evangelist and Partner Manager for Valo the Award-Winning Intranet in a Box Solution for SharePoint Online and SharePoint On-Prem. Knut is an old developer, that has taken the step into architecture/advisor and the more significant questions. Knuts main focus is advising the clients on how to get the most out of the investment on SharePoint/Office 365, and how to get the most out of the investment and platform. Knut helps his clients on upgrading SharePoint either with upgrading or with migration.
