
In this post, we will learn how to develop the Inventory system using SharePoint & PowerApps.
This tutorial consists of 2 parts,
- Part 1 or I’ll call it as Bahubali Beginning: Create Barcode enabled Inventory list in SharePoint, which tells you step-by-step how to do the data configuration for the Inventory within SharePoint.
- Part 2 or Bahubali Conclusion (this guide): Utilize SharePoint inventory list in PowerApps for User experience.
Let’s get started…
Create an app in PowerApps
We can create PowerApps directly from a SharePoint List, (as shown below).
Click on the List (in my case “sample inventory”)>PowerApps from list ribbon>Create an App.

Or, go to https://web.powerapps.com/ >Click on Start from data> Create>

SharePoint (Phone layout)>

Create Connection if you have not created before else using existing connection and select site in which our list is present.

Then select our list ‘Sample Inventory’ (in my case)

Hurray, now your PowerApps is successfully configured with SharePoint list data.

Develop the PowerApp
Now let’s develop the PowerApps screens.
Step1: Create the Browse Screen:
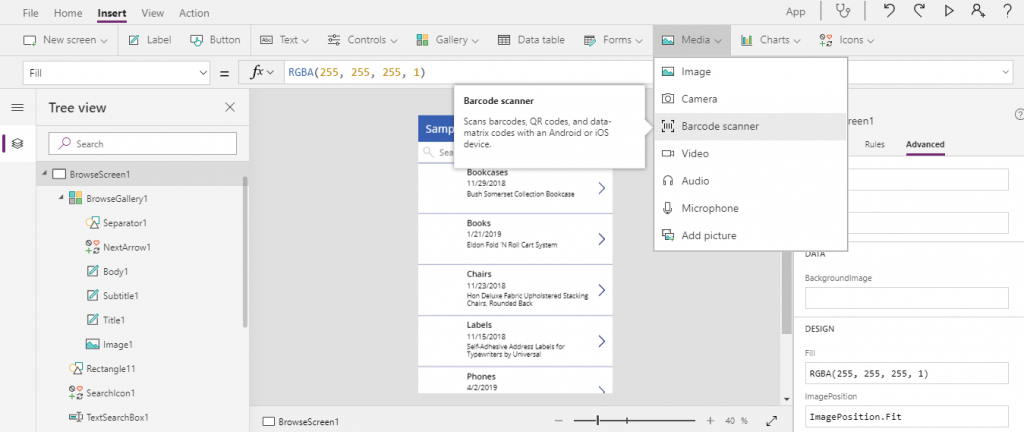
Add Barcode Scanner control from ribbon and place it beside the search.
Step 2. Update Browse Gallery’s items
SortByColumns(Filter('Sample Inventory',StartsWith(OData__dlc_BarcodeValue, BarcodeScanner3.Value)),"Title", If(SortDescending1, Descending, Ascending))
OData__dlc_BarcodeValue represents SharePoint fields which hold the Barcode value.
BarcodeScanner3.Value will give value after scanning the barcode.

Change layout of gallery from Properties>Layout
Note: I changed the layout because I don’t have an image to show in the gallery. If your Inventory system stores image for every inventory, then you can use default gallery with the image.

Step 3. Let’s work on Detail Screen.
We display Barcode image we have to change in the property of the control as below.
Select Barcode DataCardValue control>go in Advanced tab> find Image property in Data section and set it to,
Image= "{siteURL}/_layouts/15/barcodeimagefromitem.aspx?ID="&BrowseGallery1.Selected.ID&"&list={listGUID}"

Step 4. In Edit Screen, remove unnecessary fields like attachment etc.
Note: you can have columns according to your requirements in Detail and Edit screen.

Step 5. Save and publish it. (You can give cosmetic touch up as per need)
Let’s test the PowerApp!
To test this, open the “Inventory Management System” (as shown in figure 1), then Scan the barcode from any matching SharePoint items from within the Sample Inventory list.

In the figure below, we’re scanning a bar code for a bookcase (figure 1) and we find it (figure 2).

Hurray 🙂 your application is ready to use. Test the result
