
Microsoft has launched Microsoft Forms for Office 365 education customers, another step to make Office 365 a more collaborative platform. Microsoft Forms is available only to Office 365 Education subscribers, and a public preview will be rolling out for Office 365 commercial subscribers.
What is Microsoft Forms?
Microsoft Forms is an initiative of Microsoft in the education market. This product is built based on the feedback from educators as they want to have a tool to assess their student’s progress regularly. Microsoft Forms can compete with Google Forms in the education market.
Microsoft Forms allows users to create custom surveys, quizzes, polls, and questionnaires. It also can send an invitation to other users asking them to fill out the Microsoft Forms using a web browser on any device or computer. The creator can review the results in real time and analyse the collected data.
What are the main benefits of Microsoft Forms?
Microsoft Forms can be used in many institutions, businesses and government offices to fulfil their requirement for data collection and generate a real-time report. Below are the benefits of using Microsoft Forms:
Easy to Use: Microsoft Forms is a user-friendly tool that allows you to easily create and share custom forms, surveys, and quizzes. The tool offers a simple drag-and-drop interface that makes it easy to add questions and customize the design of your form.
Customizable: With Microsoft Forms, you can customize the design of your form, add logos and images, and create custom themes to match your brand or organization.
Mobile-Friendly: Microsoft Forms is mobile-friendly, meaning your audience can respond to your forms, surveys, and quizzes from any device. This makes it easy to collect data and insights on the go.
Real-Time Results: With Microsoft Forms, you can view responses in real-time, which means you can track the progress of your surveys and quizzes and get immediate feedback from your audience.
Data Analysis: Microsoft Forms provides adequate analytics tools that enable you to analyze and visualize your data. You can create charts and graphs to help you understand your data and gain insights into your audience.
Integration with Other Microsoft Tools: Microsoft Forms integrates with other Microsoft tools, such as Microsoft Teams, SharePoint, and Power BI. You can easily share your forms and data with other team members and collaborate on projects.
When would you use Microsoft Forms?
Microsoft Forms can be used in many institutions, businesses and government offices to collect data and share information with employees and customers. Below are scenarios where you may like to use the Microsoft Forms service.
- Surveys and feedback collection
- Event registration and RSVPs
- Employee or customer satisfaction surveys
- Quizzes and assessments
- Course evaluations and feedback
- Market research and consumer insights
- Application or registration forms 8. Customer service request forms
- Bug or issue reporting forms
- Polls and voting.
What is the licensing model, and what Office 365 licenses can it use?
Microsoft Forms is available for Office 365 Business Essentials, Office 365 Business Premium, and Office 365 Enterprise E1, E3, and E5 plans. It also is available for Office 365 Enterprise E4 customers before their plan is retired.
Can anonymous users complete a survey or quiz?
Microsoft Forms allows anonymous users to complete surveys or quizzes without signing in. However, the survey or quiz creator can require respondents to provide their name or email address if they wish to do so.
How to create your first form?
To create a Microsoft Form, you need to follow the steps below.
- Browse and login into https://forms.office.com/Pages/DesignPage.aspx
- After successful login, you will arrive at the “My Forms” screen as below. Click on “New Form” button to continue.
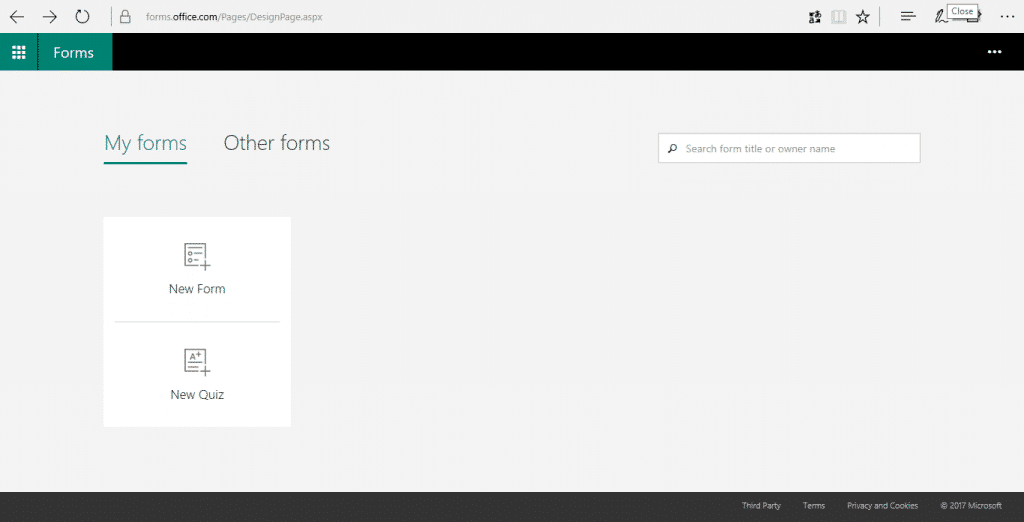
- On the following screen, you can add the form name and description and click on “Add Question” button to add a new question.

- You can add many questions based on available types.
- Once you’re done, you can preview and share your survey with others.
- You can preview the results as depicted below in the screenshots.
- Different theme options are available. You can select any option from the theme panel to change the theme.
- Now, you can share your created survey with many people using multiple options, as depicted in the below screenshot.
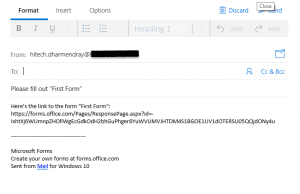
- On the following screen, we’ll share the survey using email.

- Now, you’re done with your first and simple form.
Where can the Form results be saved?
Microsoft Forms: The results of a Microsoft Form can be accessed and viewed directly within the Forms interface. After a user completes a form, the responses are stored and can be viewed within the “Responses” tab of the form.
Microsoft Excel: Users can export the responses of a Microsoft Form to a Microsoft Excel workbook. To export, users can select the “Open in Excel” button in the “Responses” tab of the form. The responses will then be opened in a new Excel workbook, which can be saved or shared.
Microsoft SharePoint: Microsoft Forms results can be saved to a SharePoint list using Power Automate. This option is helpful if the user needs to share the responses with others within the organization.
How do you build Reports based on the results?
Microsoft Forms has a rich user interface and real-time analytics to display summary details and individual results from surveys. You can export response data to Microsoft Excel for further analysis. Also, it has features to delete the responses and print the form summary.
To see your summary of responses, Open the form and click on “Responses”.
On top of the screen, you should be able to see the summary details of your form, such as Responses, Average time to complete and status. Click on the “View Results” button to see the individual result of each response for users.
You can export results to Microsoft Excel using the “Open in Excel” button.
How to feed Microsoft Forms data into PowerBI?
Power BI is a powerful tool for creating compelling visualizations and reports from various data sources. You can import your Microsoft Form data into PowerBI for data analysis and report purposes. It allows you to share the reports with power users on the web and mobile devices. Below are the steps to feed your Microsoft Forms data into PowerBI
- Log on to Microsoft Forms Site and go to the Responses section on the Form.
- Form Click on the “Open in Excel” button and save the data on your Local Machine.
- Now, browse and log in to the PowerBI site to continue.
- Go to the “Import or Connect to Data” section on the page, and click on the “Get” button under Files tile to continue.
- On the following screen, you need to click on the “Local File” tile to import Microsoft Form data from your Local System (Laptop/Desktop)
- You must select your Microsoft Form’s responses data in the opened file upload window as depicted below.
- On the next screen, there are two options that you can use to Import or Upload your data into PowerBI.
- Import – Allows you to create reports and dashboards on the imported data.
- Upload – You can create an Excel sheet with data to perform Excel-related operations.
- Now, you can create compelling visualization and report using the below screen.
- To work on Excel online, you can create another Dataset using the “Upload your Excel file to PowerBI” option.
- Click on the uploaded file to check the data and perform its operations.
Do Microsoft Forms work on mobile devices?
Microsoft Forms can be accessed on desktop and mobile devices. There is no mobile app available for this product. Many users can access this cloud service on the mobile browser to respond to the survey.
You cannot print the response summary while accessing this service from the Mobile browser, as depicted below in the screenshot.
You can create a template for your survey and share it with others. However, it doesn’t support offline features.
What are the branding/customizing options?
Microsoft Forms allows you to change your survey’s background design and colours. To change the background design and colour, follow the steps below.
- Open the form if you want to change the theme.
- Also, you can set up an image for your background from Computer, OneDrive, and Search.
How can you integrate Microsoft Forms with Power Automate?
Power Automate is a cloud-based tool that helps you automate workflows and tasks across various Microsoft and non-Microsoft applications.
Power Automate is a cloud-based service that enables you to automate workflows across various applications and services. With Power Automate, you can create automated workflows that integrate various applications and services. Power Automate can automate repetitive tasks, create alerts, and trigger actions based on specific events. Integrating Microsoft Forms with Power Automate can help you automate the collecting and processing of data from Forms.
Step 1: Create a new Power Automate Flow: To create a new Microsoft Flow, log in to the Power Automate portal, and click the “Create” button. Select the “Automated cloud flow” option, and give your Flow a name.
Step 2: Choose the trigger: Next, choose the trigger for your Flow. In this case, we will use the “When a new response is submitted” trigger, available under the “Microsoft Forms” category.
Step 3: Connect to Microsoft Forms: After choosing the trigger, you must connect to Microsoft Forms by providing your login credentials. Once connected, select the form you want to use for your Flow.
Step 4: Add actions: After connecting to Microsoft Forms, you can add actions to your Flow. The actions you can add will depend on the applications and services you want to integrate with Forms. For example, you can send an email notification to yourself when a new response is submitted, save the response to a SharePoint list, or add the response to a Google Sheet.
Step 5: Test your Flow: Once you have added your actions, you can submit a response to your form. After submitting a response, your Flow will run, and the actions you added will be triggered.
How to post the results into a SharePoint List?
Microsoft Forms allows you to save data into a SharePoint List using Microsoft Flow. You can create a Microsoft Flow to post data to a SharePoint list by using the below steps:
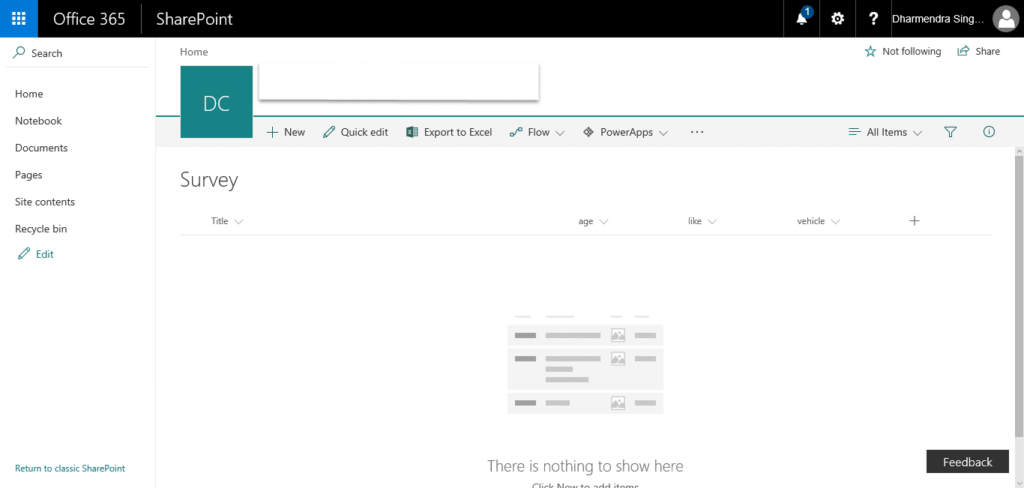
Step 1: Sign into your SharePoint Online website and create a List with columns as depicted below:
Step 2: Now, open your Microsoft Flow website and Click on “Create from blank” button under My Flows Menu
Step 3: Name your flow, search for the Microsoft Forms connector, and click “Microsoft Forms – When a new response is submitted” from the triggers section.
Step 4: Now, you must pick up your form to set the value of the “Form title” field.
Step 5: Next, you need to click on the “Next Step” button to “Add an action”
Step 6: On the following screen, you need to search for SharePoint to add a connector and trigger “SharePoint – Create item”
Step 7: Now, you need to provide your value for fields Site Address, List Name, and list columns value from Microsoft Forms as depicted in the below screenshot.
Step 8: Click on “Create Flow” button and hit the “Done” button to exit the newly created Flow.
Step 9: Now, you’re done with your Microsoft Flow.
Step 10: To test this integration work, let’s open our Microsoft Form and fill it.
Step 11: Return to your SharePoint list and check the data you filled in on Microsoft Forms.
Is the data secured and encrypted?
Microsoft Forms follows Office 365 compliance rules and meets FERPA and BAA protection standards.