Sending notifications to users when a SharePoint news item is posted is something which is commonly requested, both with clients and on the various tech forums which I frequent. It definitely makes sense, and there is a lot you can do, using Power Automate (aka. Microsoft Flow), to send notifications in a number of different ways to suit your users regardless of generation and technological awareness. Whilst, this blog post refers to Power Automate, the same approach can be applied using Azure Logic Apps.
In this blog post, we’ll look at how we can connect Power Automate to the site pages library, and how we can determine the page type, publishing status and some basic content so we can ensure that our users are getting the right information at the right time.
SharePoint News Posts
With modern SharePoint sites, you get a great way of creating and editing news items. It’s so simple to be able to create the news item within the browser, hit publish, but then wonder why users aren’t flocking to come and read your content. Let’s face it, in the modern world of intranets we don’t spend our lives watching the home page waiting for the next piece of news to appear. We spend our time where we do our work, and the only time we’ll go elsewhere is if we know there’s something there for me to look at. Even with the roll-up of news posts to the SharePoint Portal page, I still need a poke every now and then to go and check it.
SharePoint still has the ability to generate alerts, when something is created or changed, immediately or on a daily basis. We’ve seen it and have been using it for as long as I can remember, and unfortunately, it’s never changed or improved over that time and doesn’t give us the flexibility to be able to customise the notifications which are being sent to our users. It still has its uses, but, in my opinion, not in this scenario.
But before I dive into Power Automate and start creating my own notification Flow, there are a few things which I need to understand about pages created in the site pages and how they’re classified. All SharePoint news posts and pages are created within the same library, but through the SharePoint User Interface I don’t really get to see how SharePoint can distinguish between them. Yet, it knows which items to pick and display using the SharePoint News web parts, and knows which ones to roll up. It does this by automatically setting a hidden metadata field called “Promoted state”. The promoted state can take one of three values:
- 0 = Site Page
- 1 = News Post in Draft
- 2 = News Post Published
SharePoint will automatically take care of the setting of this field for me, so all I need to do is remember this field when I move across into Power Automate to create my notification Flow.
Power Automate
In this demonstration, I’m going to send notifications immediately when a news post is published by using the “When a file is created or modified (properties only)” trigger. Alternatively, I could consider using a Recurrence trigger and send out updates on a daily or weekly basis. For more information on Recurrence, see my blog post “Replace Scheduled Tasks with Flow Recurrence“.
Trigger
For my trigger, I’m going to use the “When a file is created or modified (properties only)” trigger, the page will go through draft before being published. Even if I publish the news post immediately, it will initially change to promoted state 1, and the to promoted state 2. So I’m really only interested in the modified event. I’m also only really interested in the properties as everything I need for my notification can be found here.
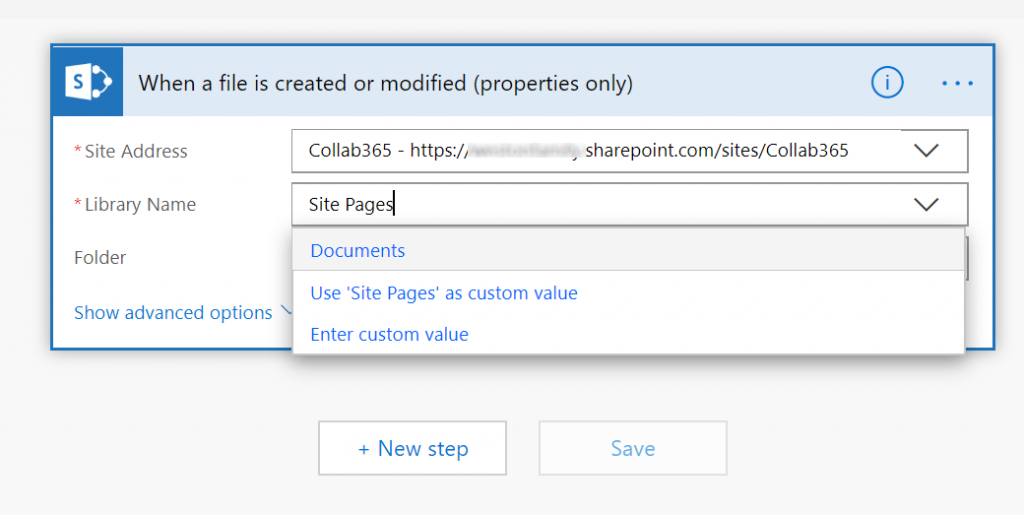
When configuring your trigger, select the site where you want this Flow to run from. Then select the drop down for the library name. Notice that Site Pages doesn’t appear, only your modern document libraries. Whilst you can’t select it, you can manually type “Site Pages” into the library name, just ensure that you either select “Enter custom value” to start with or alternatively type in Site Pages and then select “Use Site Pages as custom value”.
Checking if the Item has been Published
Each time the page is saved, it is going to trigger my Flow, so I now need to check whether the news item is in a published state or not. This is where, I’m going to use the Promoted State metadata field to check whether I’m going to start notifying my users that I’ve posted something, or whether I’m going to stop processing any further,
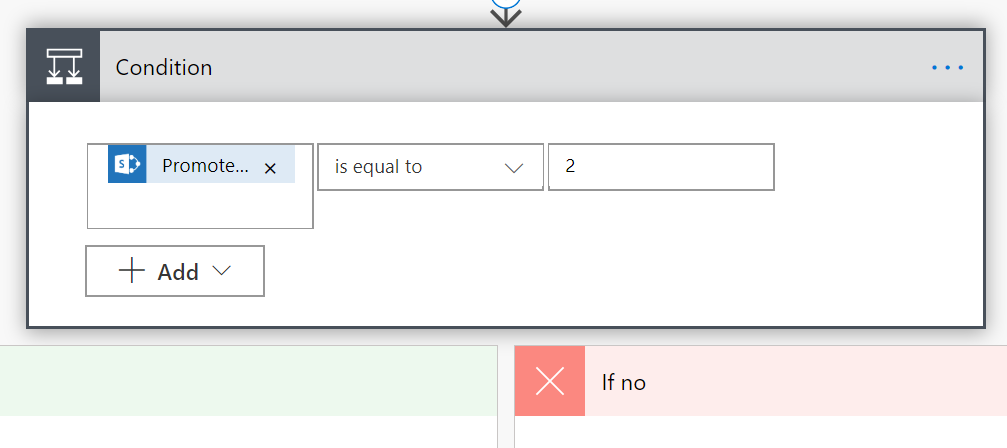
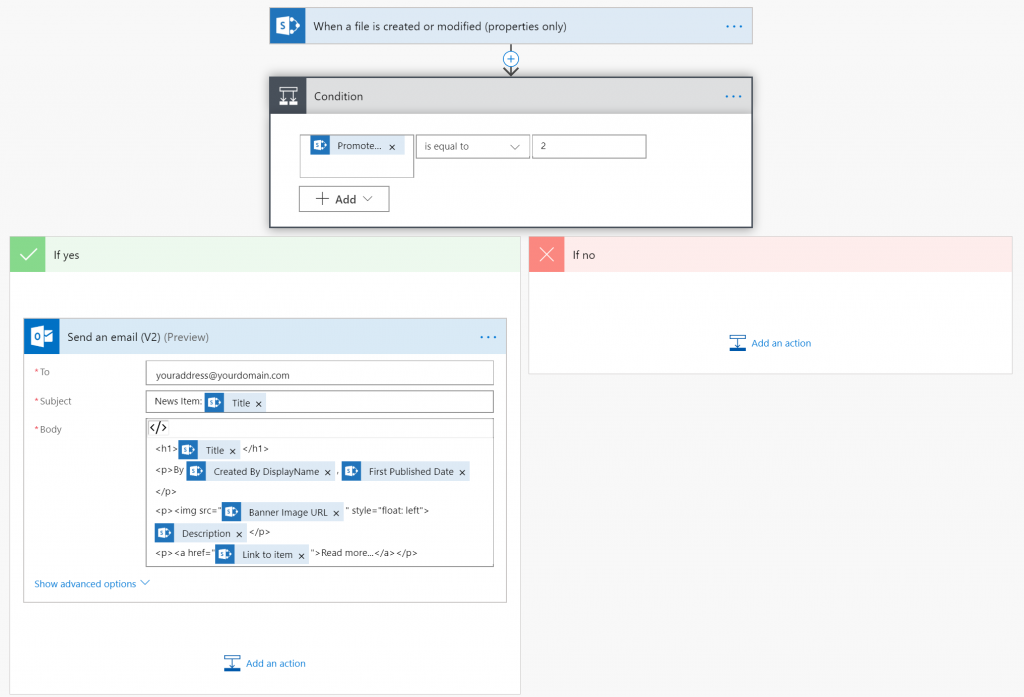
To do this, I’m going to use a Condition control and build a condition on Promoted State. The only state I’m interested in is 2 (News Post published). If it’s 2, then I’m going to start sending my notifications, otherwise, I’m not going to do anything.
Sending Notifications
There are numerous ways that I can now try to reach out to my users to tell them the good news that there’s a news item ready for them to read, which could include but not limited to:
-
- Email – good old reliable email
- Microsoft Teams – If the News Connector isn’t an option then I could post to Teams
- SMS – plan permitting
- Kaizala – send a text message using our instant messaging app
For simplicity, I’m going to go with Email so that I can focus on a couple of metadata fields which are really useful for adding a little bit of context to your notification. The fields I’m interested in are:
- Created by Display Name – so that I can announce who has written the post
- First Published Date – so that I can post the original date that this was published, not any subsequent revisions (useful field for recurrence)
- Title – the name of the news item i.e. the headline
- Link to Item – the link directly to the news item so my users can read more
- Banner Image URL – this is the image which gets rolled up to the News web parts within SharePoint. It will either be the image added to the header section of the page or alternatively, it will be the first image found in the page body. Basically, what you see within the SharePoint web parts is what you’ll get from this field.
- Description – This is the first paragraph taken from the body of the news post, and again is used for roll up to the news web parts
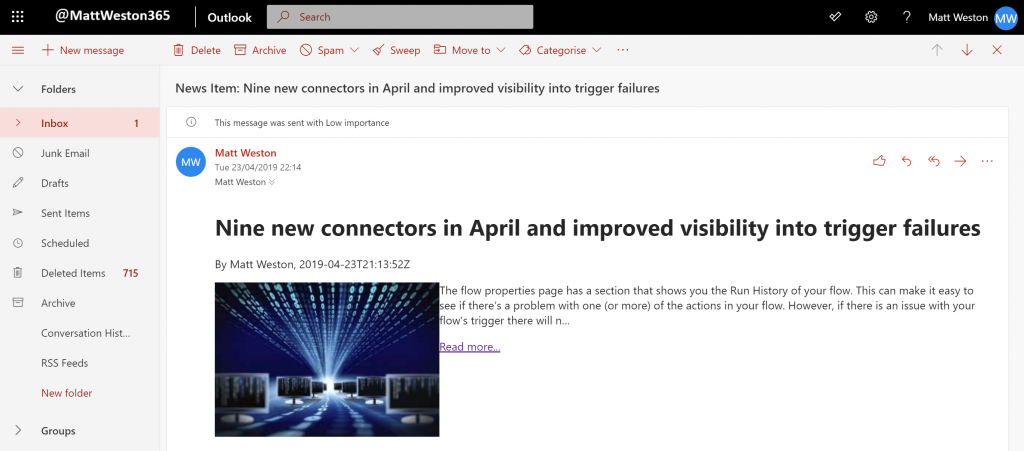
So with all of this information, I can send quite a nice notification email to my users by using the Send an email (V2) action which will allow me to go to town on the HTML styling and send out quite a nice looking email. Now I’ll caveat this by saying I’m not a designer, and I’m sure you can do a much better job with HTML styling than I can, but you’ll get the idea!
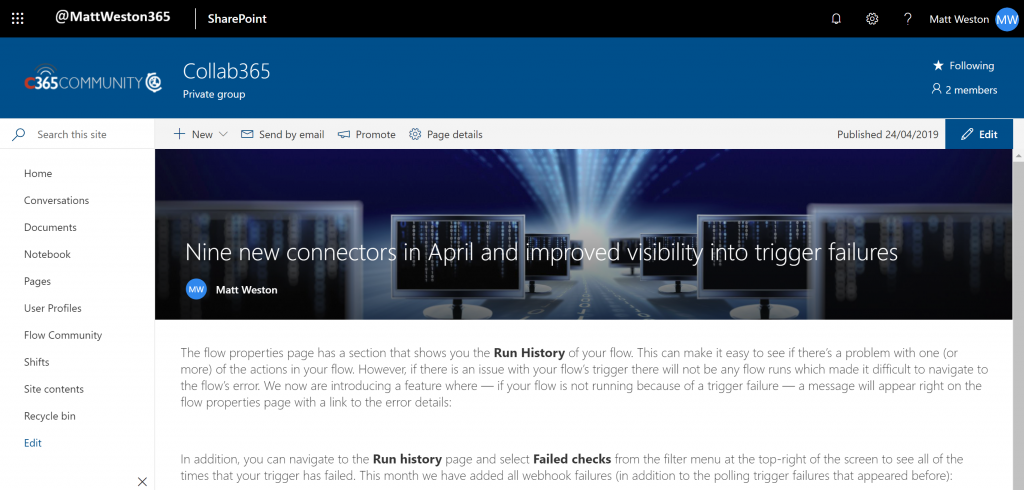
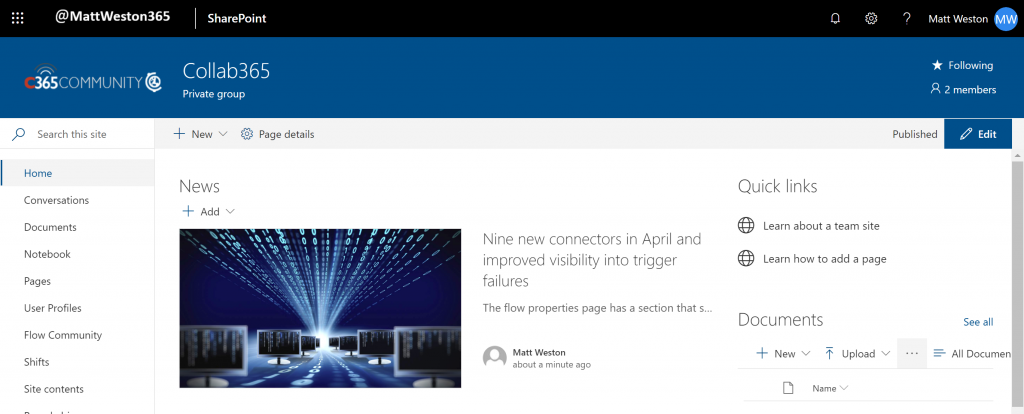
So now I just need to create some content to test this. I will navigate back to SharePoint and create myself a news post.
When I view my home page, I can see that it has taken my banner image and used it as the roll-up image in the news web part
This will now give me an idea of what I should be expecting to see when I receive my email notification:
So now we have the start of a Flow which I can use to send out notifications to users only when my news post is published. I can happily work on the item in draft mode without any notifications going out to the new users. I have a lot more flexibility over how the notification is sent and structured meaning I can add some elements of design flair to my notification. I can change the trigger and use recurrence to send out daily, weekly, monthly notifications if I wish to. Likewise, I can change the information provided in the notification, although we’ve identified the key properties such as Title, First Published Date, Description and Banner Image URL which are extremely useful to include with your notifications to provide context and that visual engagement factor.

