
SharePoint Document ID
I have had a chance to work with a number of web Content Management Systems (CMS). Whenever you see a demo by their pushy salesmen, one of the things that comes up is around SharePoint not being a proper CMS, as it can’t handle ‘static’ links. Whenever you move a document, rename it or whatever else, it breaks the existing link. Sure enough, this was true with MOSS2007, and Microsoft replied with the Document ID Service.
Plenty has been written about it, some of it justified, and some not so. For instance, when I make a copy of a file, sometimes I want to break the link, other times not. To criticize SharePoint, or any product for that matter, to do it one way or another is unfair. However, the flexibility and the decision making process/workflow should be provided.
Anyway I am happy that SharePoint is good at giving you something and then providing the tools to make it better. So as a learning exercise, let’s see if we can do better. As such this is a series of posts aimed at beginners/intermediates and it takes you through a problem. I hope you will learn a lot along the way; a bit about setting up your environment, a bit about PowerShell, a bit about Content Types, Custom Fields, Feature Receivers etc., etc.
This first part looks at the solution we are trying to build and setting up a new web application and a bunch of site collections..
Start with a solution
So my solution is going to be simple; I want the ability to provide a static url for any document.
- The user uploads a document.
- The user must specify a unique name for the document before it can be published.
- I want to use this unique name for the static url. The first part will be based on the web application, for instance http://mywebapplication/redirectpage.aspx?id=<docId>. I could use Url routing and provide better Url, but for now this will suffice.
- I want to create a list that stores this document Id against the Url for this document. When a document is published, I want to store these values. When a document is updated, I want to ensure the link is pointing to the correct url. I want to do this for two reasons; firstly to ensure if the name has been updated then that is reflected accurately in the url and secondly to ensure that the latest copy (especially if the document is in multiple places) is the one referenced by the unique key.
- When the document is moved, I want to make sure, the link is updated within the list that holds all links.
- When a document is copied, I want to prompt the user to specify whether the document is to retain the link to the original or will start a fresh life from henceforth. This is option 1, option 2 is to do nothing and let them make as many copies as they want.
- When a user accesses a document via a link, the redirect page queries the list, finds the appropriate document Url and redirects the user.
- If option 2 is used, upon querying for a document, the user is displayed a list of all documents that have that same id with their associated long Uri, last user and latest comments. The user can then select the latest Uri and continue to access the document.
For now, I will let SharePoint handle access rights.
What do I need to get there
Basically the following;
- A custom list that will have at least two columns; Unique Id and Source Uri. I may add the site & web Uri, and the document library name as well to help with various filtering etc.
- A redirect page that redirects the user to either the document and if more than one matches to the disambiguation page.
- A disambiguation page/ control that shows the details of all linked files. I may choose to have this as a separate page, as it can then be called from anywhere, such as from a popup menu to verify how many versions of this document are floating around. This will obviously not list every instance of that document, but only those that have been tagged with the same document id.
- A custom field that can be added to any document content type. Call this ‘Sticky Id’ for now. We also want to make it required. We also want to use the Client Object Model and some Ajax to warn the user if the Sticky Id is already taken. The user may still go ahead with publish.
- A Feature receiver that would ensure when a document is published, the Sticky Id along with the Uri goes into the Custom list.
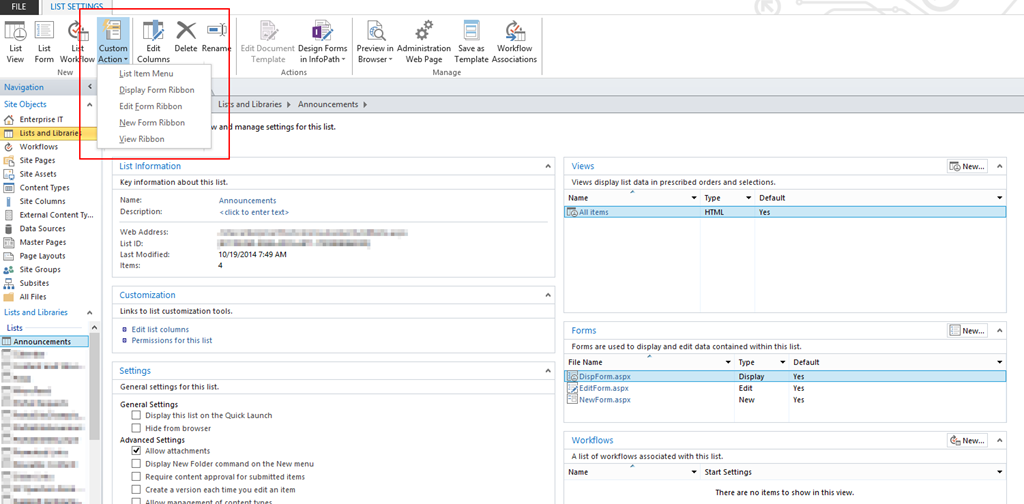
- A popup menu command to view and copy the Sticky Uri.
(I’ll edit this section as I get more things and comments – As I’ve not done the application and not fully designed it, its good as a starting point – at least for the purpose of learning)..
Let’s Start with a New Web Application
Well, why not. After all some of the beginners might be interested in this. For my development testing (unashamedly) I have a simple single server setup that has pretty much everything that I need; Windows 2012, SharePoint 2013, OWA, SQL 2012, VS 2012, Active directory on the same box etc., etc…
If you have everything setup, fire up your browser with ‘SharePoint Central Admin’. This should be in the start menu, or a tile on the Metro interface. Click ‘Manage Web Applications’ and you should see the SharePoint Central Administration v4 as one of the application setup and perhaps another one.
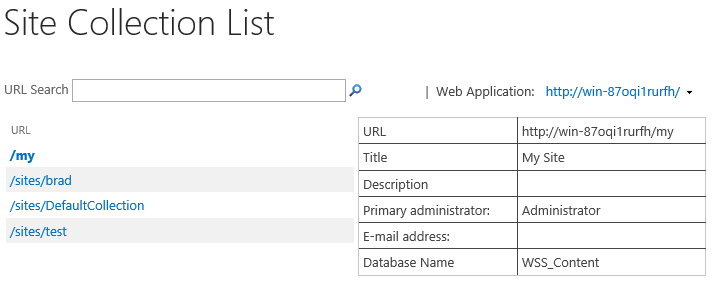
Now if I go back into Application Management and select ‘View all site collections’, I can select the correct web application and then see all site collections under it, along with the content database.
Again we can go back to application management, create a new web application and a new site collection and so on… but hey, where is the fun in that! Also it is tedious, we want to be able to do all this using the power of PowerShell. But first let us get comfortable with it. Let’s start looking at what we looked at using SharePoint Central Admin.
So fire up SharePoint 2013 Management Shell, as it has all the snap-ins loaded. For the sake of messing around, lets check what snap-ins are loaded;
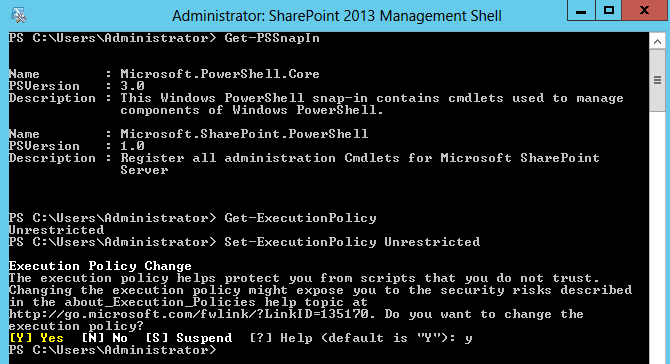
I also set the execution policy to unrestricted – only on my development machine, so I can run various scripts unhindered. Now let’s start digging deeper into the SharePoint PowerShell arsenal.
Our first attempt;
Get-Command –Module Microsoft.SharePoint.PowerShell
This retrieves an extremely long list of commands. For now though, we need to filter only a subset. PowerShell provides a number of ways to do this. Any of the following is okay.
Get-Command –Module Microsoft.SharePoint.PowerShell –verb get
This restricts the commands to only the get ones, but since we also want the Application and Site collection centric.
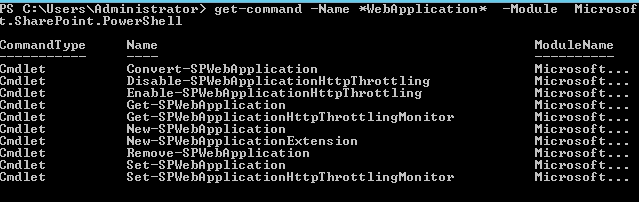
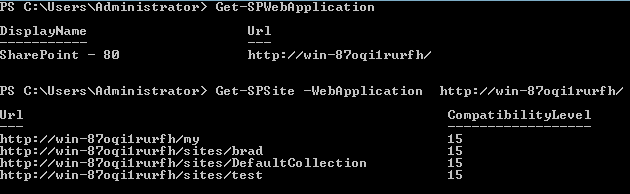
Get-Command –name *WebApplication* –Module Microsoft.SharePoint.PowerShell
You could use any wild cards etc, and you get the following results
BTW, you could use Pipes, formatting, select, where, export to CSV, export to Html, get counts, check syntax etc., etc. Now let’s quickly do what we started in Central Admin; get a list of web application and for a particular web application, list of sites. We can also set a bunch of properties, but we will do that when we create a new web application and site collection for our Uri stuff later.
Create a new Web Application and Site Collection
Okay, we are going to use PowerShell. We will create a new Web Application with its own host header (as opposed to the computername:port syntax. I am also assuming you have SharePoint 2013. For brevity, I am going to keep it extremely short, but please follow the following resources if you want details. The recommended authentication with SharePoint 2013 is Claim based, and on my Windows 2012 setup I had to do the following two
things;
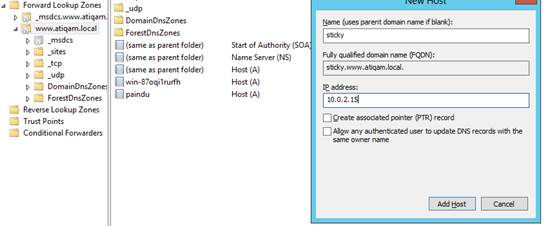
1. Add an entry into DNS for the host header. This is done in the forward lookup zone. My domain is www.atiqam.local (I know it should just be atiqam.local!). Anyway, for my Sticky site, I have opted for a host header of sticky.www.atiqam.local (unforgivable to have www in there, but there is a bit of history that can’t be undone in such short time!).
2. Ensure if you haven’t already done, do the DisableLoopbackCheck registry change. It will save you headache later, especially if you are accessing your site from the single box that it is hosted on. It’s simply a registry DWORD entry of 1 under HKLM\SYSTEM\CurrentControlSet\Control\Lsa. (Google if you need more info!).
That said, here are the two articles if you want to get deeper into setting up the Web Application and SiteCollections…
http://technet.microsoft.com/en-us/library/ee806885.aspx
Please note that if you do decide to use the script there, and you want to use port 80, ensure that you also add the HostHeader parameter to the New-SPWebApplication.
Also here is a really good post that shows you how to create a web application using SharePoint Central Admin. The important part is setting up a DNS entry. Rather that repeating what was said, you might as well check that article out.
http://sharepointgeorge.com/2012/create-web-application-site-collection-sharepoint-2013-preview/
Okay, here is my script to create a Web Application;
$ap = New-SPAuthenticationProvider

$WebAppName = "StickyDocuments"

$WebAppHostHeader = "sticky.www.atiqam.local"

$WebAppPort = 80

$WebAppAppPool = "StickyUriAppPool"

# This User has to be a Sharepoint Manager Account

$WebAppAppPoolAccount = "WWW\Administrator"

$WebAppDatabaseName = "Sticky_Content"

$WebAppDatabaseServer = "WIN-87OQI1RURFH"

New-SPWebApplication
-Name $WebAppName –HostHeader $WebAppHostHeader -Url ("http://" +
$WebAppHostHeader) -Port $WebAppPort -ApplicationPool $WebAppAppPool
-ApplicationPoolAccount (Get-SPManagedAccount $WebAppAppPoolAccount)
-AuthenticationProvider $ap -DatabaseName $WebAppDatabaseName -DatabaseServer
$WebAppDatabaseServer
And here is one that creates 3 separate
Site Collections under it. For the first one, it will use the same Uri as web
application, but the others, I simply used /sites/Test1,
# Set variables

$SiteCollectionName = "Test 2"

$SiteCollectionURL = "http://sticky.www.atiqam.local"

$SiteCollectionTemplate = "STS#0"

$SiteCollectionLanguage = 1033

$SiteCollectionOwner = "WWW\Administrator"

# Create a new Sharepoint Site Collection

New-SPSite -URL
$SiteCollectionURL -OwnerAlias $SiteCollectionOwner -Language
$SiteCollectionLanguage -Template $SiteCollectionTemplate -Name
$SiteCollectionName
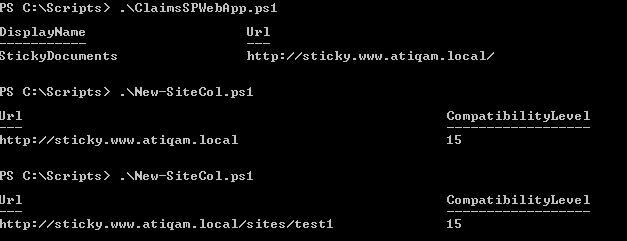
The Site Collection Template can be specified to whichever site you want. To get a full list, use PowerShell (Get-SPWebTemplate). Here are my set of Web Application and sites when done through PowerSheel (as proof!).

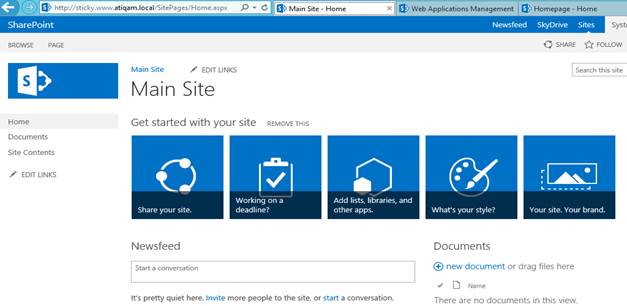
And as viewed through the browser;
For now, this is enough. (For me, at least). The next post we will look at How Document ID Service works within SharePoint 2013. This will be followed by a number of posts about our solution.
Happy reading!!!
