
This post contains some amazing time-saving tips and tricks to help you and your team get the most out of Microsoft Teams. If you’d like to learn more about what Microsoft Teams is, then check out our Beginners Guide to Microsoft Teams.
From basic user tips to more advanced features, as with most of Microsoft’s tools, there are always features you hadn’t realised were there that can save you time, make you more productive, or are just fun and cool. We hope we have covered a good few of them for you here.
4TH EDITION
Contents
Tip 1. Meetings with external or Guest users
Tip 2. Meeting Scheduling in Teams
Tip 3. Guests – The other stuff they can do
Tip 4. Apps and Actions from the Command Box
Tip 5. Spruce up your channels with images
Tip 6. Get the most out of Chats and Conversations
Tip 8. Navigation Buttons (< >)
Tip 10. Don’t put all your eggs in ‘General’
Tip 11. How to publish an RSS Feed post to Microsoft Teams as a card (Using Zapier)
Tip 12. Translation of Teams Messages
Tip 13. All your Wikis in one place
Tip 14. Record your Teams meetings
Tip 15. Work on Visio in a Microsoft Teams Tab
Tip 17. Microsoft Immersive Reader for Teams
Tip 18. Something to hide?… Use Background Effects
Tip 19. Use Existing Team as a Template or Create a Team from your existing Office 365 Group
Tip 20. Use Chrome profiles to Manage more than one Teams Login
Tip 21. Secret Teams Developer Menu from the System Tray
Tip 22. Send or Forward an Email into a Teams Channel
Tip 23. How to change the display order of your Channels.
Tip 24. Get Planner Notifications in your Teams Team
Tip 25. Post a message to multiple Channels at once
Tip 26. Announcement within a Channel
Tip 27. Share your system sound in a Team meeting
Tip 28. Whiteboard in Teams Meetings
Tip 29: Broadcasting a Teams Meeting using OBS to Social Platforms
Tip 30. How to use Breakout rooms in Teams
Tip 31. Using tags against Team Members to be able to @Mention Groups
Tip 32. How to create a quiz or poll in Microsoft Teams
Tip 33. Don’t get distracted – disable notifications.
Tip 34. Move files with ease to your Team
Tip 35. Sync your files to your desktop.
Tip 36. Drill down into your data!
Introduction
Microsoft Teams is now massive. We thought that the figures were impressive in March 2019, with over 500,000 organisations using it, and 13 million active daily users. These figures were already growing massively at the start of 2020. However, the Covid-19 pandemic arrived and turned all our lives a little upside down, forcing two years’ worth of Digital transformation in 2 months. In March 2020, the Active Daily users had reached a massive 44 million users; however, it did not stop there. The forced Digital Transformations and Global change in working patterns and practices pushed that figure to a massive 75 Million daily active users by the end of April 2020. With these figures continually growing, it is becoming one of the most popular chat and collaboration applications out there.
However, for many users, it can be overwhelming when first getting started, given the array of functionality available. The tips in this eBook will help everyone from beginner through to the more advanced user get the most out of Microsoft Teams.
As with most of Microsoft’s tools, there are always features you hadn’t realised were there that can save you time, make you more productive, or are just fun and cool. We hope we have covered a good few of them for you here.
So, let’s get started!
Tip 1. Meetings with external or Guest users
Many people will have used Skype for business by adding it to meetings directly into the invite in Outlook, a handy feature. Well, you can do that with Microsoft Teams and pretty much in the same way:
Question and Answer from Ingeborg Hawighorst: “What needs to be in place for the ‘New Teams Meeting’ to show up in the Outlook ribbon?”. Answer – If you have the Teams Desktop client installed, Outlook will see an add-in for Teams, which will automatically be enabled. If you don’t have the desktop client installed, you won’t be able to see the ribbon icon.

On the Outlook online UI, you can arrange a Teams meeting, you simply go to your Calendar and create a ‘New Event,’ and in the meeting details window, you can select ‘Teams meeting’ as the location.

As you can see from the screenshot below, in both scenarios, the meeting invite has the link to the Teams meeting at the bottom for attendees to click on when the meeting time comes.

So, who can attend these meetings?
Well, anyone with an email address can attend, whether or not they have a Teams account, which is really neat. There are a few ways users outside and inside your organisation can take part in your Teams meeting. Here are the three main ones:
i. Web meeting
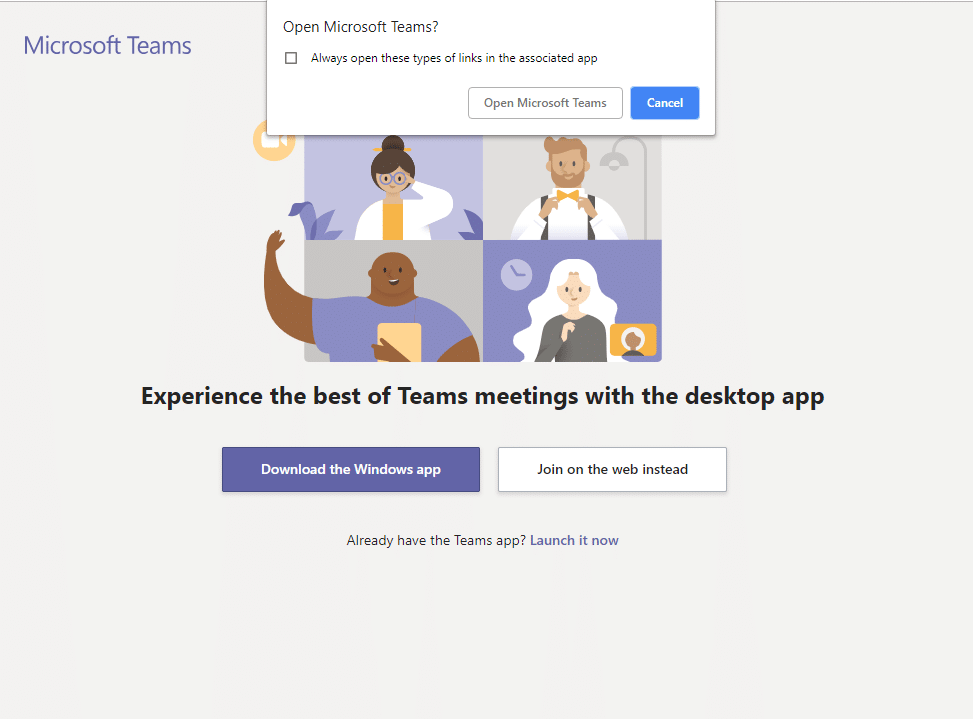
Anyone with an email and internet connection can access the call via the browser, simply by clicking on the link within the meeting invite and then clicking the ‘Join on the web instead’ button.
While the resulting interface is quite restricted for the attendee on the web, you cannot share a camera or screen but can view other members shared screens. It is still a great way to have a conference call in Teams, without all attendees being in Teams.
ii. A user with an email, added as a Guest user
If the user has been added as a Guest user in Teams and has access to the Teams application on their device, then instead of clicking ‘Join on the web instead’, they would select ‘Open Microsoft Teams’ option and get a much richer experience of the meeting in Microsoft Teams as a Guest.
iii. Anyone with a phone
You can have dial-in conference options so people can join your meetings in Microsoft Teams from almost any device, anywhere. You need to have Audio Conferencing, which comes with Office 365 Enterprise E5 subscription or is available on a pay-per-minute basis as an add-on to Office 365 E1 or E3 subscription. Where the Audio Conferencing is enabled, users will automatically see the dial-in options for Microsoft Teams meetings that are created.
Take a look at these two blog posts for some further info
- 9 Tips for Meeting with Microsoft Teams.
- 9 tips for having the best online meeting experience with Microsoft Teams
Tip 2. Meeting Scheduling in Teams
This one is closely related to number 1; however, the simple features are always the best, in my opinion, so I figured it was worth a separate section.
You can schedule meetings from within Teams. From within a team or channel, you can click the small camera icon to meet now or using the same icon you can also choose to schedule a meeting as you would in Outlook.

You can also see your Calendar and meetings within teams by clicking the meetings icon on the left-hand panel. When scheduling from within Teams, you get this window:

It has the option to add the Teams channel, or it will Show the Teams channel you triggered the meeting from. You can use the scheduling assistant as you can in Outlook and the ability to select the people you would like to invite from your organisation. Once scheduled, the result is a calendar invite in Outlook with the relevant Teams link in it to click and join the meeting when the time comes. This diary entry will also display in Teams when you click on the Calendar icon from the Teams left-hand panel.
Tip 3. Guests – The other stuff they can do
The above meeting functionality shows that there are various features you or your guest can make use of in your Teams, providing some great ways of working with people outside of your organisation. Well, it doesn’t stop there. Guests can participate in channels, conversations, chats, and meetings; they can share files in channels, add new channels, and use the Wiki, which provides some fantastic collaboration opportunities. This Microsoft Documentation page gives a good summary of Guest versus Team member capabilities.
Note: Guest access is available on the desktop, web, iOS, and Android apps.
All a user needs to be a Guest is an email address. Once you have this, adding a guest can be done by a Team owner and is almost too simple!
Click on the three dots ‘…’ next to the team you want to add them to, be sure it’s the correct one. As I said above, it is almost too simple, so you could easily add someone to the wrong team and get into all sorts of trouble. Then in the window that pops up, just enter the email and click add. You can add more than one at a time in the same window.

What can a guest do?
This post from the Microsoft support site best describes the different capabilities of Team Owner, Member, and Guest. Every member of Teams has a role, and each one has different permissions.
Owners
Team owners manage certain settings for the team. They add and remove members, add guests, change team settings, and handle administrative tasks. There can be multiple owners in a team.
Members
Members are the people in the team. They talk with other team members in conversations. They can view and usually upload and change files. They also do the usual sorts of collaboration that the team owners have permitted.
Guests
Guests are people from outside of your organisation that a team owner invites, such as partners or consultants, to join the team. Guests have fewer capabilities than team members or team owners, but there’s still a lot they can do.
This table gives a great summary of the capabilities of each role via the desktop:

And on Mobile:

You can also manage guest permissions via the ‘Manage Team’ option, again by clicking on the three dots ‘…’ next to the team.
In this menu, you can see your members, add and delete members, manage channels, manage settings, and manage Apps. With a mix of the Guest permission and the other settings, you can choose to set the team up to be fully interactive with all members and guests, or you can lock down to just the owner being able to post, which might be useful as an announcement or information channel.
All in all, the functionality and Collaboration that Guest access enables for users and organisations is fantastic!
Tip 4. Apps and Actions from the Command Box
The search bar at the top is hiding more than just search functionality, it has some great ‘shortcut’ app and command options, some of which are really useful… A great shortcut key to get to the bar is CTRL+E.
All you have to do to see what’s on offer is type ‘/’ for the commands that work standalone or ‘@’ to see the Apps commands, give it a go.

Once installed, the apps can be accessed by clicking on the ‘…’ at the bottom of the conversation window. This allows you to share the search result, or item from the relevant app in the conversation, a great way to interact with Apps and your teams.
So back to the Command Bar, the shortcuts in here can be useful, here are just a few of my favourites:
- /whatsnew – This has to be the most useful one given the speed that MS release changes these days. This takes you to the Release notes tab in the T-Bot channel. Worth a regular check.
- @Wikipedia – Allows you to do a Wikipedia search. Returns a summary that you can click on to go to the full Wikipedia page.
- /goto – If you have a lot of teams or channels or spend a lot of time, as I do, in the Chat part of teams, then this is a good way to hop straight to your destination.
- /unread – Helps in those busy times, and pulls up a list of all your unread items
- /mentions – Gives a list of all your @Mentions. This will include direct tags or where a team you are in has been tagged.
- /files – Shows your recent files and allows you to search and go to the file you want rather than having to click around your teams to find what you need.
- /keys – This is a shortcut to show shortcuts. Nice quick reference for the MS Teams Keyboard Shortcuts.
- /call – This allows you to type the first few letters of the person you want to call and select them to call. In big organisations, this could be very timesaving.
- /help – Pretty self-explanatory and straightforward. A really good quick way to ask a question of the Teams help via the T-Bot.
- /saved – This takes you straight to your list of saved messages.
Other Useful Shortcut Keys
- Navigation of the Left navigation panel – Ctrl + 1+ 2 + 3 – i.e. Ctrl + 1 = Activity feed; Ctrl +2 = Chat; Ctrl + 3 = Teams etc
- An Emoji for every occasion – Type a colon “:” immediately followed by a word – to discover additional emojis (e.g. :disapointed or :frog)
- Move your Teams around – Ctrl + Shift + up or down arrow – Moves the Team you have selected up in the Teams Panel on the left hand side, up or down in your list of Teams.
- What you really need! – CTRL + ‘.’ – Ctrl and the Full stop key together, probably should be first in this list, as it gives you all the shortcuts you can use

Tip 5. Spruce up your channels with images
If you want to give your channels a bit of an eye-catching makeover, then fear not, it’s easy! To achieve this, all you need to do is edit the channel name, copy a Unicode character, and paste it in.

To locate a relevant image, use a Unicode Character Finder resource. Then once you have found the image you want, copy the Unicode to the clipboard, edit the channel, paste the code in front of the channel name and save it.
This is an ideal tip if you want to bring more prominence to a particular channel.
Tip 6. Get the most out of Chats and Conversations
So, we all know how chat works and can pretty much do it without thinking, but I figured it was worth putting together a list of basic and best bits for Chats and Conversations in Teams. Remember you can have a conversations while on Post’s Tab, which is the first tab after the name of your channel. At the bottom on this page, you’ll see New conversation.
Chats – These are done via the Chat tab on the left-hand menu and are more traditional chats where you can have 1-to-1 or group chats. Probably best compared to a chat in domestic Skype.
Conversations – While on the face of it very similar to chats, this gives some structure and context to your conversation, to allow better collaboration in a more focused way. The interface is very similar to chat; however, with some subtle differences worth mentioning, so below is an example of a couple of conversations within a channel:

As you can see, there can be several conversations going on at once, around specific subjects or documents. If used correctly, this helps keep track of conversations, here are some tips for conversations:
- Reply – The ‘Reply’ option under each conversation should be used to add further points to that conversation.
- New Conversation – The bottom chat entry is used to start a new chat, this is the one most commonly misused, as people try to use it to reply to the conversation above when they should have used the ‘Reply’ option.
- Conversation on a Document – To start the conversation on an existing document, open the document in teams and then click ‘Start Conversation’ at the top. To start on a new document, click the paperclip and upload the document, this will start the conversation and upload the document to the files tab of the Channel or Chat you are in at the same time.
- Subject – When creating a conversation, it is good to add a subject – By Clicking the ‘A’ icon you get more edit options. Adding the title helps keep focus and context to that conversation.
- @mention – Also when starting a conversation or asking a specific question, it’s good to use the @mention functionality to either get the whole channel’s attention, by using the name of the channel, or a given team member name. The relevant people then get alerted to this new reply or conversation.
- GIFs – In both chat and conversation, if it is enabled on your Microsoft Teams by the administrator, you can brighten up everyone’s day and use the GIFs. Just click the GIF icon and have a look around, don’t blame me if it distracts you from your work for a while!
- Praise – A Great little option on the chat and conversation boxes is the small medal/badge icon that allows you to give open Praise to teams members that appears in the conversations feed. Good for Team Morale!
- Meetings – I have already mentioned this earlier in the post, but worth a mention again – you can click the camera icon Under the new message box to either start a meeting now or schedule one for the future.
Tip 7. Bookmarking Messages
This is a handy piece of functionality that allows you to save a particular message, or more accurately a position in a conversation or chat, just by clicking on the 3 dots ‘…’ menu next to the message:

Then to recall all your saved messages, you simply click on your profile picture top right and select ‘Saved’ or possibly quicker would be to type in the command bar ‘/saved’. This gives you a list of all your saved points in the left-hand pane and clicking on them takes you back to the point in the conversation you saved them from.

Tip 8. Navigation Buttons (< >)
The simple tips are the best! When I first started using Teams, my impression was that it was great, but had some challenges in regards to multitasking. Every time I went from working in a tab in a given team to continue a chat, by clicking on the chat icon, and then to go back, I would always have to click all the way through back to where I was. I was missing something, and it was these navigation buttons:

Now when I have come from another channel because someone messages me or similar, I can easily click back, and also forward again to toggle. I’m finding this vastly improves my Teams Experience.
Tip 9. Tabs for all occasions
A must for productivity and ease of access within your working group is taking advantage of the tabs within your Teams and Channels. They can be used to simply expose a website or file to be easily accessible, or to show more complex Apps to manage work and help with day to day activities.
All you need to do to add a tab is click the ‘+’ sign on the right-hand side of your Channel and then search for the thing you want to add in. The more popular Apps, are at the top with more available below:

There are too many to mention them all; however, here are some of the ways I have found tabs useful in Teams:
- Simply Exposing Office documents or Websites on a tab for quick reference – I have found this useful in many scenarios from quick access to templates through to tracking spreadsheets of various kinds. In fact, we recently placed the Collab365 Teams live show onto a tab in our Collab365 Teams based Community (so far with over 1800 Members in as Guests to our tenant). My recommendation would be that any File or Website that all team members reference daily is worth considering adding as a tab.
- Task Management – Here at Collab365, we have used tabs to expose both Microsoft Planner and tools like Trello, depending on the audience involved – The quick access to tasks and scheduling is useful. There are more complex task and project management apps that you can use from the store.
- OneNote – for those that love OneNote, you can create a OneNote tab and off you go using OneNote within your Channel.
- Forms – Simply select ‘Forms’, and you can easily create a very powerful form/survey that can be managed in teams, and with a tweak of the share permissions, shared and filled in by anyone that has the link. The responses can be seen on the tab by the form owner and also stored in a spreadsheet in the files tab.
- Expose any existing SharePoint Document Library – Just select the ‘SharePoint’ icon fill, in site URL, select the document library you want from the list, give the tab a name, and the library will be exposed in a Teams channel.
That is just a few of the tabs we have found useful, however, you only have to look at the number of Apps in the store to know there are going to be tools of all shapes and sizes, have a look around.
Tip 10. Don’t put all your eggs in ‘General’
When you first start using Teams, it is tempting to keep everything in the General channel of your team, adding tab after tab for each need you come across. Now in some circumstances with small teams, this is fine however, in most, it will lead to confusion and makes it hard to find stuff as the Teams resources grow (or use of the team grows.)
So, here are some recommendations:
- Think of the General channel as the landing page for your Team, the hub for the high-level interaction.
- Then for each subject area or main function in that Team, create a new Channel.
- When adding a tab to General, always ask yourself if this would work better as a separate channel, or as a tab within another channel.
- The more tabs you add to General, the fewer people will find them. So, try the rule that when the number of tabs doesn’t fit on your standard working screen size (different for everyone), start thinking about flipping the tabs to existing or new channels.
- Finally, don’t forget you can have more than one Team, so if you have a subject area for files and conversations that don’t fit in your existing Teams, create a new Team with Channels and tabs for them.
Tip 11. How to publish an RSS Feed post to Microsoft Teams as a card (Using Zapier)
For those that don’t know, at Collab365 we run a ‘Community Team’ on our Teams Tenant, and one of the challenges we wanted to solve was adding the Collab365 Today posts to a channel and for them to look nice (as cards) like this:

We created a blog post showing the steps of how we did it… Read More
Tip 12. Translation of Teams Messages
You can now translate messages to your base language in Microsoft Teams on a message by message basis. In this example, the original message is in French.
Simply click the ‘…’ and choose ‘Translate’

Et Voila – (Sorry, couldn’t resist)

You can set it back to show the original language via the same menu. A great feature – I think you will agree.
NB: If you do not see this option, then talk to your IT admin, as they may need to turn it on for you to access it.
Tip 13. All your Wikis in one place
If you are using the Wikis within teams, then this is a fantastic feature to help with your productivity. Simply click ‘…’ on the left-hand menu and choose ‘Wiki’.

This will take you to the Wiki home page on your ‘Personal ‘Wiki tab, and this is a great place for taking private notes.
Click on the ‘All‘ tab, and it gives you a summary view of all the Wikis you are involved in, making it easy to navigate, consume, and update them.
A nice extra on the Personal Wiki is being able to add notes from anywhere using the top command box. Just type ‘/wiki’ and press enter, and you can then type your note. Press enter again, and your note will be added. Press enter a third time, and it will take you to your Personal Wiki.
Tip 14. Record your Teams meetings
You can record your Microsoft Teams meetings. The recording captures Audio, Video, and any screen sharing activities. The meeting is recorded in the cloud and saved to Stream, meaning you can manage, download, and share along with all your organisation’s other Video content.
At the most basic level, this allows you to have a record of what was discussed, so you can go back to it at a later stage, or share with team members that could not attend. This can also be used to easily create company or department announcements, management team updates, news items, demos, solutions to common problems, or any other communications you might use video for in your organisation.
So how do we do it? Well, it couldn’t be easier – once in the meeting just click the ‘…’ and click ‘Start Recording’ like this:

Once clicked, you will be told you are recording in a message at the top of the meeting. Once finished, click stop recording from the same menu. The video is saved to Stream. However, you will also see a link to it in the meeting chat window and be emailed a link to it from Stream. Obviously, as with all your Stream video content, it does take up space, so you need to ensure this use of Stream is included in your storage planning.
Here are a couple of links to help explain further and give other prerequisites and considerations:
- Teams Cloud meeting recording
- Get started with Microsoft Stream
- End User Documentation: Record meeting in Teams
Tip 15. Work on Visio in a Microsoft Teams Tab
If there was ever a tool that got the best productivity and results when worked on collaboratively, it’s Microsoft Visio. Well, now you can do this with your team from within Teams. How cool is that?

Once you have uploaded the Visio file into a channel, you and your colleagues can alter the diagram from directly inside Teams! You can also discuss the diagram within the Teams conversation window while working on it as you go. I am sure you will agree, this is a great way to get input and agreement from all stakeholders as you go, saving everyone time and getting a better quality result.
Tip 16. Zoom in and out
You no doubt are used to zooming in and out on your browser many times. Did you know you can do exactly the same in the Teams desktop client?
All you need to do is press ‘CTRL+’ to zoom in and ‘CTRL-‘ to zoom out.

At the time of writing this there’s no way to zoom on the mobile apps.
NB: If you’re using Teams in the browser you can also use the normal browser zoom functionality.
Tip 17. Microsoft Immersive Reader for Teams
This functionality has been around in other Microsoft Tech for a little while and is predominantly a tool in the Microsoft Education space, that’s aimed at schools, colleges, and teachers billed as a learning and accessibility tool. However, it can, of course, be useful to a much wider audience than just schools, especially now that it is available in Microsoft Teams. So how do you use it, and what can it do?
Firstly, to access a given message, use the three dots ‘…’ and select it from the drop-down.

It can read the text aloud, at different speeds. It can show in larger font size with different colours and spacing. It can show syllables, verbs, nouns, adjectives, and sub-clauses all in different colours, and even with labels.

Tip 18. Something to hide?… Use Background Effects
If you’ve got something you don’t want to share in the background, then it’s pretty easy to blur it out or add a background effect in a Teams video call/meeting.
This is handy functionality if you work in a busy office and have confidential information on your walls. It’s also helpful if you work from home and have the risk of family life crossing over to work-life in the background of your video calls.
To activate Background Blur during meetings, just click on the more actions ‘…’ three dots on the call menu and select ‘Background effects’.

EXTRA TIP: If your device supports it, click CTRL+Shift+P when you’re on the call to toggle the blur.
It gets better though, with Background effects, there are a number of effects given as standard, from office backdrops to beaches:

And to top it off you can add your own background effects just by clicking the ‘Add New’ option and the top and uploading any of your photos. A nice way to brighten up meetings and cover up your settings.
Tip 19. Use Existing Team as a Template or Create a Team from your existing Office 365 Group
While there is not the concept of a Template for your teams as such, there is some great functionality for using existing teams as your template for creating a new team.
Within Microsoft Teams and on the ‘Teams’ list, at the bottom select ‘Join or create a team’. Here you will have the option to create or join a team.
Choose the ‘Create Team’ Option.

Then in the window that pops up, you have the option to ‘Create from… An existing Office 365 Group or Team’

Once selected, you then have the following two options:

Selecting Team Option
You will then be able to choose from a list of your existing Teams and will be guided through the process where you are asked for the new team name, description and which aspects of the originating team you would like to copy over.
For Larger Organisations or the initial rollout and adoptions of Teams, it may be worth creating a team that is solely used as the template, possibly called ‘Template Teams’. This will help your users get started, as well as maintain a standard approach for your Channels and Tabs within each team.
Selecting Office 365 Group
You will be presented with a list of existing Office 365 Groups that you own and that don’t currently have a Microsoft Team associated with them.
Select your desired group, and a team with the same name will be created automatically. The team will share the same group privacy (public or private) and members as the original group.
This is a great way to bring your existing SharePoint groups into Teams. This Microsoft Post explains it in a little more detail.
Tip 20. Use Chrome profiles to Manage more than one Teams Login
There are many reasons for needing to log into Teams with two different accounts. Unfortunately, Microsoft Teams doesn’t make account switching easy. If you have to manage more than one login account for Teams, then it’s a challenge as you can only be logged into one account at a time.
There are a few options here. You can either use multiple (different) browsers, or you can create another user within Chrome. Once set up, you can easily switch between the two instances. The best part is that everything is separate, including logging on to other Office 365 services.

Don’t have Chrome?
- Join the other team as a guest using your ID.
- Login to the Teams desktop with one account and the browser version of Teams with the other.
Tip 21. Secret Teams Developer Menu from the System Tray
That’s right – there is a secret Developer menu you can access via the Teams icon in the system tray. If you go into the system tray and right-click the Teams icon, you usually get the standard menu that can take you to your status, settings, or open or quit the Teams window.

However, there is a menu that can be accessed from here that has all sorts of goodies on it for the Developers amongst you. Now don’t laugh when I tell you the secret handshake, I promise it works. All you have to do is double click the icon, then right-click all in quick succession.
If it doesn’t work the first time, keep trying as it often takes 2 or 3 goes.

This Menu gives you access to various tools to help with your work with Teams. However, the most useful is the ‘Open DevTools‘ options, which allows you to debug like you are in a browser.
Tip 22. Send or Forward an Email into a Teams Channel
Now it might sound a little odd that the new way we all talk can get a message from the old way we all used to talk. However, emails are still widely used, and this flexibility with Teams provides some great uses, in particular when dealing with larger teams.
This is a great way to get an announcement, news, or information in front of your team quickly. You may send the message to their email addresses as well, however as people are moving increasingly towards managing their day-to-day work and communications within Teams, sending a message in this way is likely to get the highest (and probably fastest) read rate.
All you need to do is click the three dots ‘…’ against the channel and select ‘Get email address’. You can then copy the address and use it in your emails as you would any other.

When a message is sent to the channel, it will appear as a conversation on that channel.

Tip 23. How to change the display order of your Channels.
As the number of channels within your team grows, you may realise one day, maybe for efficiency of use or Logical layout, that you would like to change the order of your channels.
Well, you cannot as such change or fix the order of your channels, and the General Channel is always fixed at the top no matter what. However, it is worth noting that the channels display order is alphabetical or to be more accurate alphanumerical order.
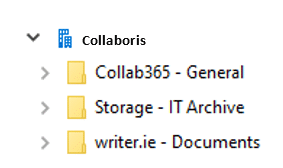
If you have the following set of Channels you want to re-order, you could give them different names to get a better order:

Or, an easier option would be to give numbers to your Channel names:

There you have it, your teams nicely ordered how you want them.
Note: There is, however, one thing to be aware of; renaming the Channel retrospectively in this way does not rename the SharePoint folder.
Tip 24. Get Planner Notifications in your Teams Team
In your Teams Channel, you can organize your tasks by adding one or more Planner tabs. You can then work on your plan from within Teams or in Planner for web, remove or delete your plan, and get notified in Teams when a task is assigned to you in Planner.
What does this mean?
Team members of a team with a Planner tab will receive a Teams notification when a Planner task is assigned to them by another person. This provides a fantastic way to manage and assign tasks with your team, all within the Teams workspace.
The Teams notification appears in the Teams Activity Feed and in Chat. It contains the task title, who assigned you the task, the plan the task belongs to, and a link to open the task details in Teams. You can see a record of past Teams notifications in the chat conversation with Planner.
The alerts and functionality can be enabled or disabled both at the individual and admin level.
Tip 25. Post a message to multiple Channels at once
A cool function if you have information or an announcement that needs to be shared across multiple teams and channels.
Go to the conversations tab of the channel you want to start from. In the Start new conversation box at the bottom, click the format button, the ‘A’ with a pencil next to it.
Then in the top of the window, you can select ‘Post in multiple channels’ as you can see below:

Once posted, the message will appear as a new conversation in each of the channels you have selected. From that point onwards, they are separate conversations, and reply messages in each of the channels will only show in that channel like it would with a normal message. Even so, with an @General mention in the message, it is a great way of getting an important message across a number of teams quickly.
Tip 26. Announcement within a Channel
Another great way to catch your user’s attention is an Announcement. Which, if used in conjunction with posting to multiple channels, can be really powerful.
To start, go to the conversations tab of the channel you want to start from. In the Start new conversation box at the bottom, click the format button, the ‘A’ with a pencil next to it.
This time in the top left, select the down arrow next to ‘New conversation’ and choose ‘Announcement,’ as shown below:

This provides a couple more options for your message over that of a standard message; you can add a Headline, Format it, and add a background image with the buttons on the right-hand side. Then you can add your Subheader and message content as with a standard conversation.

As I mentioned above, you can then choose to post this to multiple channels as well, giving you a great way to communicate that important announcement across many channels and teams. Once posted, the message will appear in each of the channels selected and will have a little red icon on the right-hand side, from that point onwards though they are separate conversations. With an @General mention in the message, it is a great way of getting an announcement across a number of teams quickly.

Tip 27. Share your system sound in a Team meeting
You can now share your system sound with a team meeting so that you can share the audio of a video you are showing while sharing your screen. Here at Collaboris and Collab365, where we work remotely and deal with a lot of online summit sessions and general video content, this is a really useful improvement for us to collaborate effectively.
Doing this is really easy when you click the ‘Share’ button to share your screen from within a Teams meeting.

On the screen that pops up where you select the Window, Screen, or Application you wish to share, ensure you click the ‘Include computer sound’ checkbox.

This will share all your system sounds, which is great for viewing videos or listening to some audio while sharing with your meeting. However, it is also worth noting that alerts and notification sounds will also be heard in the meeting. Here are a couple of other key points to consider if using this function:
- Teams and your computer need to be set to the same speaker. Adjust your computer’s audio output in your system settings and your Teams audio output in your device settings in Teams.
- To avoid echo, remember to keep only one device’s mic and speaker on in a room.
Take a look at this Microsoft Support page on Sharing your system audio in a Teams meeting for some further information on this.
Tip 28. Whiteboard in Teams Meetings
Whiteboarding does have to be enabled for you to use it in Teams, but once it is, it is a great way to interact remotely. Here is a post from Microsoft on How to Manage Whiteboard in Microsoft Teams.
To use Whiteboard in a Teams meeting, you simply click the ‘Share’ button as you would to share your screen, then on the right-hand side you select Microsoft Whiteboard.

Here you can then collaborate on a whiteboard, using your mouse or Surface pen if you have one.

The whiteboard can be accessed either before or after the meeting, via the Whiteboard tab within the meeting.

Take a look at this post from Microsoft for More information.
You can then access and share all the Whiteboards you are involved in by downloading the Whiteboard app from the Microsoft Store. From this app, you can also create new Whiteboards and share them directly into your Teams Channels.

Tip 29: Broadcasting a Teams Meeting using OBS to Social Platforms
It has become a talking point, How to get your Microsoft Teams meetings and Live events broadcasted to your social media platforms?
Although there are a number of ways to achieve this, in this Teams Tip, we show you how to do it using OBS Studio , which offers numerous ways to integrate with Microsoft Teams.
What is OBS?
Open Broadcast Software, commonly referred to as ‘OBS’ is a free recording and streaming platform predominantly used for streaming live video games to social media, which makes it a great tool for live encoding video on Teams. Being open-source, its community is vast and has a bold library of interesting and useful plugins to assist your productivity and creativity.
Why use OBS?
It’s free! It packs a lot of punch for no cost at all. I will be demonstrating how you can use OBS to prepare your presentations in a way that will keep your students & clients focused on just the important aspects. Your private stuff will remain private in a way that will look very organised and professional.
How do we broadcast our Team meeting?
So, how do you do it? Take a look at this post and Video from Collab365’s resident broadcasting and video expert, Connor Deasey – Using OBS Studio with Microsoft Teams to stream to YouTube, LinkedIn & Facebook
Tip 30. How to use Breakout rooms in Teams
Breakout rooms have arrived in Teams! They allow you to create rooms where you can have a separate meeting within a meeting. This is ideal for people who are attending a meeting to have a private chat, with the option to returning to the original meeting.
Only meeting organisers using the desktop version of Teams can create breakout rooms. The highlighted icon below is for Breakout rooms.

- Select Breakout rooms and chose how many rooms you need – the maximum is 50. Then either assign participants Automatically or Manually and select Create Rooms

To assign people manually to a breakout room, select Manually and check peoples’ names and then assign a room. At this stage you can add more rooms and assign people accordingly

- Once you have assigned somebody to a room, you must open the room by clicking the three dots ‘…’ beside the room and selecting open – the room status will change from Closed to Open

- The attendees will be notified on screen that: The breakout room session has started. You will be automatically moved in 10 seconds
- As a meeting organiser you can join any of the breakout room by selecting the More options ‘…’ next to the room and Join room. When the meeting organiser joins a breakout room, the original meeting is put on hold
- To send an announcement to everybody in all the breakout rooms, select the (…) and choose Make an announcement

- When finished with the breakout rooms, you can either close one or all of them at once. To close one, select More options and pick the room that you would like to close. Alternatively, select Close rooms to close them all
- Attendees who want to return to the main meeting can select Return

- Please note – when the attendees have finished with their breakout rooms and want to join the original meeting – and if you as the meeting organiser have also joined a breakout room – you must select Resume to start the original meeting and then the attendees will automatically join it
Chats in Breakout rooms
Any files that are shared or chats that occur in a breakout room are saved to Chats.

Please note:
- Only a meeting organiser can move freely between multiple breakout rooms
- You must be using the desktop version of Teams – not the web app – to organise breakout rooms; however, attendees can use the web app / mobile app to take part in breakout rooms
- Attendees can present in breakout rooms by default
- You can rename your breakout room by selecting the ‘…’ by the room’s name
- In each breakout room you can record, chat, and share content just like a regular team meeting
- Breakout rooms become part of the original meeting and remain in place for further use, if required
- A room must have attendees assigned for it to open
- You can start breakout rooms individually, or all at once
- If a guest selects Rejoin while in a breakout room, they will leave that room and the original meeting; in order to rejoin the original meeting they must click on the link which they were initially sent
Tip 31. Using tags against Team Members to be able to @Mention Groups
This is a fantastic way of grouping your team members so that you can send messages in the Team with @mentions that only alert a subset of people in the team. It can be particularly useful for larger Teams.
There are a couple of ways to allocate the tags, you can do it on a user by user basis, or you can bulk add users to tags using the Manage tags option.
To do this, navigate to your Team, click the ‘…’ menu and select ‘Manage Tags’.

From here, you can see all your Tags and which team members have them as well as Create new tags and allocate to Teams members, as shown below:

|

|
The second way to do this is by choosing the ‘Manage Team’ option from the same ‘…’ menu. Here, against each member of your team, you can choose the tag option to be able to allocate and unallocated tags for that user, you can also create new tags here if needed:

Once you have your tags set up, this allows you to use each tag in an @mention format in a conversation. E.g In the example below, this message will appear as an alert in the activity feed for all the people with the tag ‘Challenger’.


This gives some nice flexibility for applying some grouping to your Team members so you can target different messages to them, without having to have each group of members in a different team.
Tip 32. How to create a quiz or poll in Microsoft Teams
Both of these are a great way to get more engagement on teams and can be both fun and useful.
Creating a Poll in your Teams Team
This is so easy and quick to do that once you start, you won’t be able to stop. In the team and channel where you want to do a Poll, and click on the ‘…’ menu below the new conversation box and type ‘Forms’ in the search bar that appears.
Select ‘Forms’, and this will open the Create new poll window where you can enter your question and the answer options, you can also allow multiple answers if needed. The tool will also suggest answers for you once you type your question.

Click ‘Next’ to see a preview of your Poll question and then ‘Send’ it to the Channel conversation feed.

The Poll will appear in the Conversation feed with the question first followed by the summary of answers below it. A really simple way to do a quick Poll.
Creating a Quiz in your Teams Team as a Tab
This is a little more complicated than adding Polls to your teams, but it is a great way to inject some fun into your team, or to assess learning and understanding on a particular subject.
Microsoft Teams for Education has some slight additions to standard Microsoft Teams, making quizzes and tests slightly easier. For this Tip, we are concentrating on how to use standard Microsoft Teams and Forms to create a quiz in a tab on a Teams channel. This approach could also be used to create a Team survey.
Firstly, open Forms in your browser, you will need to log in with the same account that you logon to Teams with. Here you can create a new quiz and start to add your questions. There are many types of questions you can ask from the standard Multiple or Single choice, along with Text answers, through to more unusual formats like ranking the order of things or rating how you feel about something. You can also allocate points for correct answers as well as add different sections to your quiz to give it some structure.
Once we have our Quiz Ready in Forms, we simply navigate to the Teams Team Channel we want the quiz to be displayed in and click on the ‘+’ icon to add a tab.

Forms will likely be one of the top apps however, if not, you can search by typing ‘Forms’ in the search bar and then selecting it.

You will now be presented with several options, choose the ‘Add an Exiting Form’ option and select your quiz.

There you have it, a nice quiz in your Microsoft Teams Channel, and each member of the team notified about it.

This is a great way to engage with your team, either just for fun or to test understanding. Having it there in the place where work and collaboration are happening should also make for a higher response rate.
We have put together a more detailed blog post on this which you can view here – How to create a Poll or Quiz in Microsoft Teams
Tip 33. Don’t get distracted – disable notifications.
If you are on many teams, you might get distracted by the volume of notifications that you’ll get while using the desktop app. So, if you need some quiet time, you can turn them off.
You can turn them off for each channel by hovering over the ‘…’ and selecting Channel notifications and the specifics notifications you want to avoid.

You can also turn off all notifications by going to your settings beneath your own icon.

Here, under notifications you have many options to ensure that you get that peace and quiet you need.

Tip 34. Move files with ease to your Team
If you want to move files from OneDrive or SharePoint into your Team site, you don’t have to download them and upload again. Simply go to your OneDrive or SharePoint and select Move to or Copy to.

As Teams uses SharePoint document libraries for its Files, they actually appear as SharePoint libraries in the pane. Just select the Team and folder if necessary and select Move here.

Tip 35. Sync your files to your desktop.
If you are constantly opening documents which are saved in Files and find working with the Teams app a bit slow, just sync your files to your desktop.
- Click on Files and select Sync.

- If you don’t have OneDrive installed on your computer, you will go through a few short steps, starting with entering your email address. Now, don’t worry when you see OneDrive – SharePoint document libraries and Teams’ Files (which also use SharePoint document libraries) both use the OneDrive client.

- If you have OneDrive running on your PC, you will get the following message:

- Now, this will linger on your screen without telling you it’s finished, so wait a minute and check your desktop client. The files that you synced will appear next to your OneDrive client and sit alongside any SharePoint document libraries that you have already synced.
- If you don’t want to sync all your folders in Teams, you can sync the ones you like via Settings in the OneDrive client.

- Select the folders you want and you’ll never have to look at Files again!
Tip 36. Drill down into your data!
Fans of data analytics will love the Team and Channel analytics which Teams have to offer. Simply go to the ‘…’ by the Team and then Manage team. Under Analytics, you can drill down to all the data you like!

Tip 37. Some Useful Links
That’s it for the Teams tips: However, I just wanted to add some other useful resources that might help you with your quest to learn more about Teams:
- Collab365 Community site has some great posts – https://collab365.com/category/microsoft-teams/
- Microsoft interactive teams demo – https://teamsdemo.office.com/
- Collab365 Microsoft Teams Facebook group is one of our most popular Facebook groups and a fantastic place to get help and questions answered – https://www.facebook.com/groups/MicrosoftTeams
- Microsoft’s Support site has some great resources including the really useful Microsoft Teams FAQs
- Resources you can purchase from our Recent Teams Virtual Summit:
- Teams Virtual Summit – Session Recordings.
- Teams Nuggets Training Videos
That’s all the tips folks, I hope you found them useful.
